Introduction
This tutorial will guide you through the process of creating a Preannotated Project. Instead of starting annotation from the ground up, we'll set up our project using a dataset that already has annotations. This approach is advantageous when you and your team are familiar with the ontologies in use, and you aim to maximise the amount of data you can gather, or you want to perform annotation via error correction. Projects of this kind are typically preannotated using heuristic tools such as gazetteers (dictionaries) or machine learning models.
For this guide, we will employ the same data as in Introduction Tutorial - Alice's Adventures in Wonderland by Lewis Carroll. Let's dive in!
Creating a Preannotated Dataset
The primary difference between regular projects and preannotated projects lies in the dataset they use. In the Introduction Tutorial, we constructed a Standard Dataset composed of items separated by new items (the most straightforward QuickGraph dataset type).
Creating a Preannotated Dataset is simple. First, we need to determine whether we will have solely preannotated entities or both preannotated entities and relations. For this tutorial, we'll opt for the latter: we'll include preannotated entities and relations. With preannotated datasets, to ensure uniformity between the project's ontology resources and the labels in the dataset, we are required to designate an ontology resource when creating the dataset.
If you're collecting data for named entity recognition, you'd want to create a Preannotated Entity Dataset. However, if you want to create knowledge graphs or do relation extraction, you would want to create a Preannotated Relation Dataset.
To create your Preannotated Dataset, we must first navigate to the Dataset Creator.
Details
Once you're in the Details step of the Dataset Creator, follow these steps:
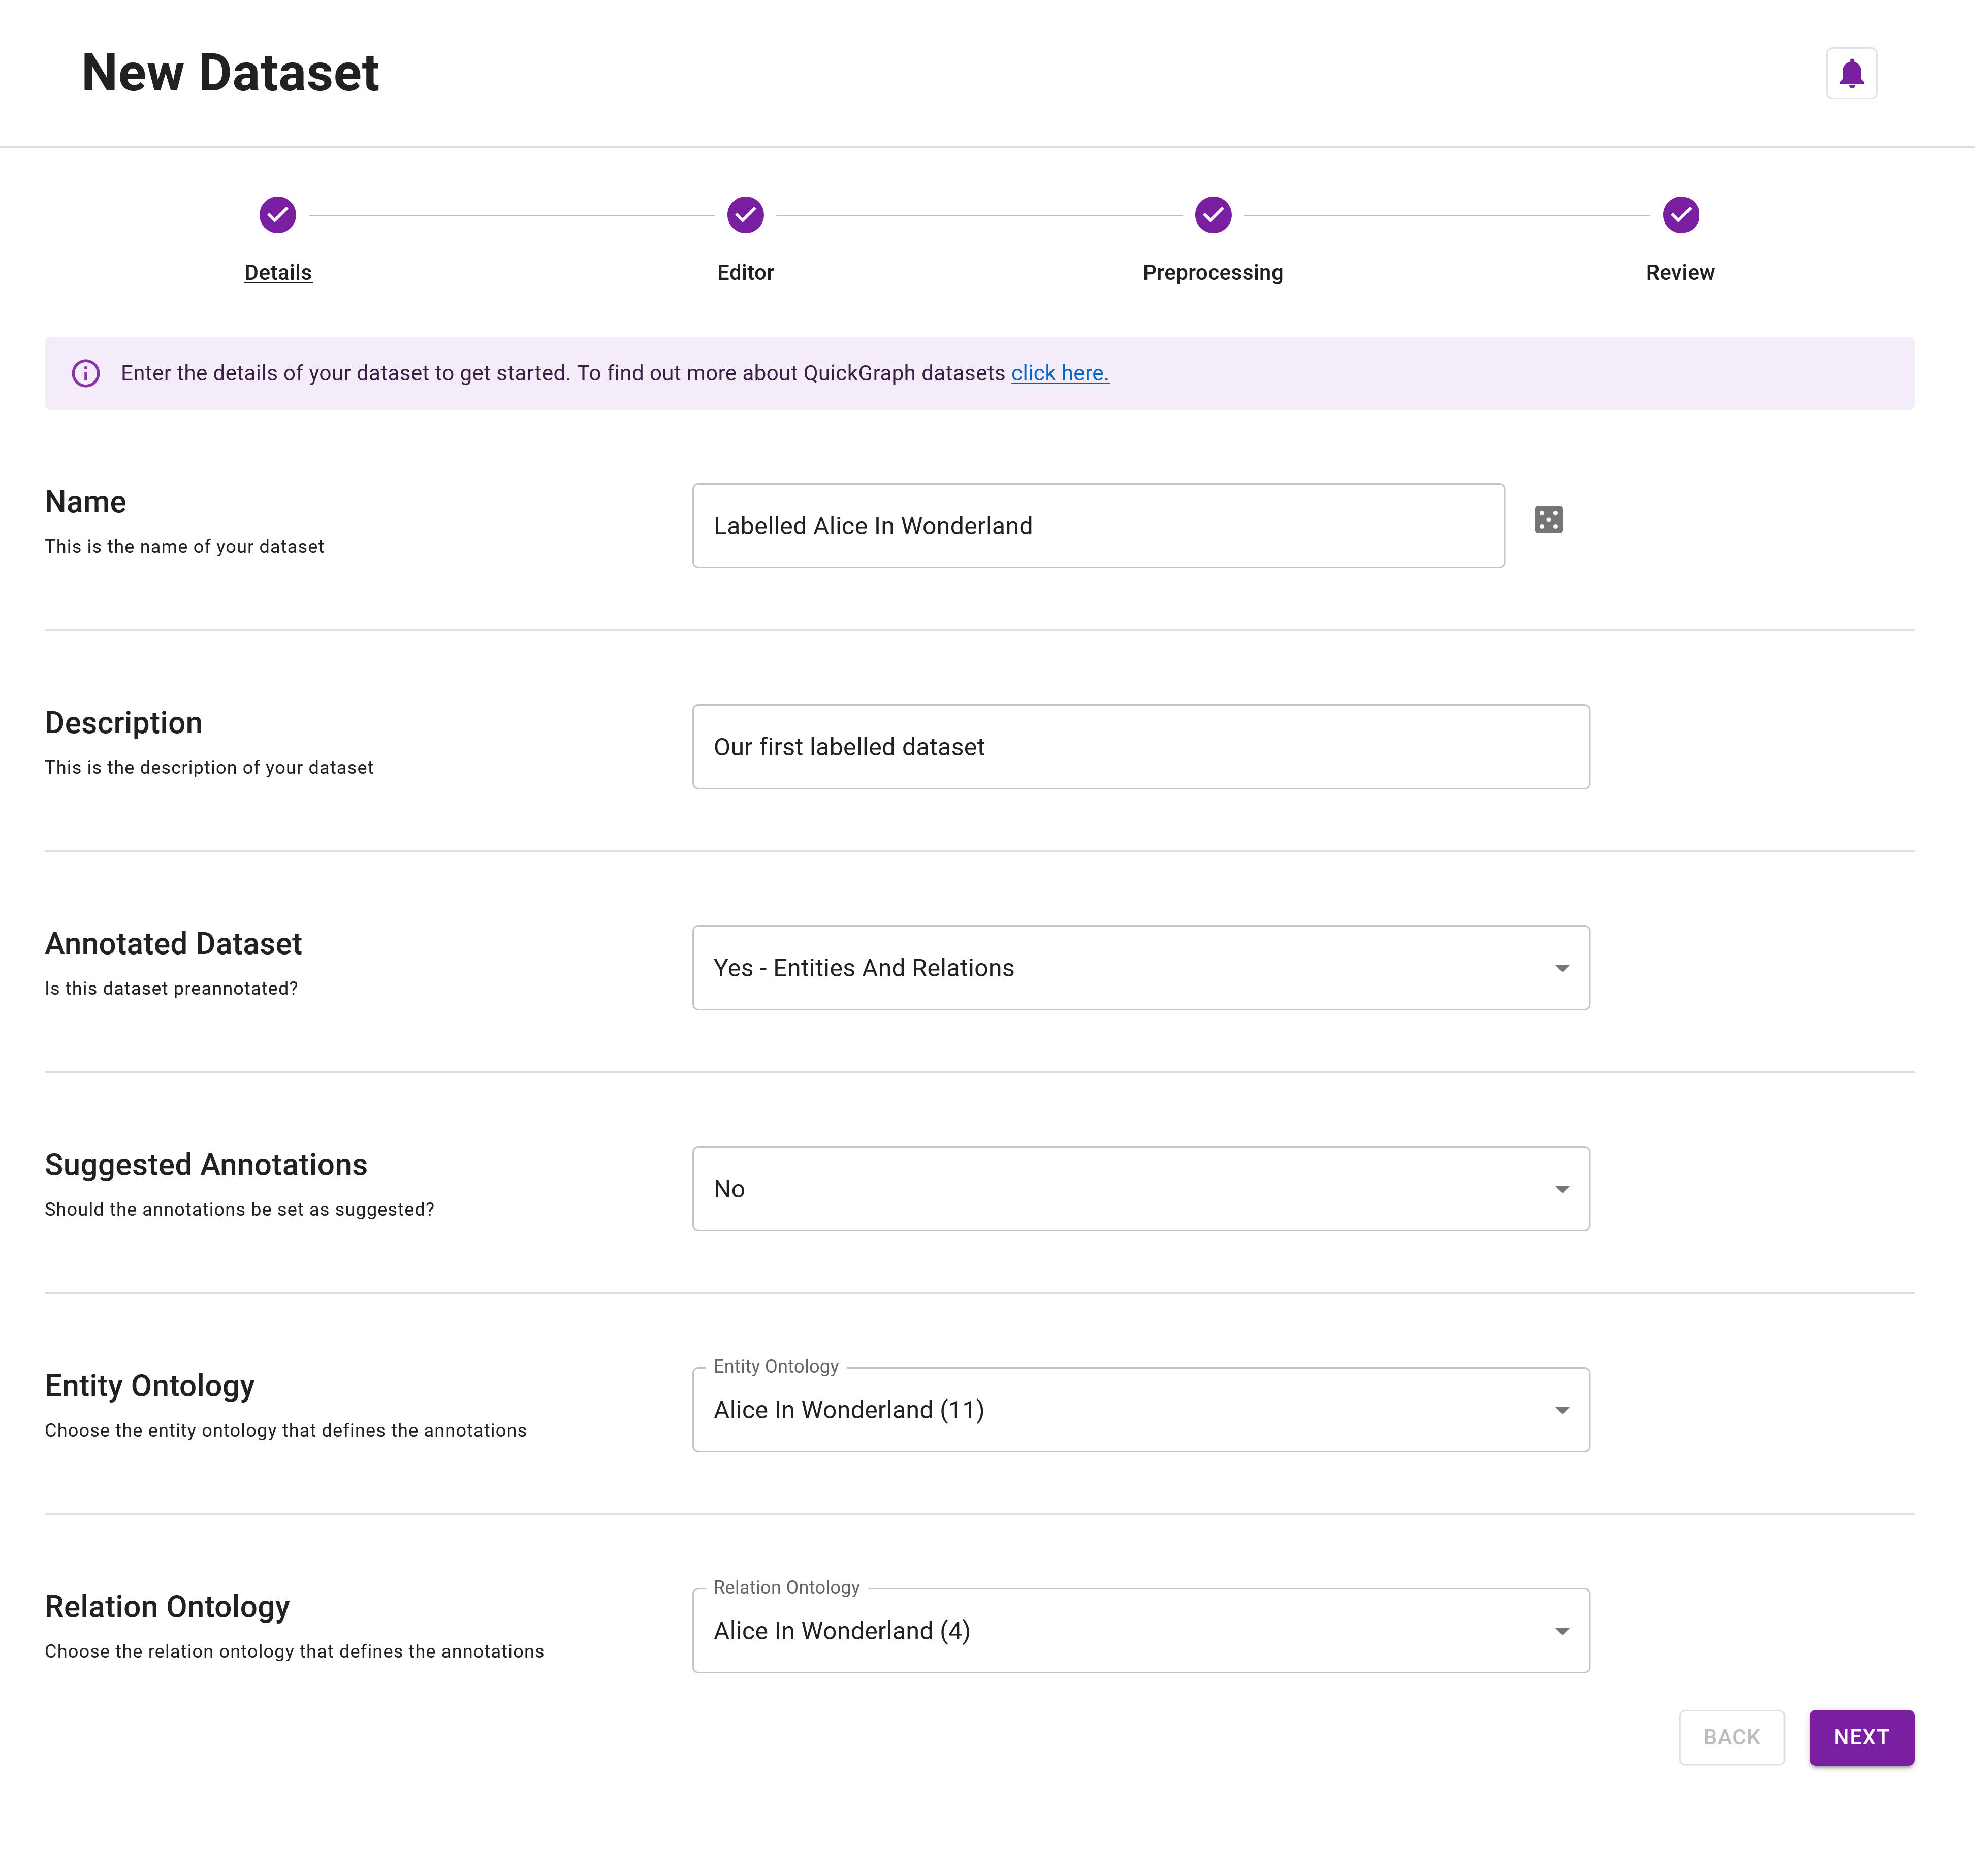
Step 1: Name your dataset Labelled Alice In Wonderland
Step 2: (Optional) Provide a description for your dataset, for example, Our first labelled dataset.
Step 3: Click on Yes - Entities and Relations in the Annotated Dataset field. This action informs QuickGraph that we're creating a preannotated dataset and triggers the loading of all available ontology resources for selection.
Step 4: Select Alice In Wonderland (11) for the Entity Ontology and Alice In Wonderland (4) for the Relation Ontology.
By following these steps, your dataset details should align with those presented in Figure 1 below. If your details match, click Next to proceed to the Dataset Editor.
If the Alice In Wonderland ontology resources aren't available, please refer to Introduction Tutorial - Step 1 for guidance on creating them. For any other issues you might encounter, please don't hesitate to contact us.
QuickGraph will have validation errors if you select ontology resources that do not match the labels in your Preannotated Dataset.
Editor
While in the Dataset Editor, follow the following step:
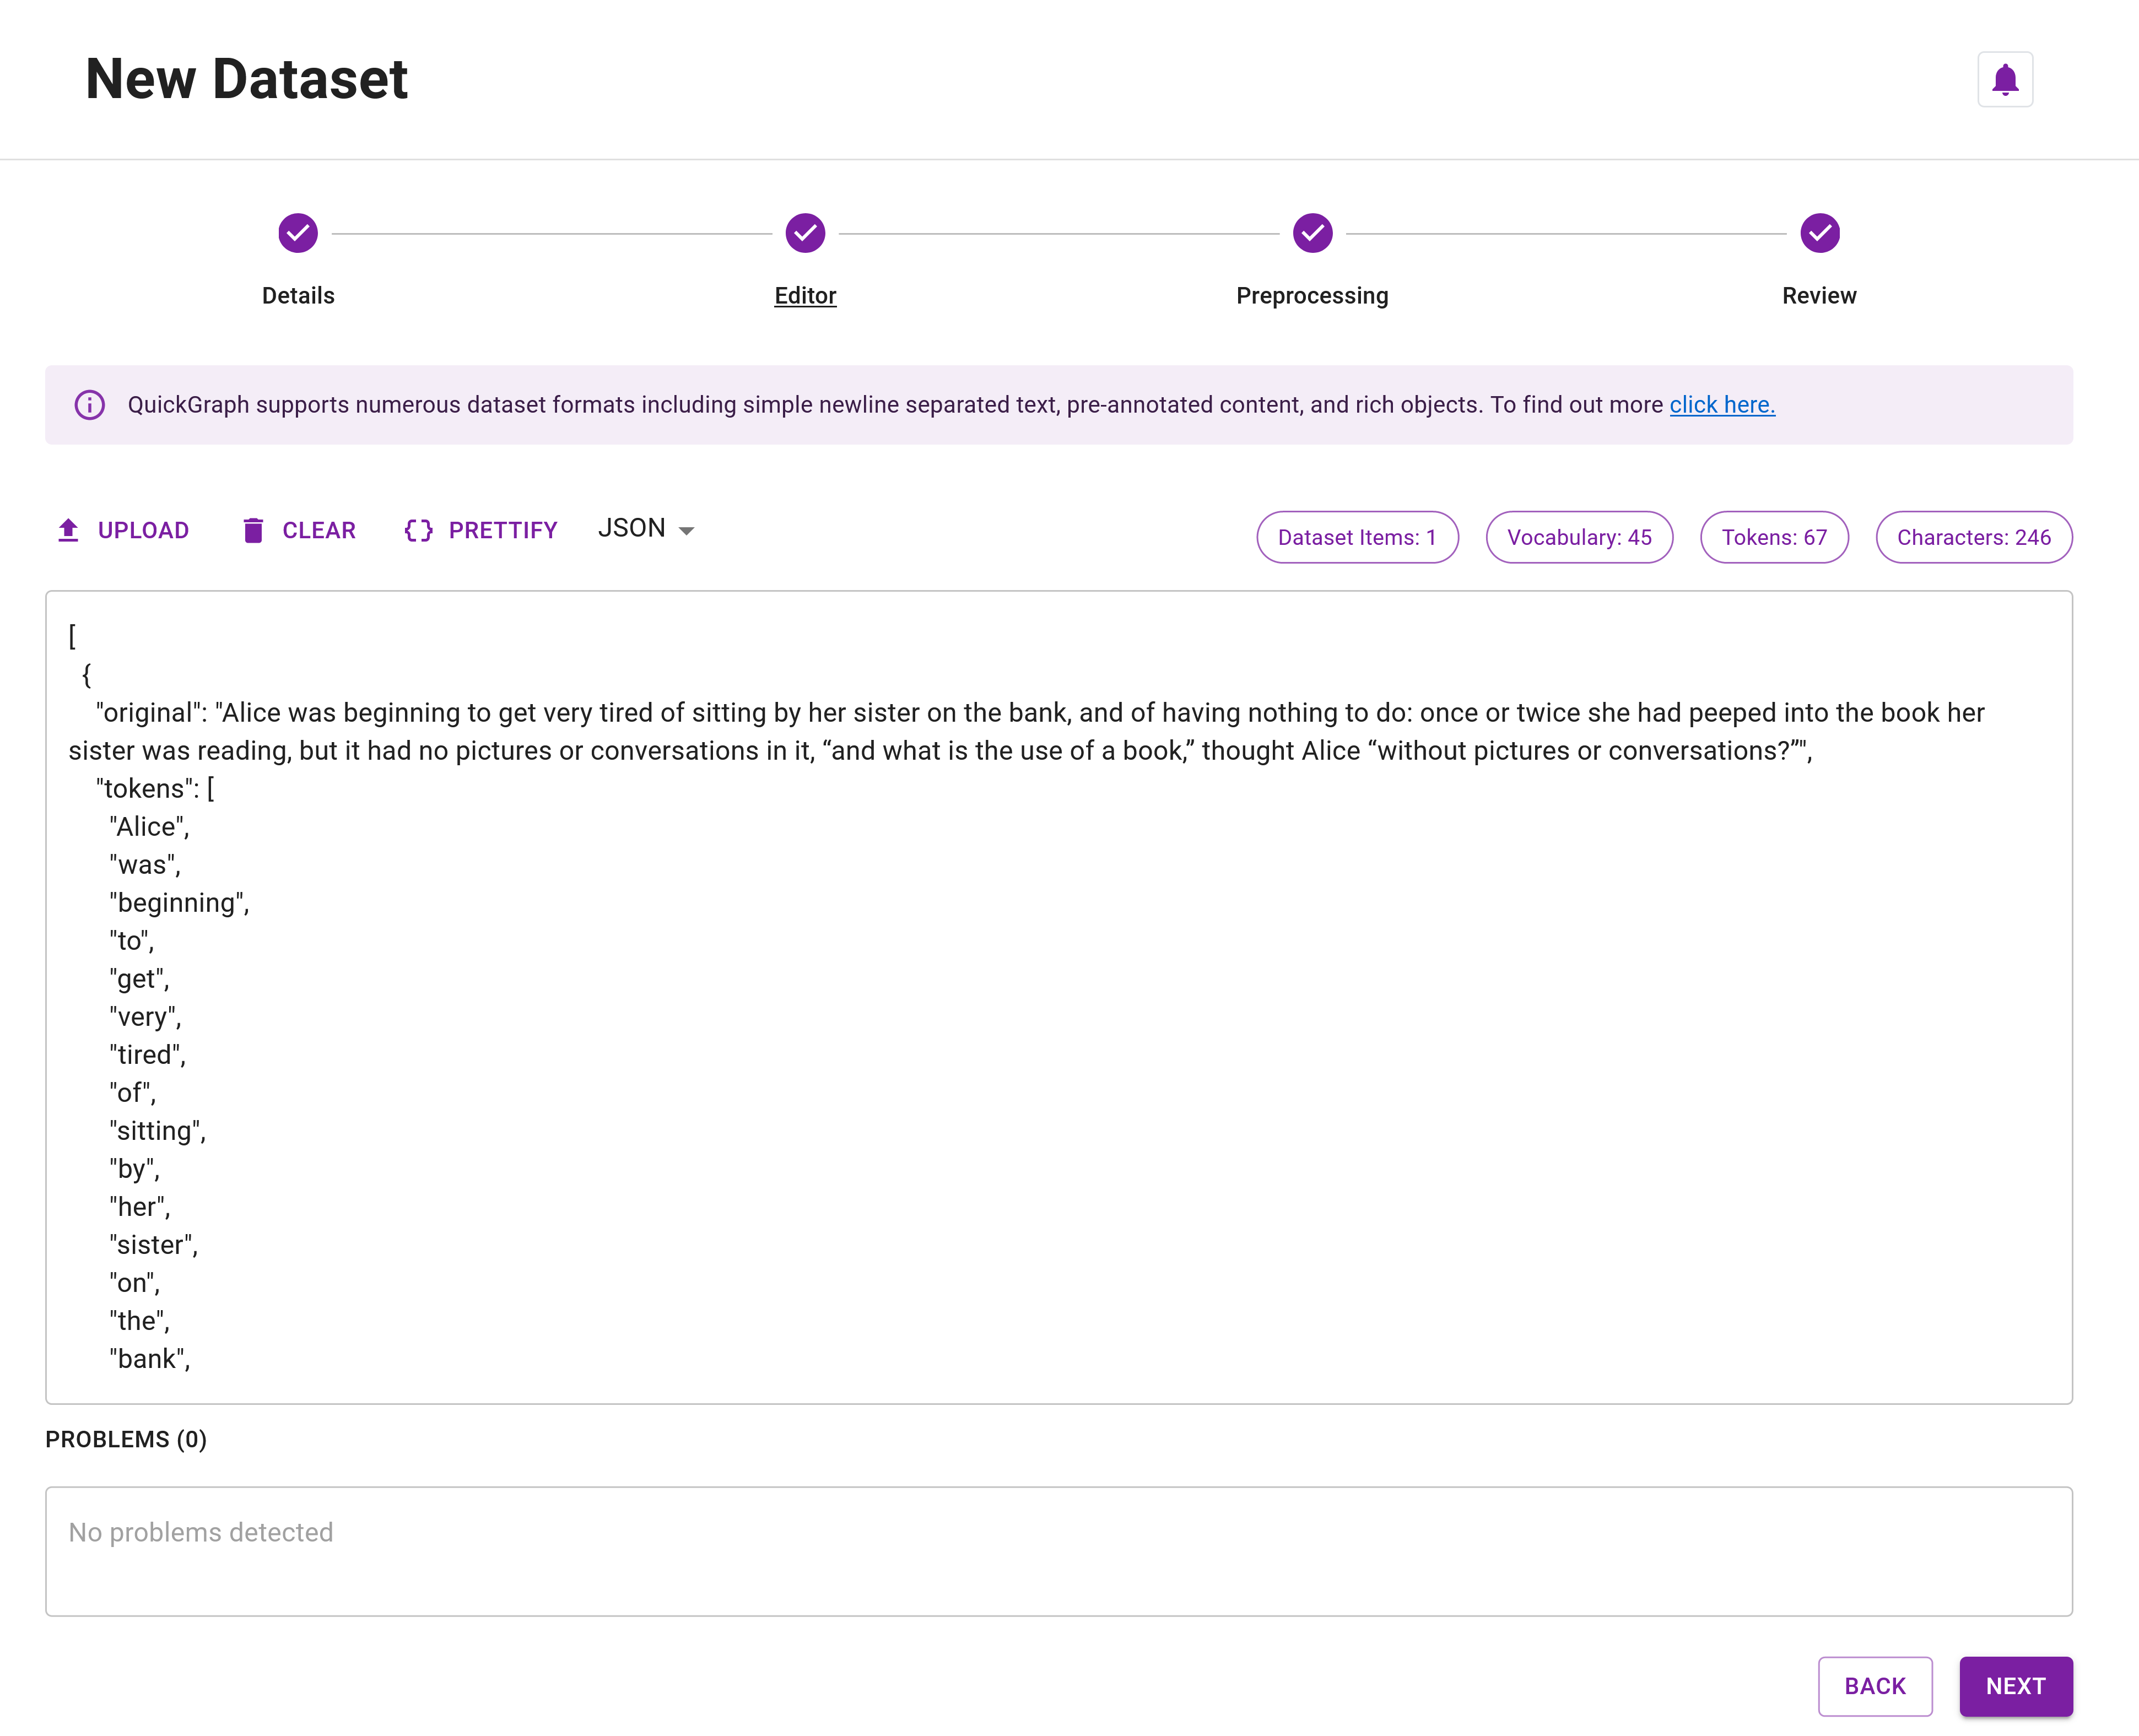
Step 5: Copy and paste the data below. This is the first dataset item in the Introduction Tutorial, converted into entity and relation annotated JSON format. It contains 7 entities and 3 relations. For this tutorial, we won't add any rich fields in the dataset like external_id or extra_fields.
[
  {
    "original": "Alice was beginning to get very tired of sitting by her sister on the bank, and of having nothing to do: once or twice she had peeped into the book her sister was reading, but it had no pictures or conversations in it, “and what is the use of a book,” thought Alice “without pictures or conversations?”",
    "tokens": [
      "Alice",
      "was",
      "beginning",
      "to",
      "get",
      "very",
      "tired",
      "of",
      "sitting",
      "by",
      "her",
      "sister",
      "on",
      "the",
      "bank",
      ",",
      "and",
      "of",
      "having",
      "nothing",
      "to",
      "do",
      ":",
      "once",
      "or",
      "twice",
      "she",
      "had",
      "peeped",
      "into",
      "the",
      "book",
      "her",
      "sister",
      "was",
      "reading",
      ",",
      "but",
      "it",
      "had",
      "no",
      "pictures",
      "or",
      "conversations",
      "in",
      "it",
      ",",
      "“",
      "and",
      "what",
      "is",
      "the",
      "use",
      "of",
      "a",
      "book",
      ",",
      "”",
      "thought",
      "Alice",
      "“",
      "without",
      "pictures",
      "or",
      "conversations",
      "?",
      "”"
    ],
    "entities": [
      {
        "id": "1",
        "start": 0,
        "end": 0,
        "label": "Character"
      },
      {
        "id": "2",
        "start": 59,
        "end": 59,
        "label": "Character"
      },
      {
        "id": "3",
        "start": 14,
        "end": 14,
        "label": "Location"
      },
      {
        "id": "4",
        "start": 31,
        "end": 31,
        "label": "Object"
      },
      {
        "id": "5",
        "start": 33,
        "end": 33,
        "label": "Character"
      },
      {
        "id": "6",
        "start": 55,
        "end": 55,
        "label": "Object"
      },
      {
        "id": "7",
        "start": 11,
        "end": 11,
        "label": "Character"
      }
    ],
    "relations": [
      {
        "source_id": "1",
        "target_id": "7",
        "label": "Knows"
      },
      {
        "source_id": "5",
        "target_id": "4",
        "label": "Possesses"
      },
      {
        "source_id": "7",
        "target_id": "3",
        "label": "LocatedIn"
      },
      {
        "source_id": "1",
        "target_id": "3",
        "label": "LocatedIn"
      }
    ]
  }
]
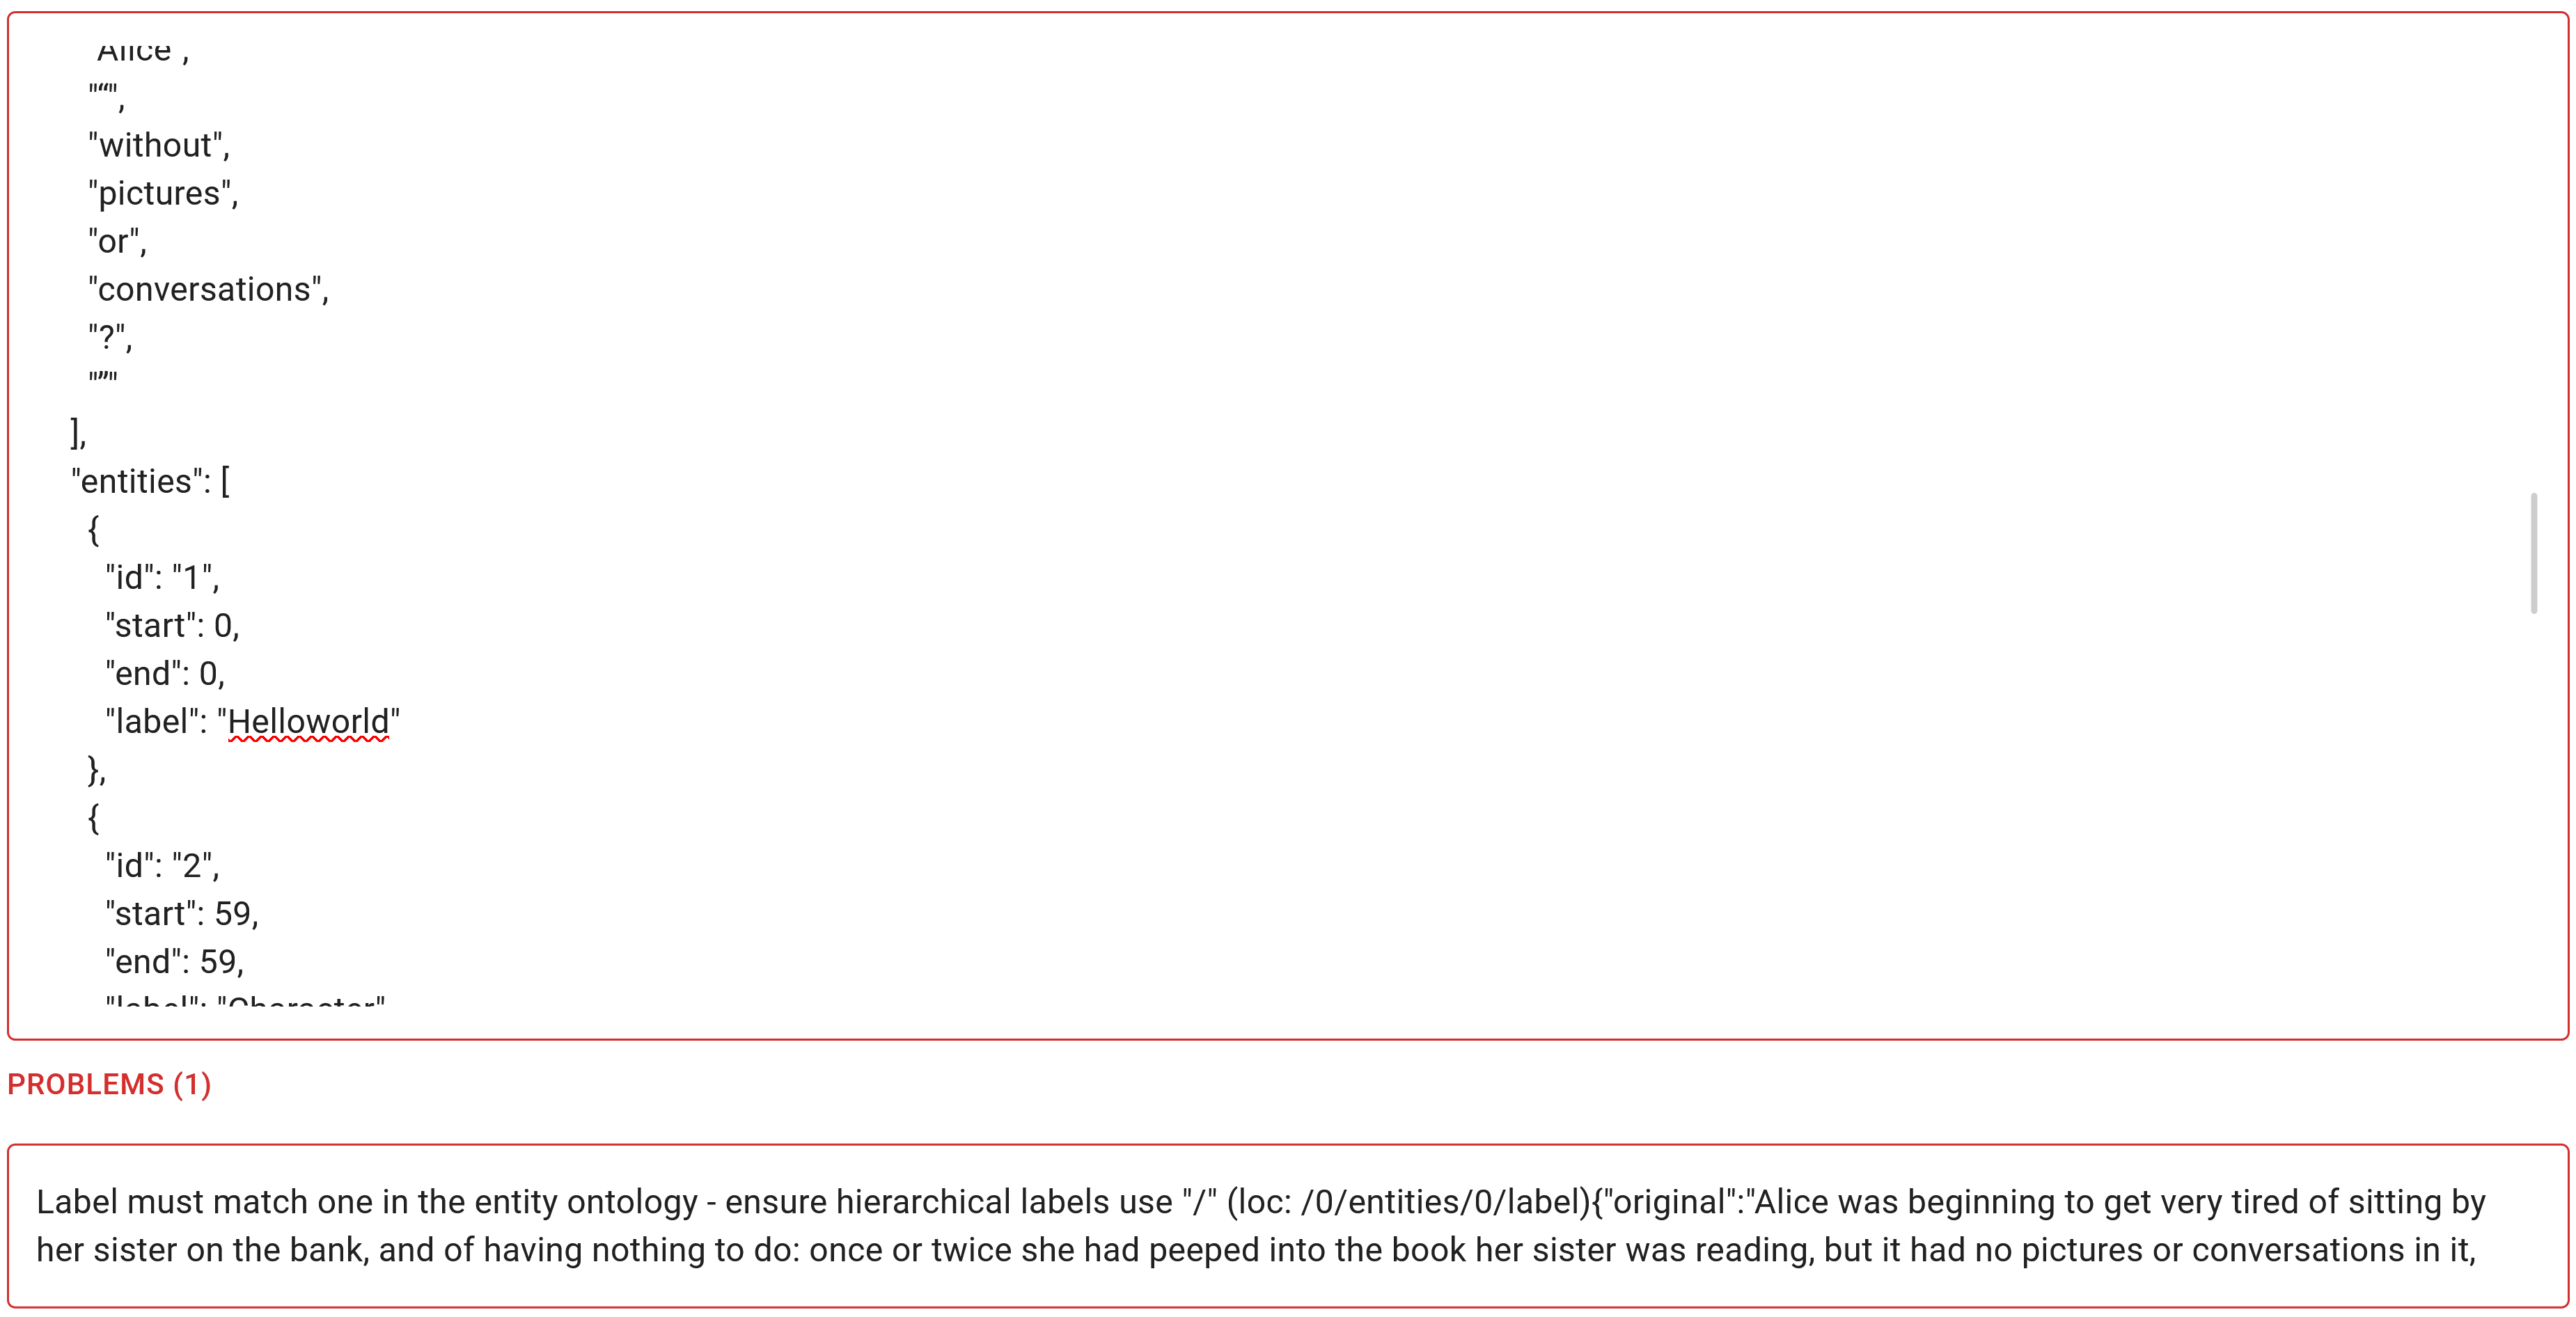
Your Editor should resemble Figure 2. The dataset consists of one dataset item without any issues. However, if we alter the label of our entities or relations from those defined in our ontology resources, validation errors would prevent us from creating the dataset (as shown in Figure 3).
Step 6: Click Next to proceed to the Dataset Preprocessing step.
Setting preannotated entities and relations with hierarchical labels requires the use forward slashes. For instance, Character/Name. This format is expected by QuickGraph when it processes and unifies them with the children in your ontology resources.
Preprocessing and Review
You should be on the Preprocessing Step. For preannotated datasets, you cannot perform any preprocessing operations as this could cause conflicts between the token start/end positions. All preprocessing must be done prior to dataset creation in QuickGraph.
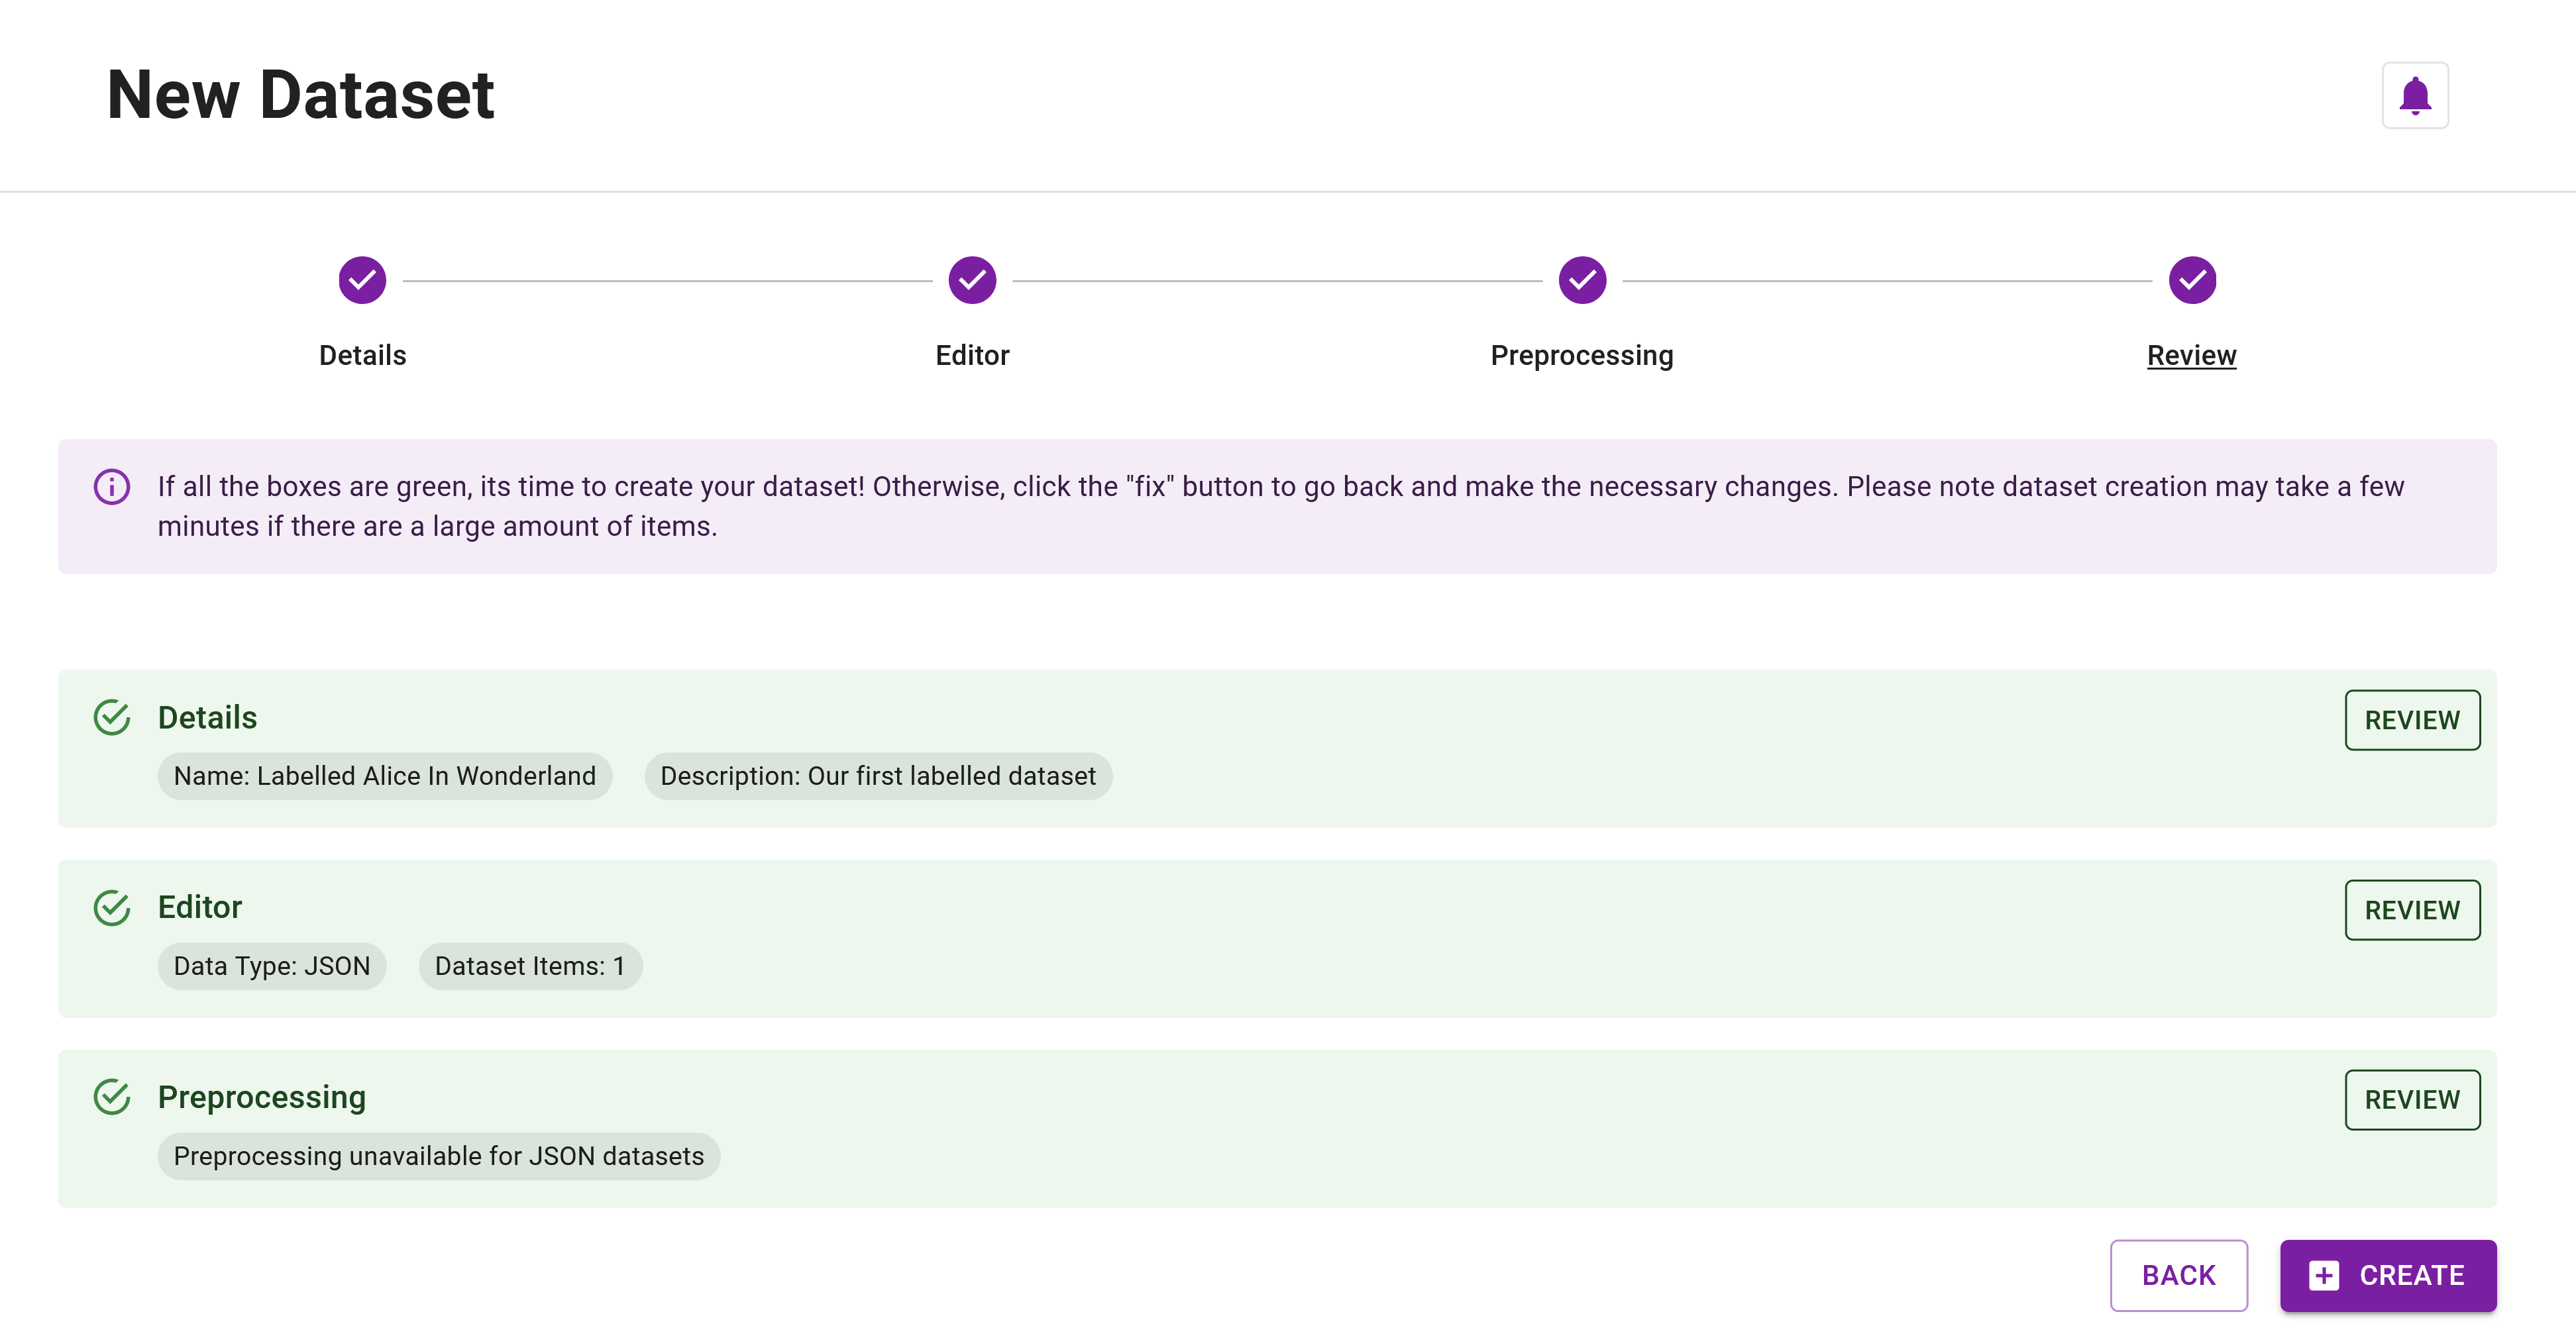
Step 7: Click Next again to reach the Review Step and then click Create to create the dataset. Your Review Step should resemble Figure 4.
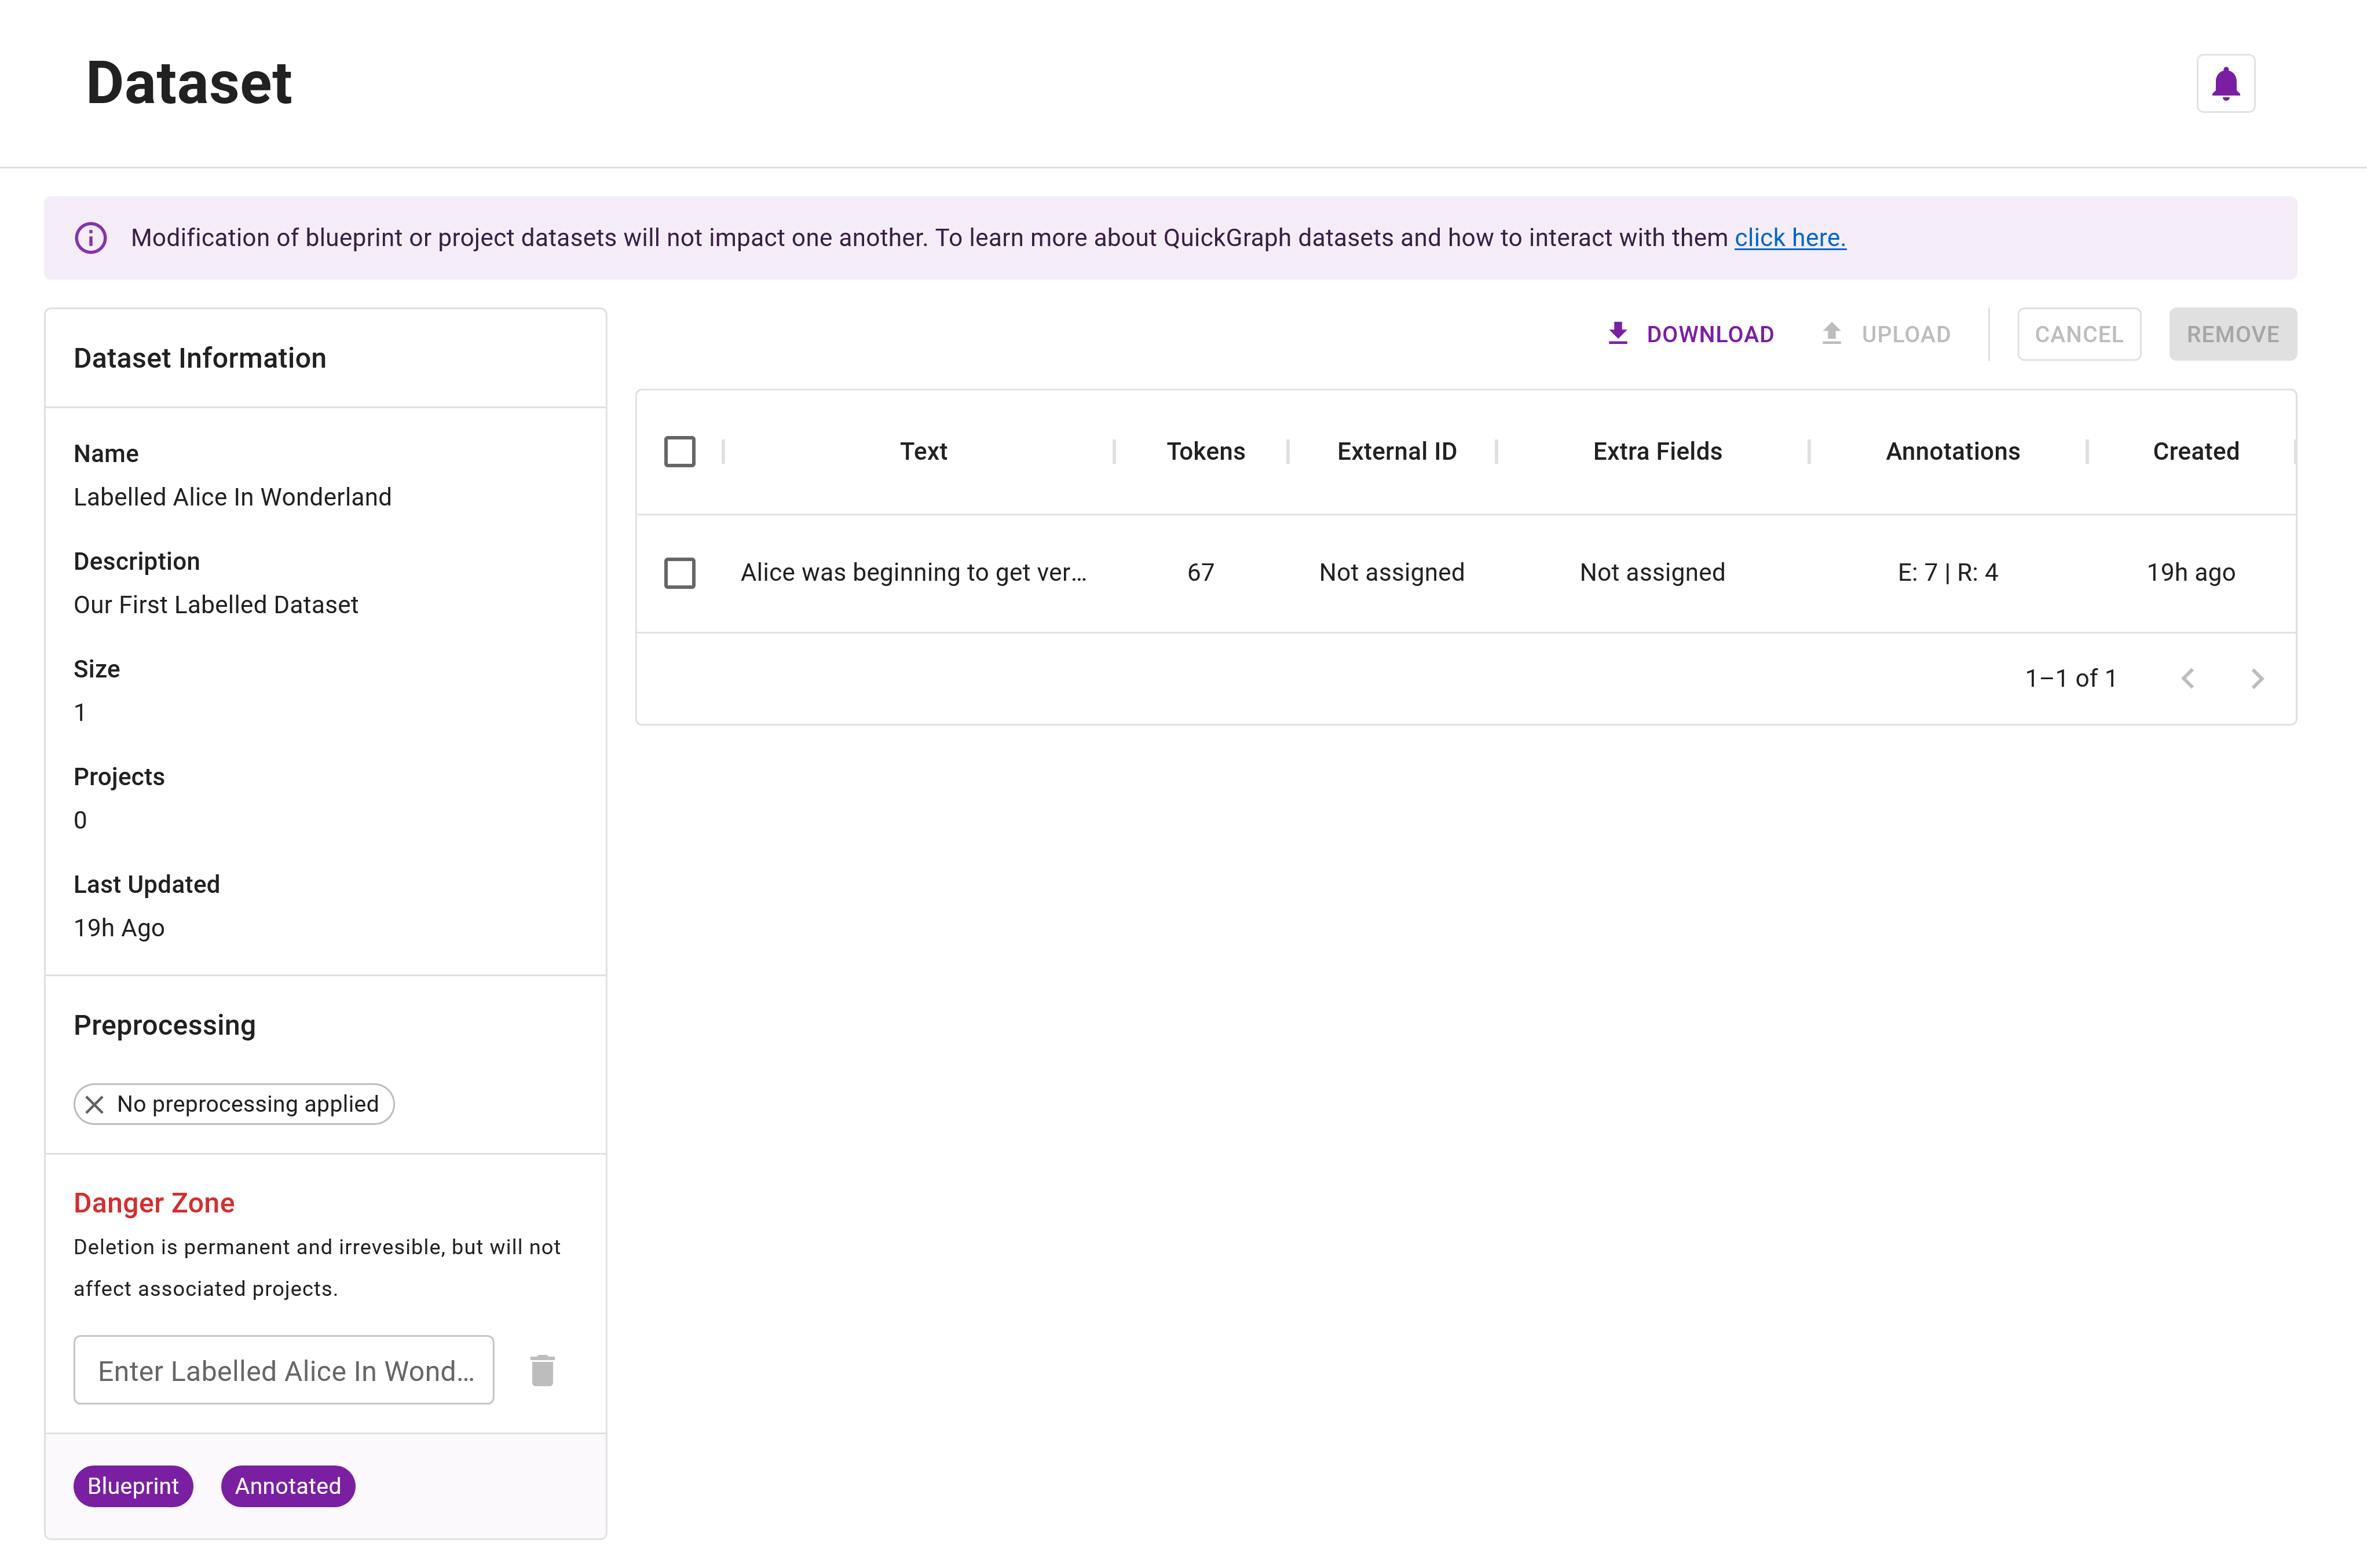
Management View
Step 8: After creating the dataset, you'll be automatically redirected to its management page (Figure 5). Here, you'll notice the Blueprint and Annotated chips signifying this as a blueprint dataset (which projects can copy from) with annotated dataset items. You'll also be able to see your single dataset item, including the 7 entity and 4 relation annotations it contains.
Creating a Preannotated Project
With our Preannotated Dataset prepared, we can now create a new project based on it. The process will be somewhat similar to the Introduction Tutorial. However, there are two unique aspects when working with preannotated datasets:
- Selecting a preannotated dataset will require us to choose ontology resources it was created with.
- We need to specify whether the annotations are set as suggested or accepted.
Step 9: Navigate to the Project Creator.
Details
In the Project Details step, following the following steps:
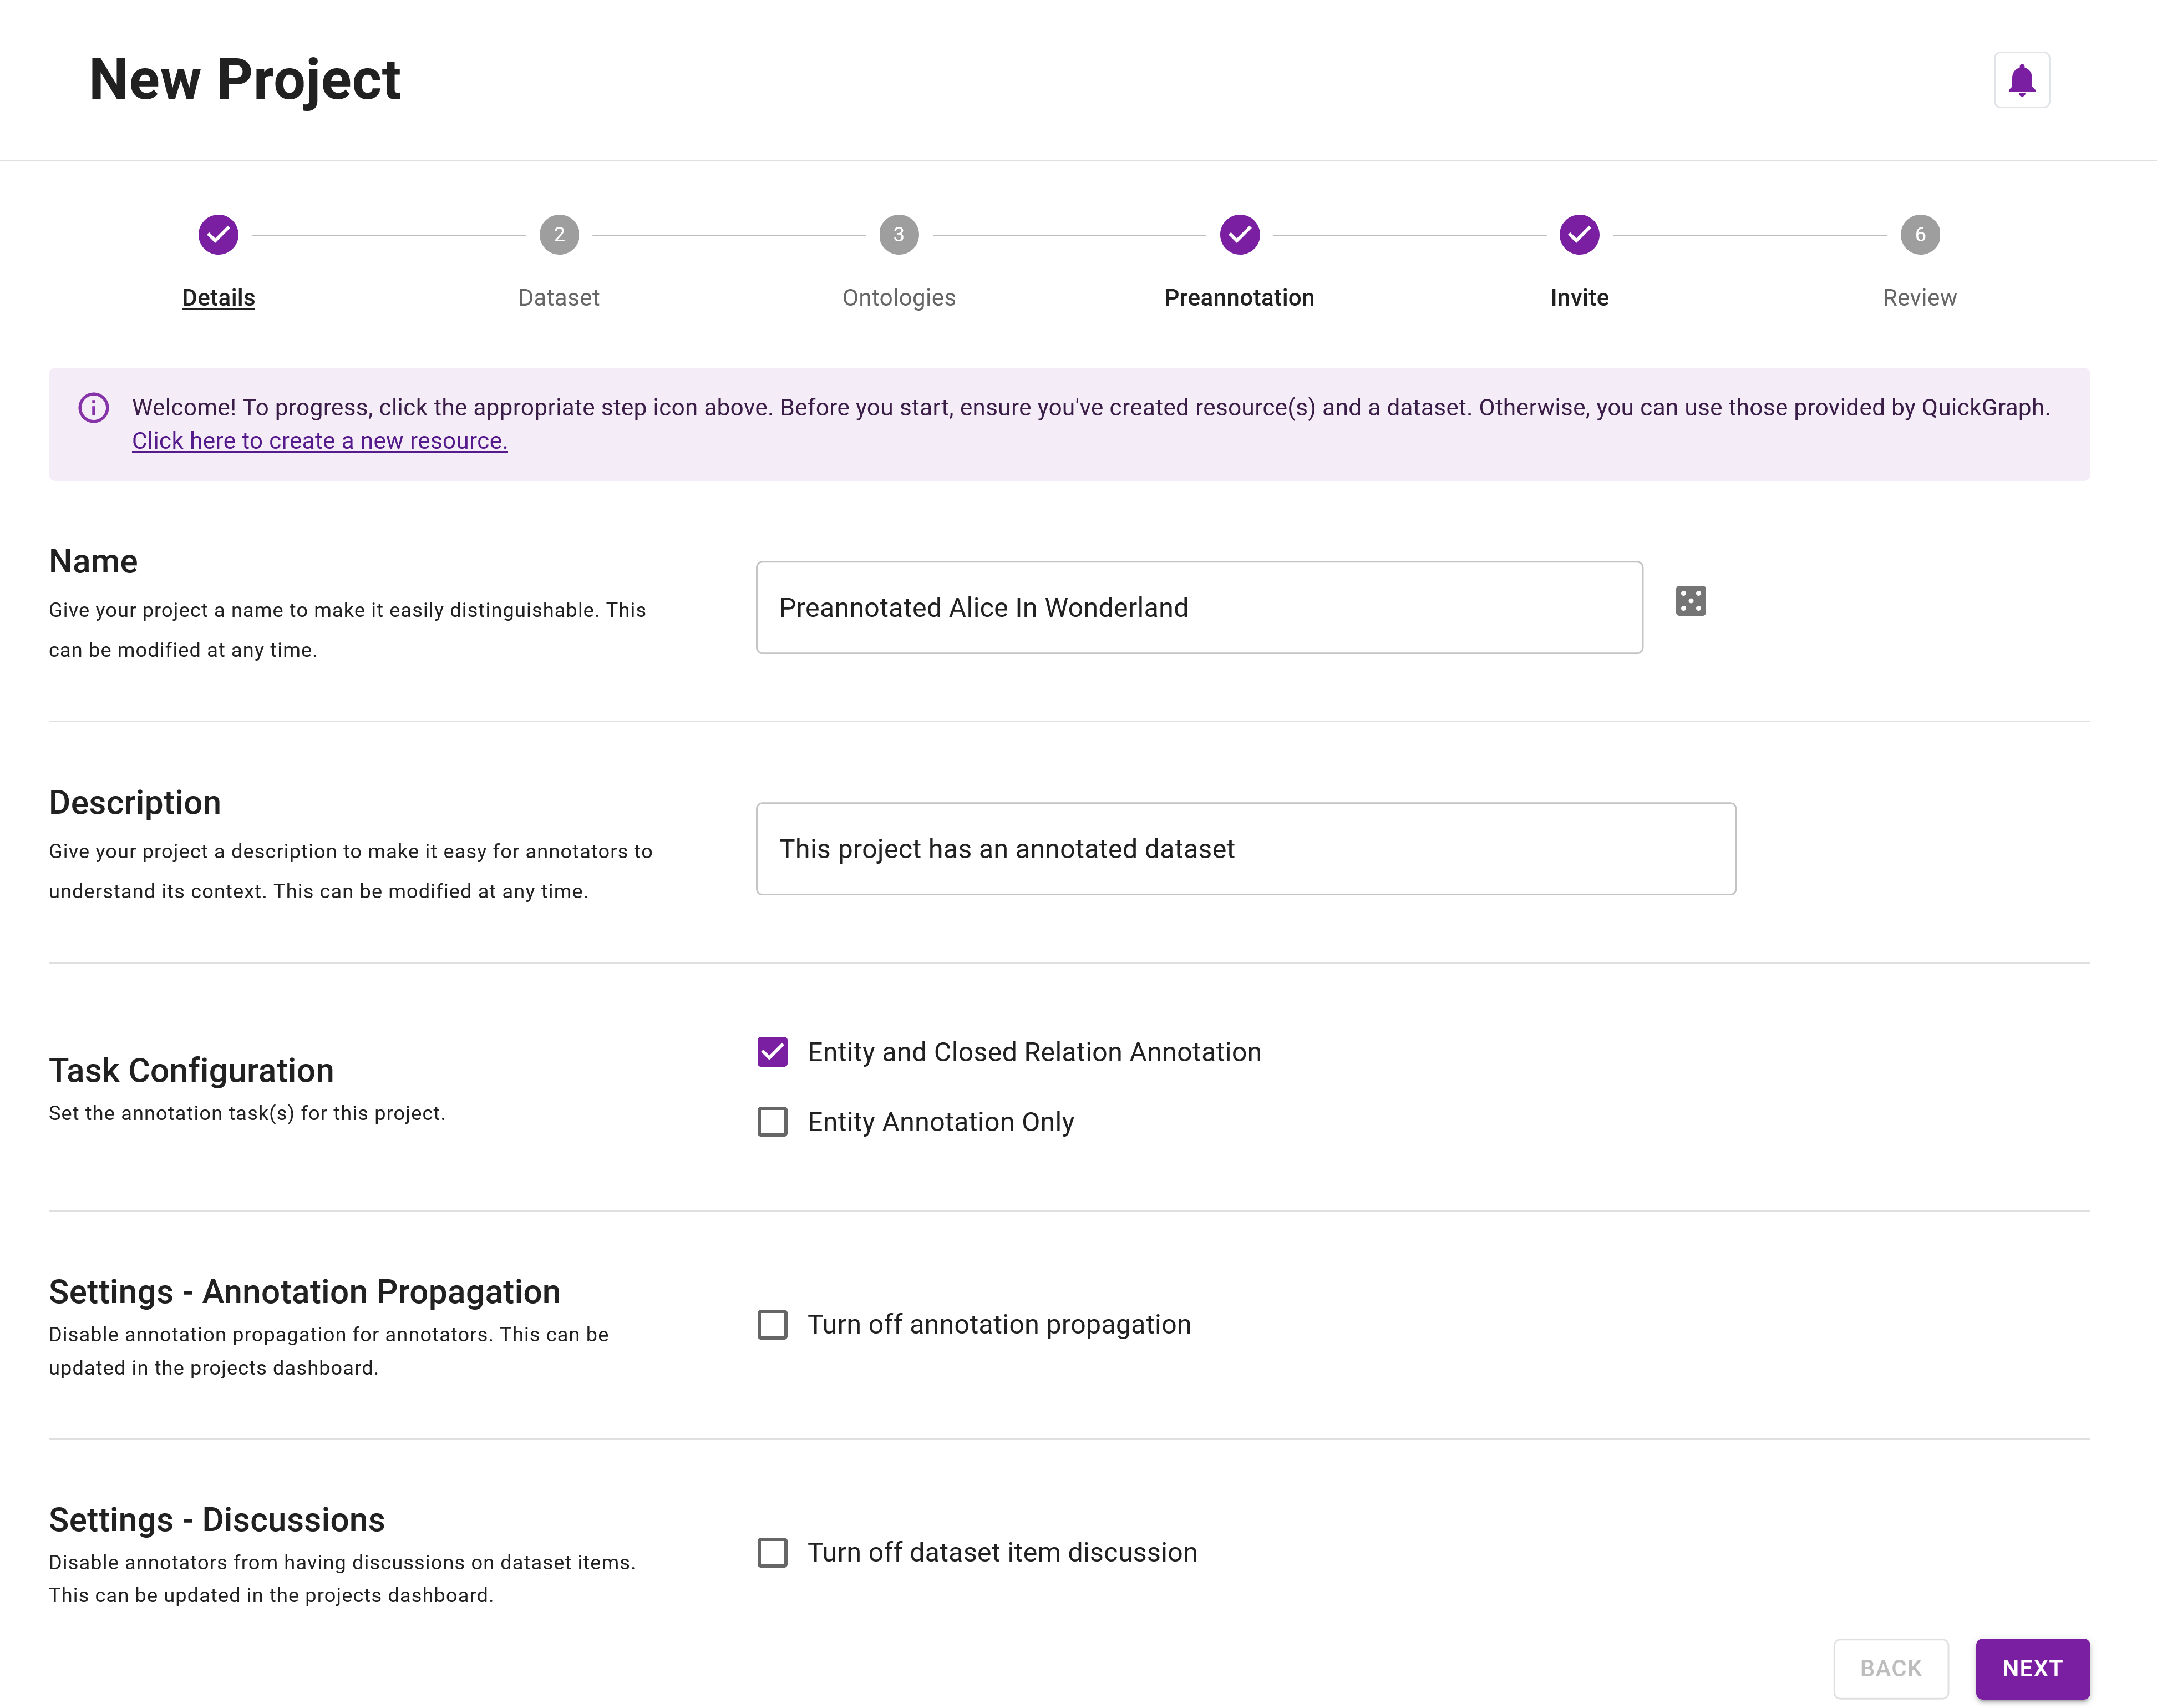
Step 10: Name your project Preannotated Alice In Wonderland.
Step 11: (Optional) Give your project a description such as This project has an annotated dataset.
Step 12: Specify the project task configuration as Entity and Closed Relation Annotation.
Step 13: Click Next to proceed to the Project Dataset step.
Dataset
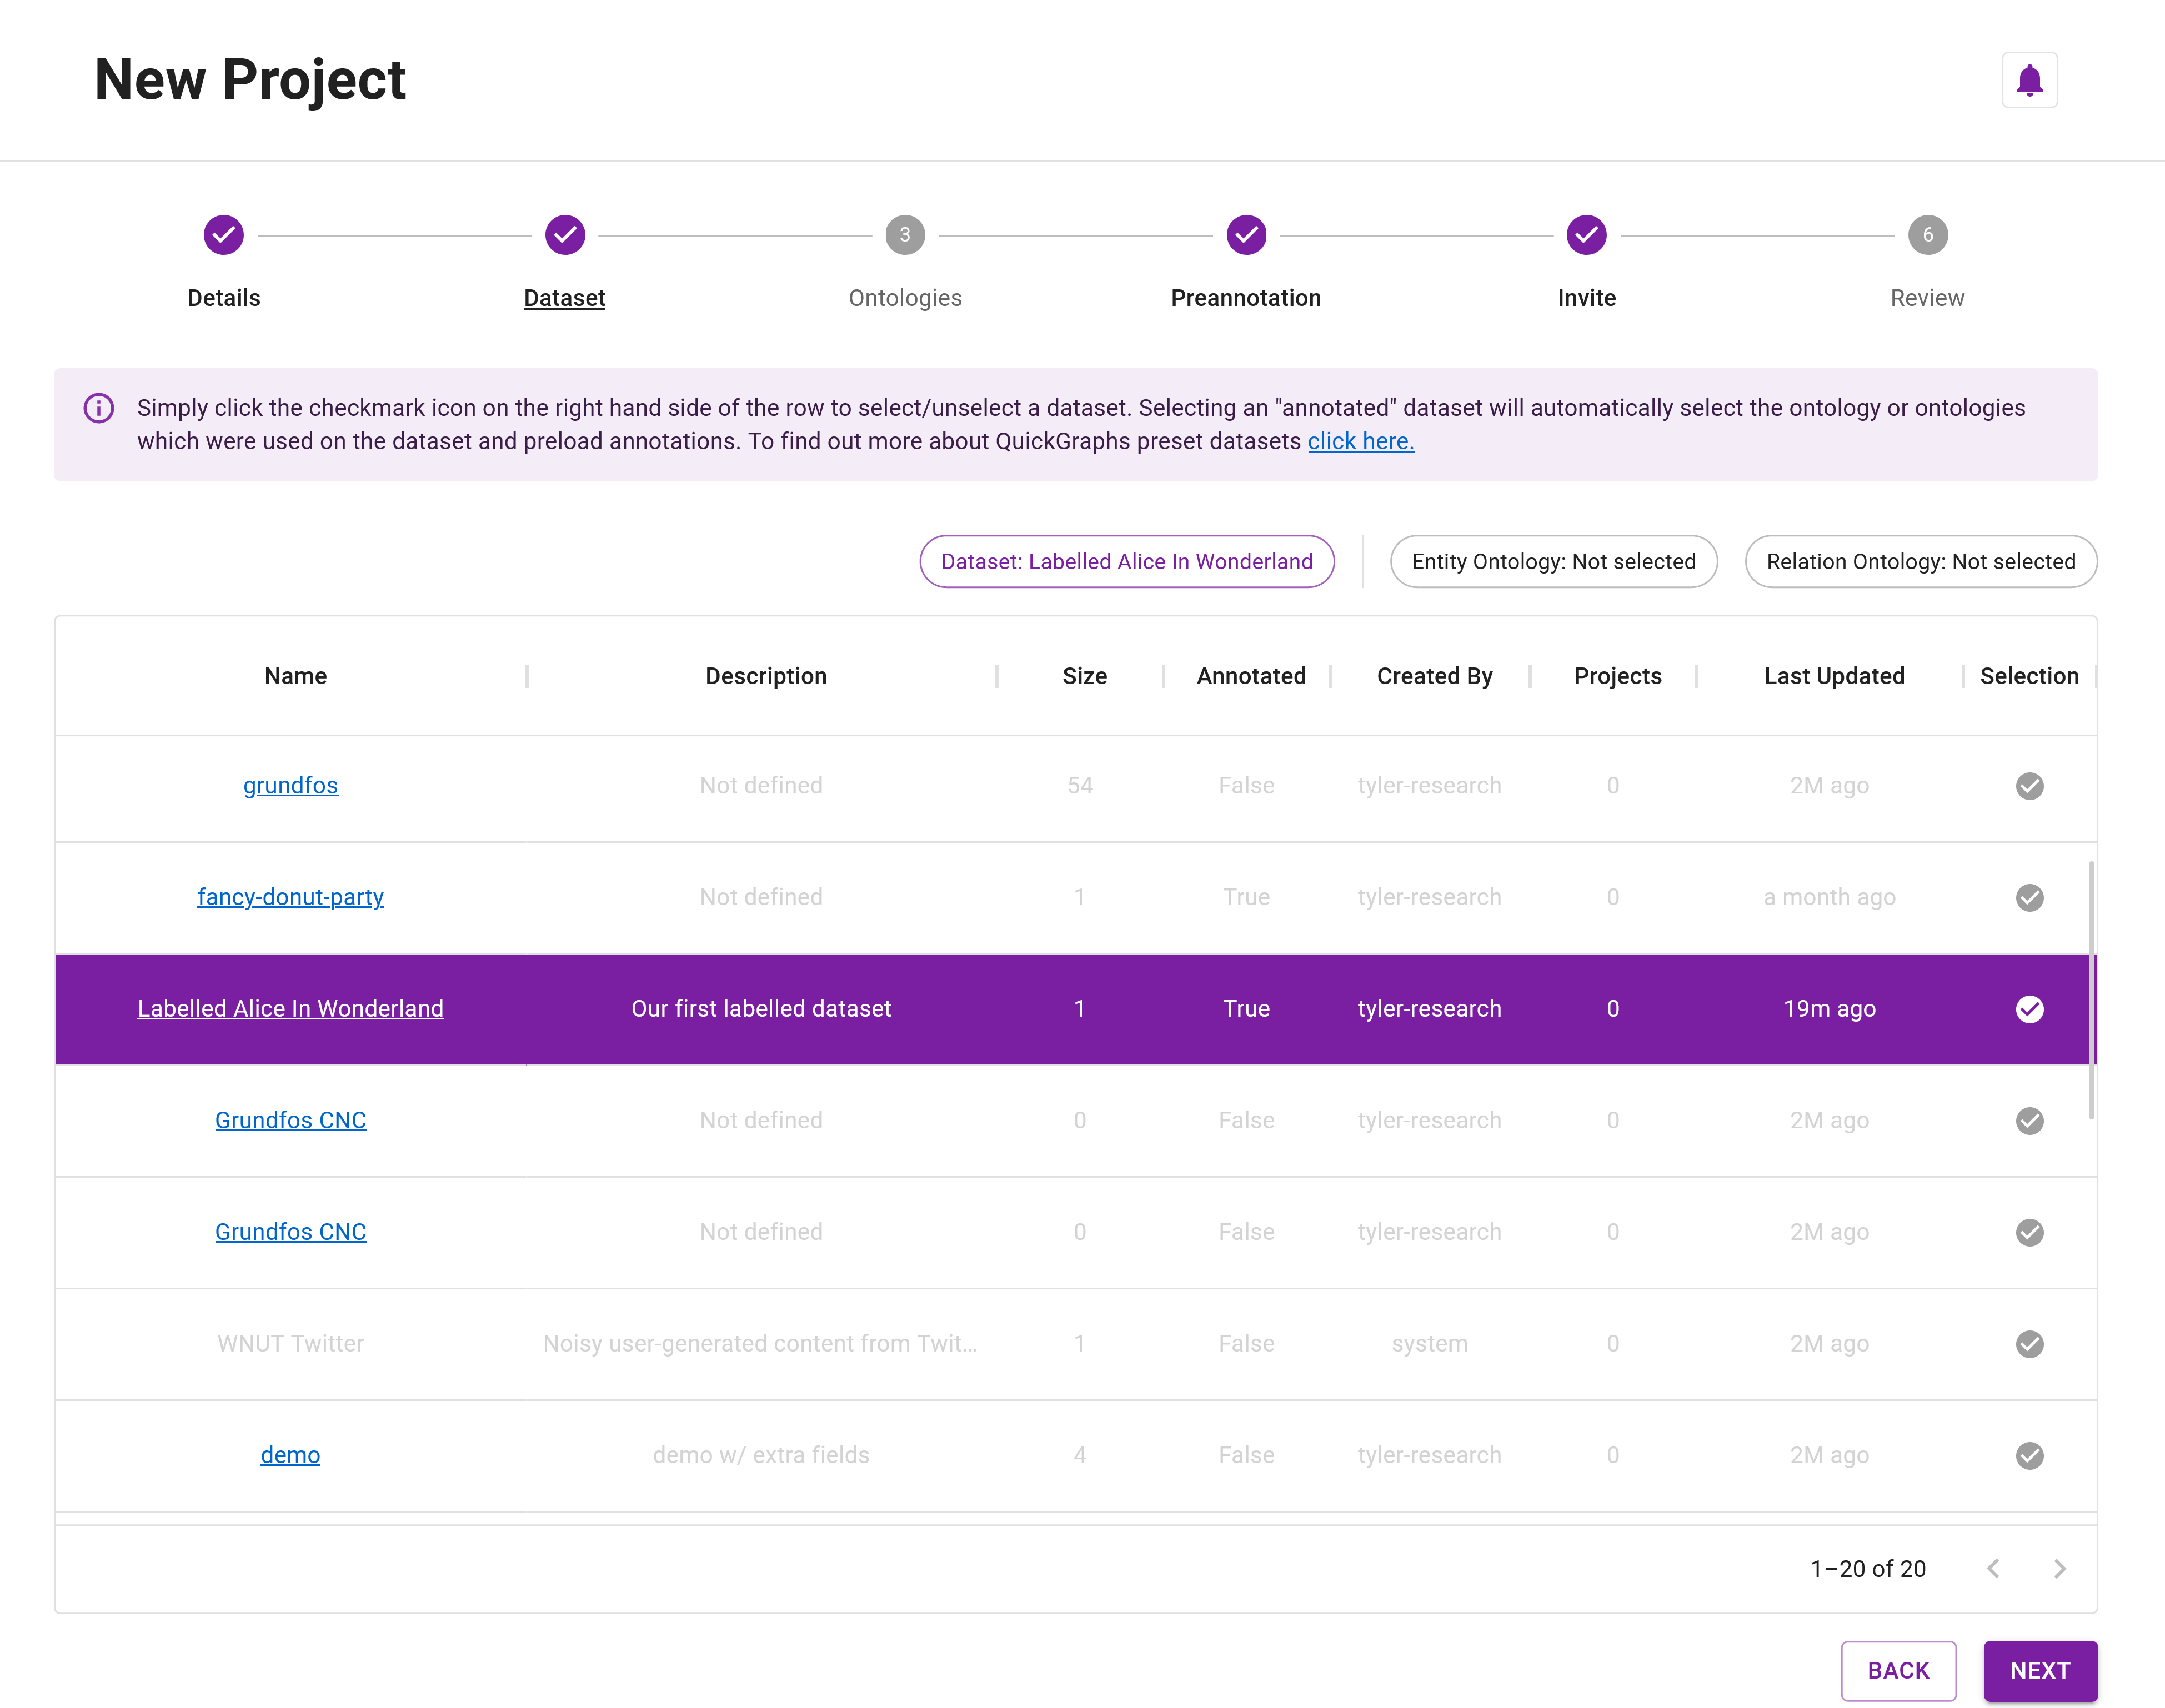
Step 14: Next, we need to choose the dataset for the project. Since we are creating a preannotated project, select the preannotated dataset that we created earlier. The dataset will have the value True in the Annotated column. Click on the Labelled Alice In Wonderland dataset (Figure 7).
Step 15: Click Next to move to the Project Ontologies step.
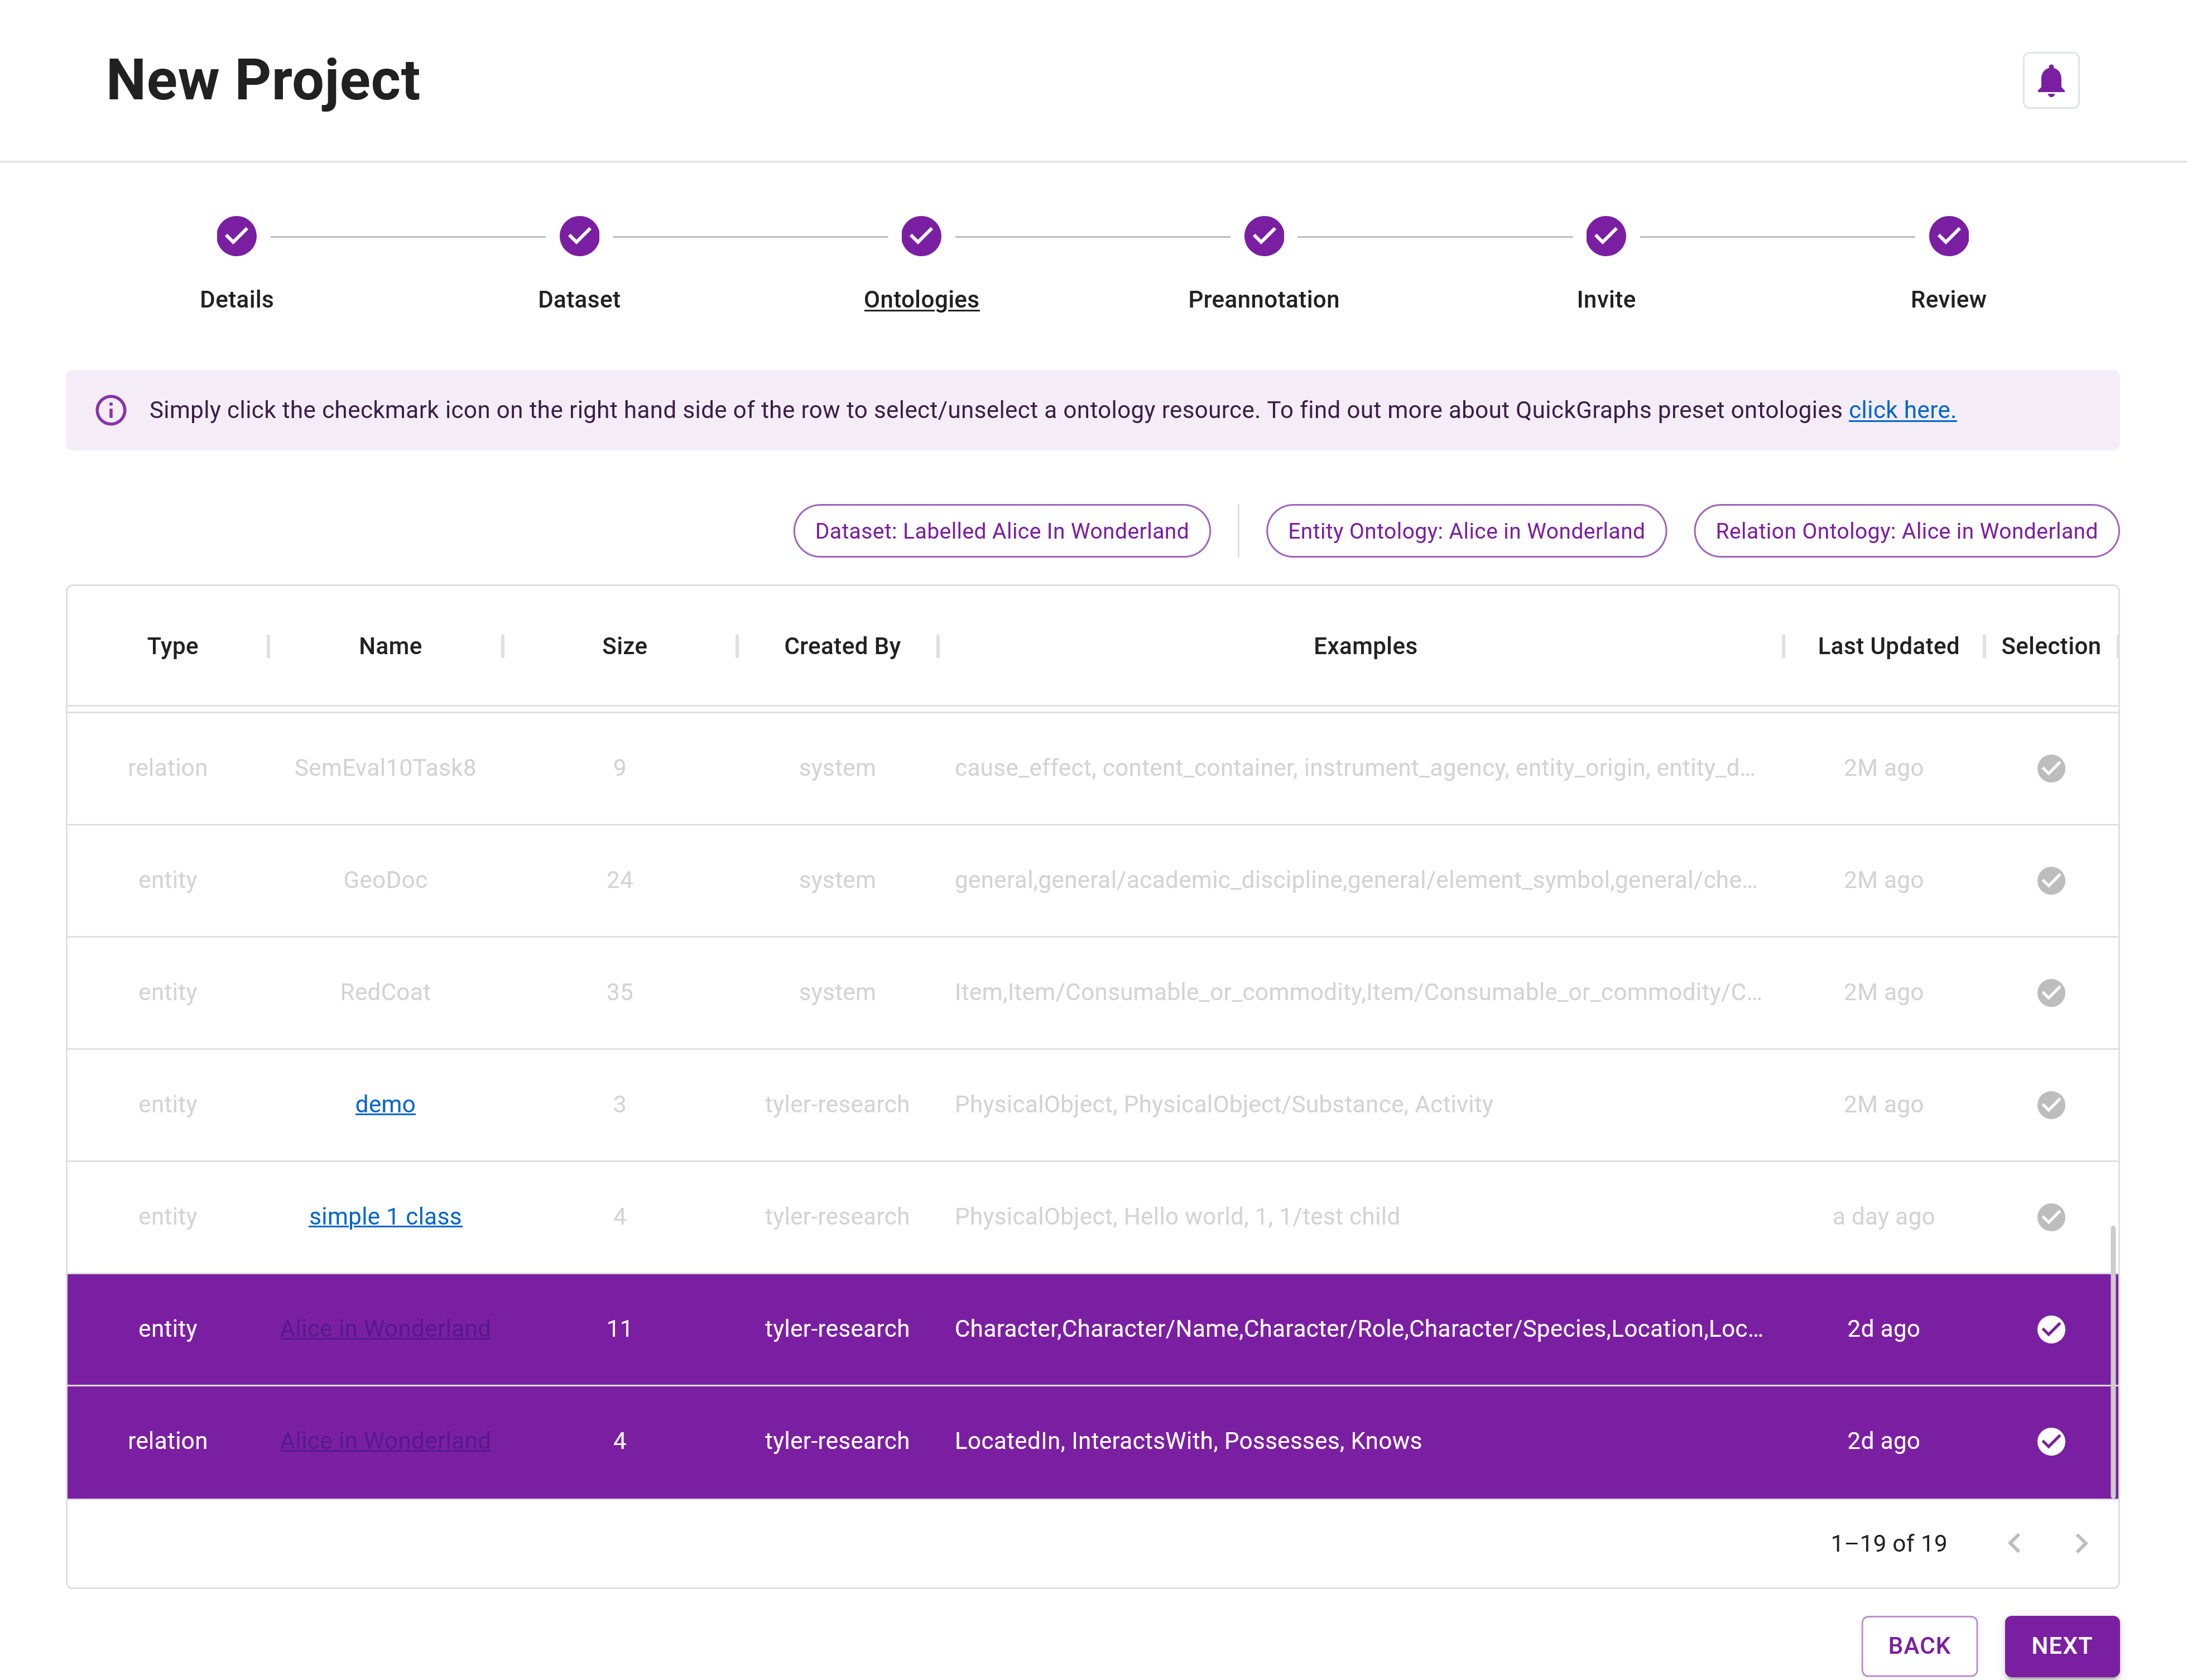
Ontology Resources
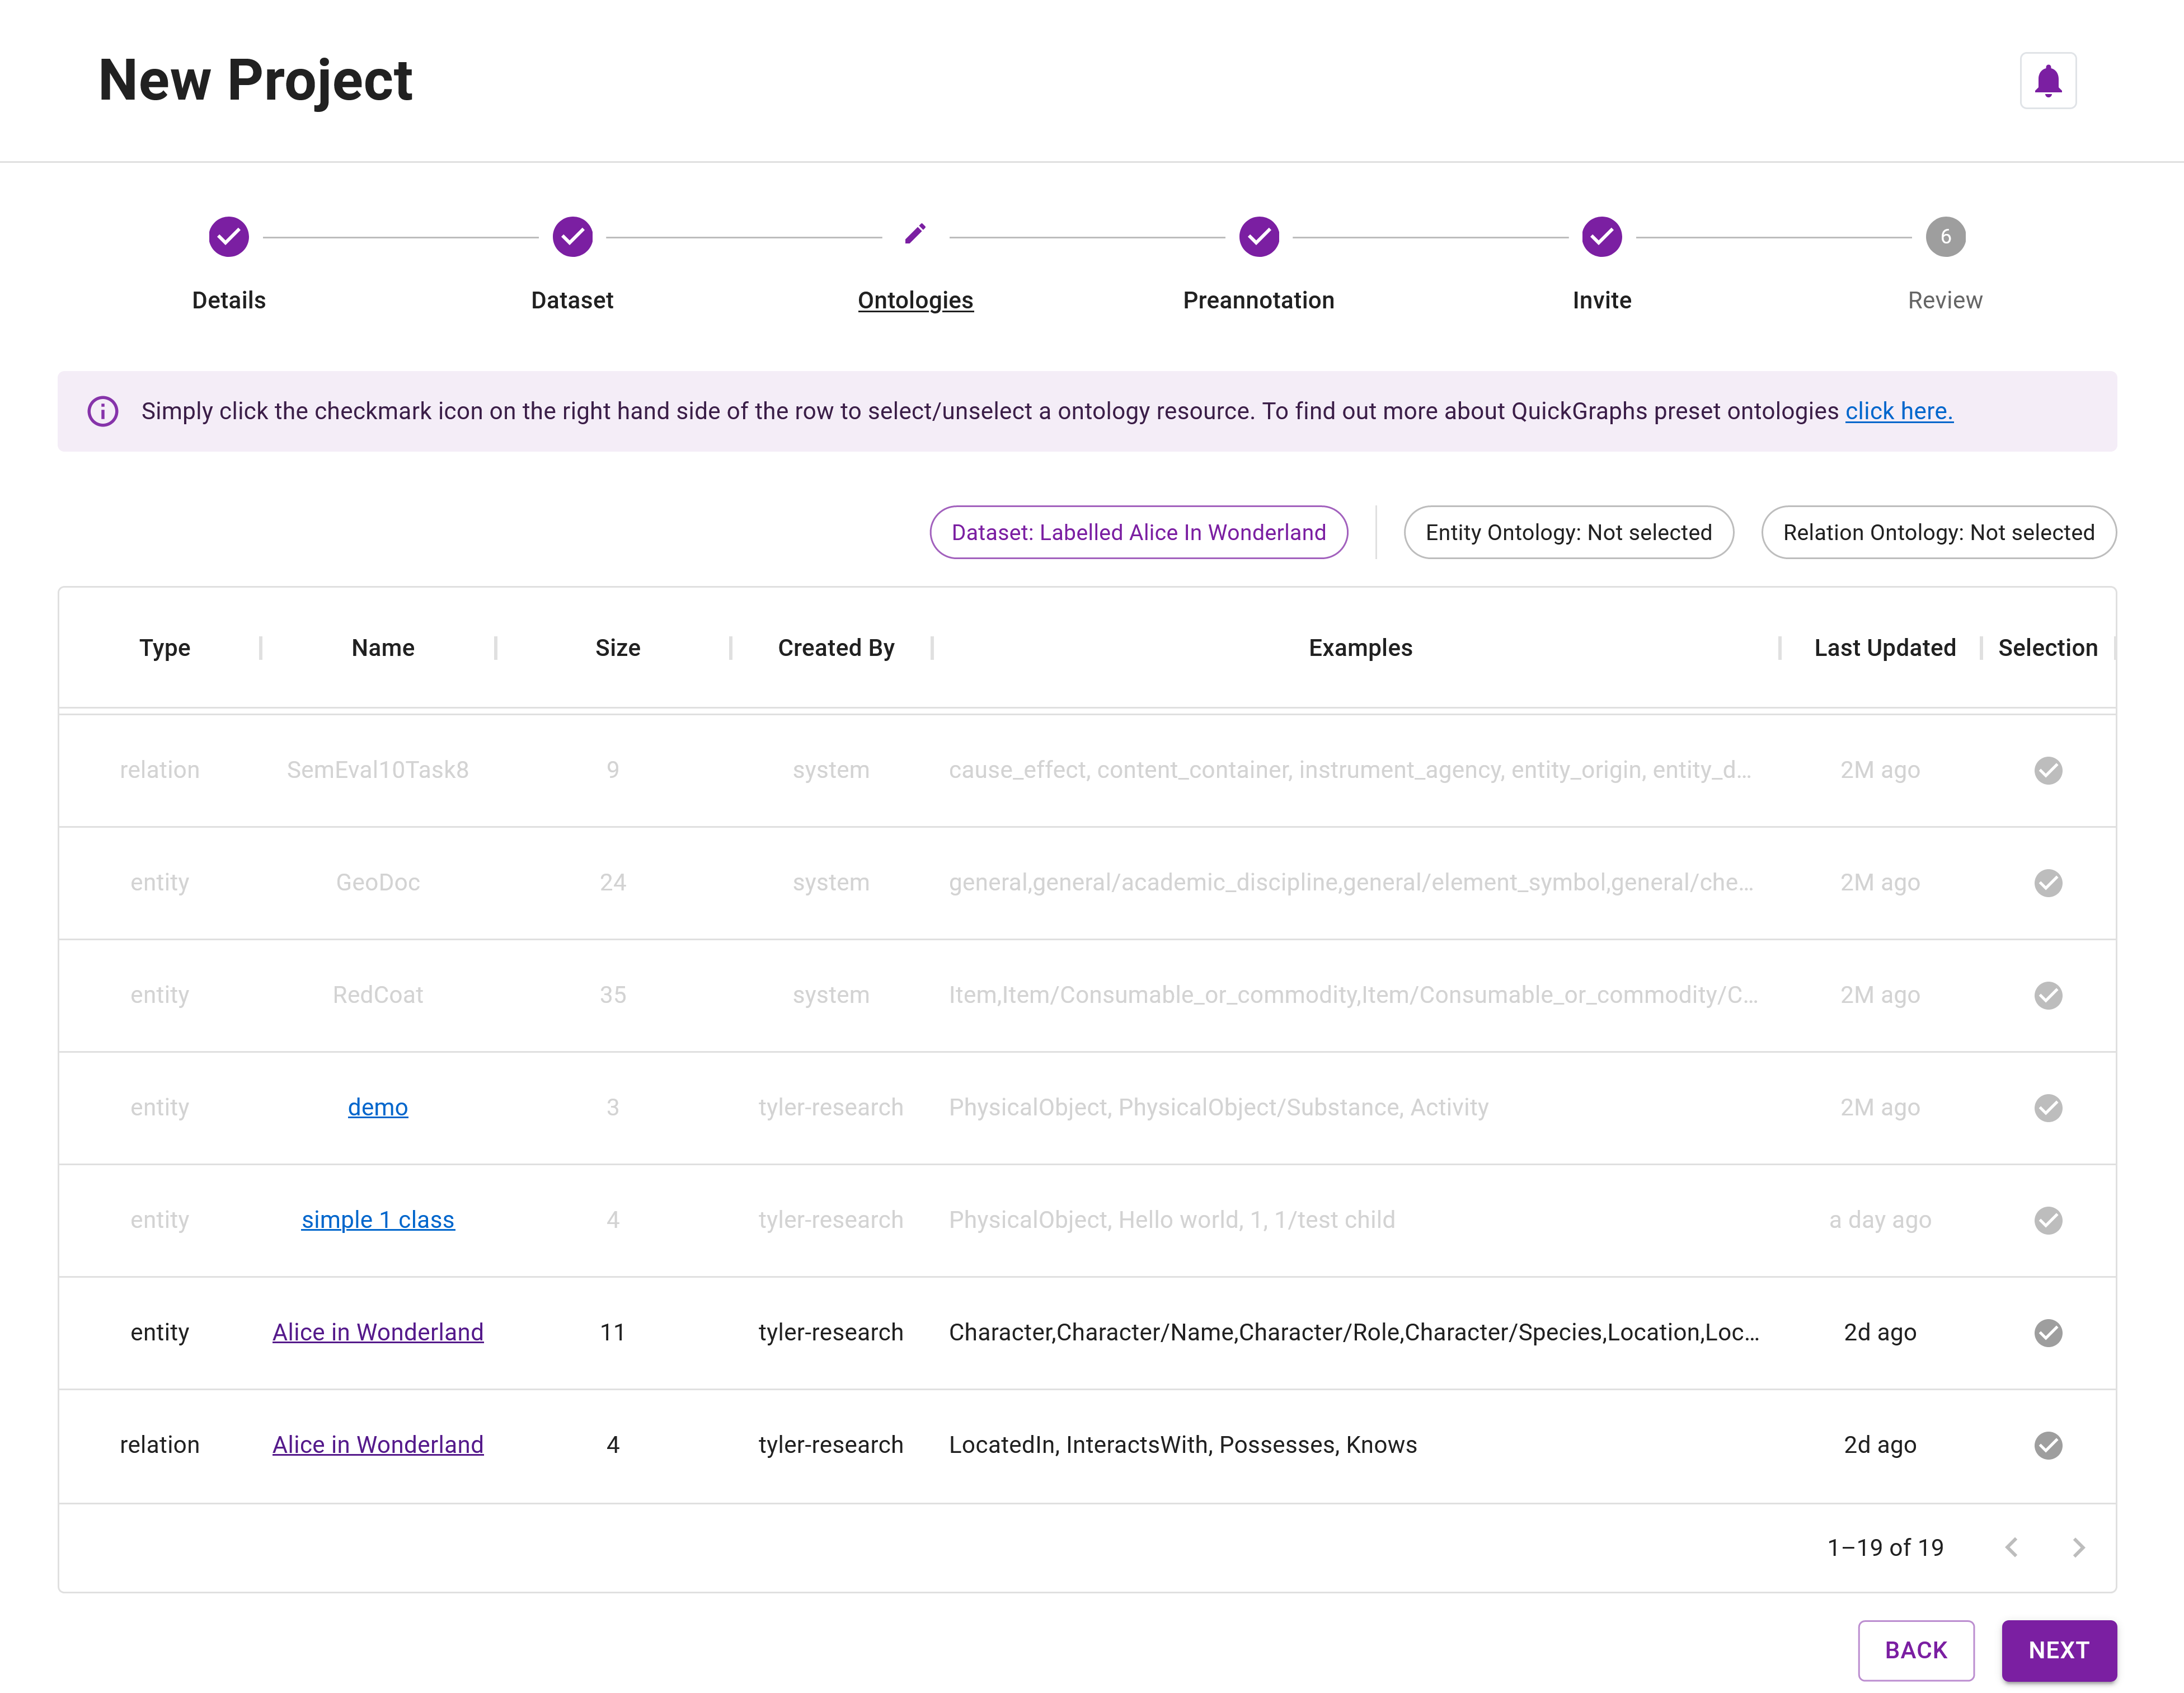
Step 16: For the Ontology Resources, you must select the ontology resources that were used when creating your preannotated dataset. To make this easy, QuickGraph automatically disables all of the resources except those linked to the annotated dataset (Figure 8). Click on the ✓ to select the visible resources (Figure 9).
Step 17: Click Next to move to the Project Preannotation step.
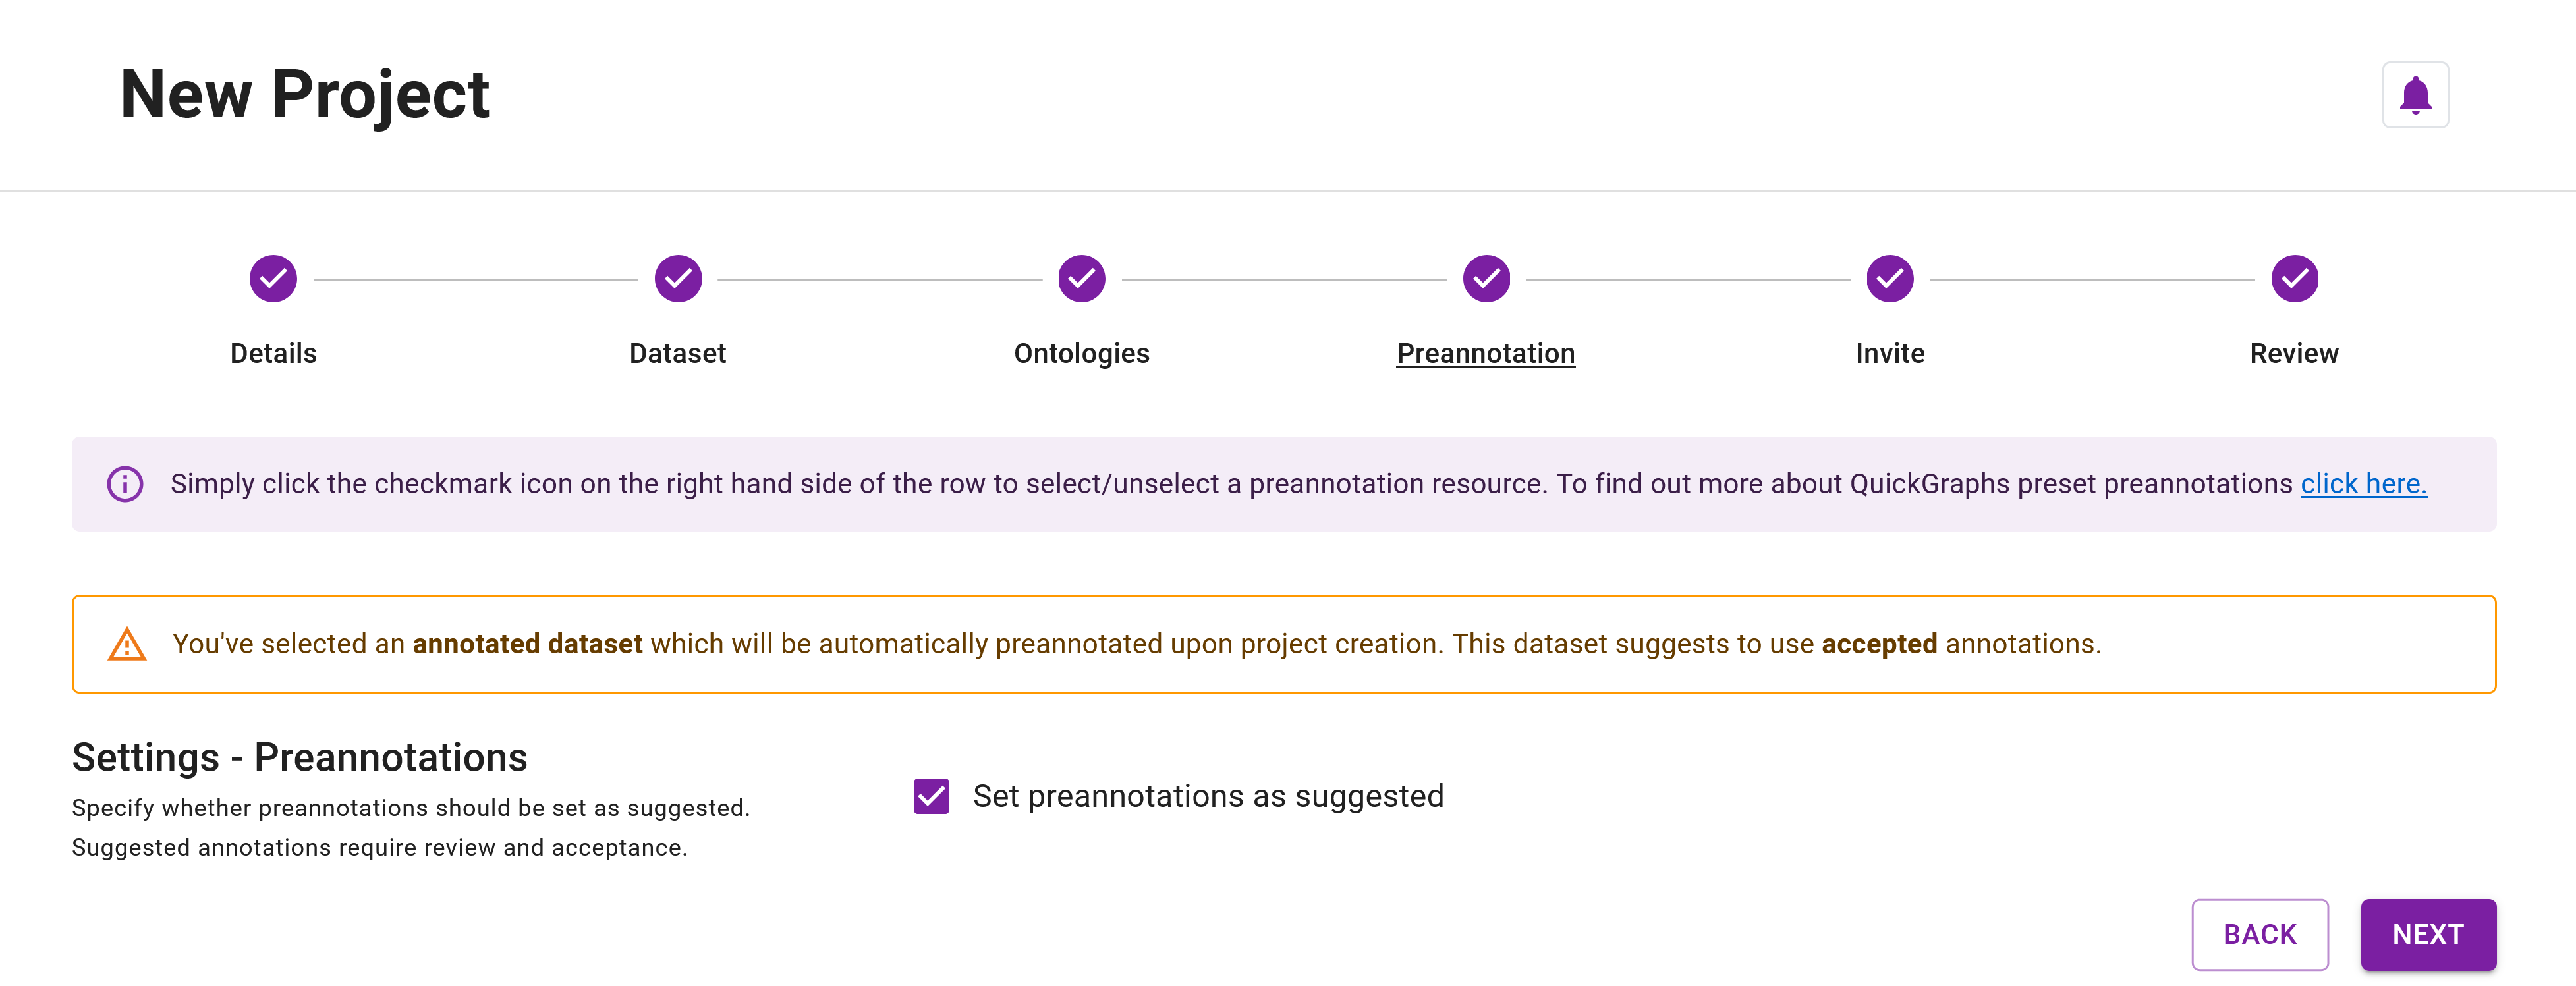
Preannotation
In the Preannotation step, decide whether the preannotations in your dataset should be accepted or simply suggested (see Concepts - Annotation for more details). By default, the selection will be set to what the blueprint dataset has.
Step 18: Leave the checkbox checked. We want the annotations to be set as suggestions. Your screen should resemble Figure 10.
Step 19: Click Next twice to move to the Project Review step.
Review
Step 20: Finally, review your project details before creation. Ensure everything is correct, then click Create to create the project.
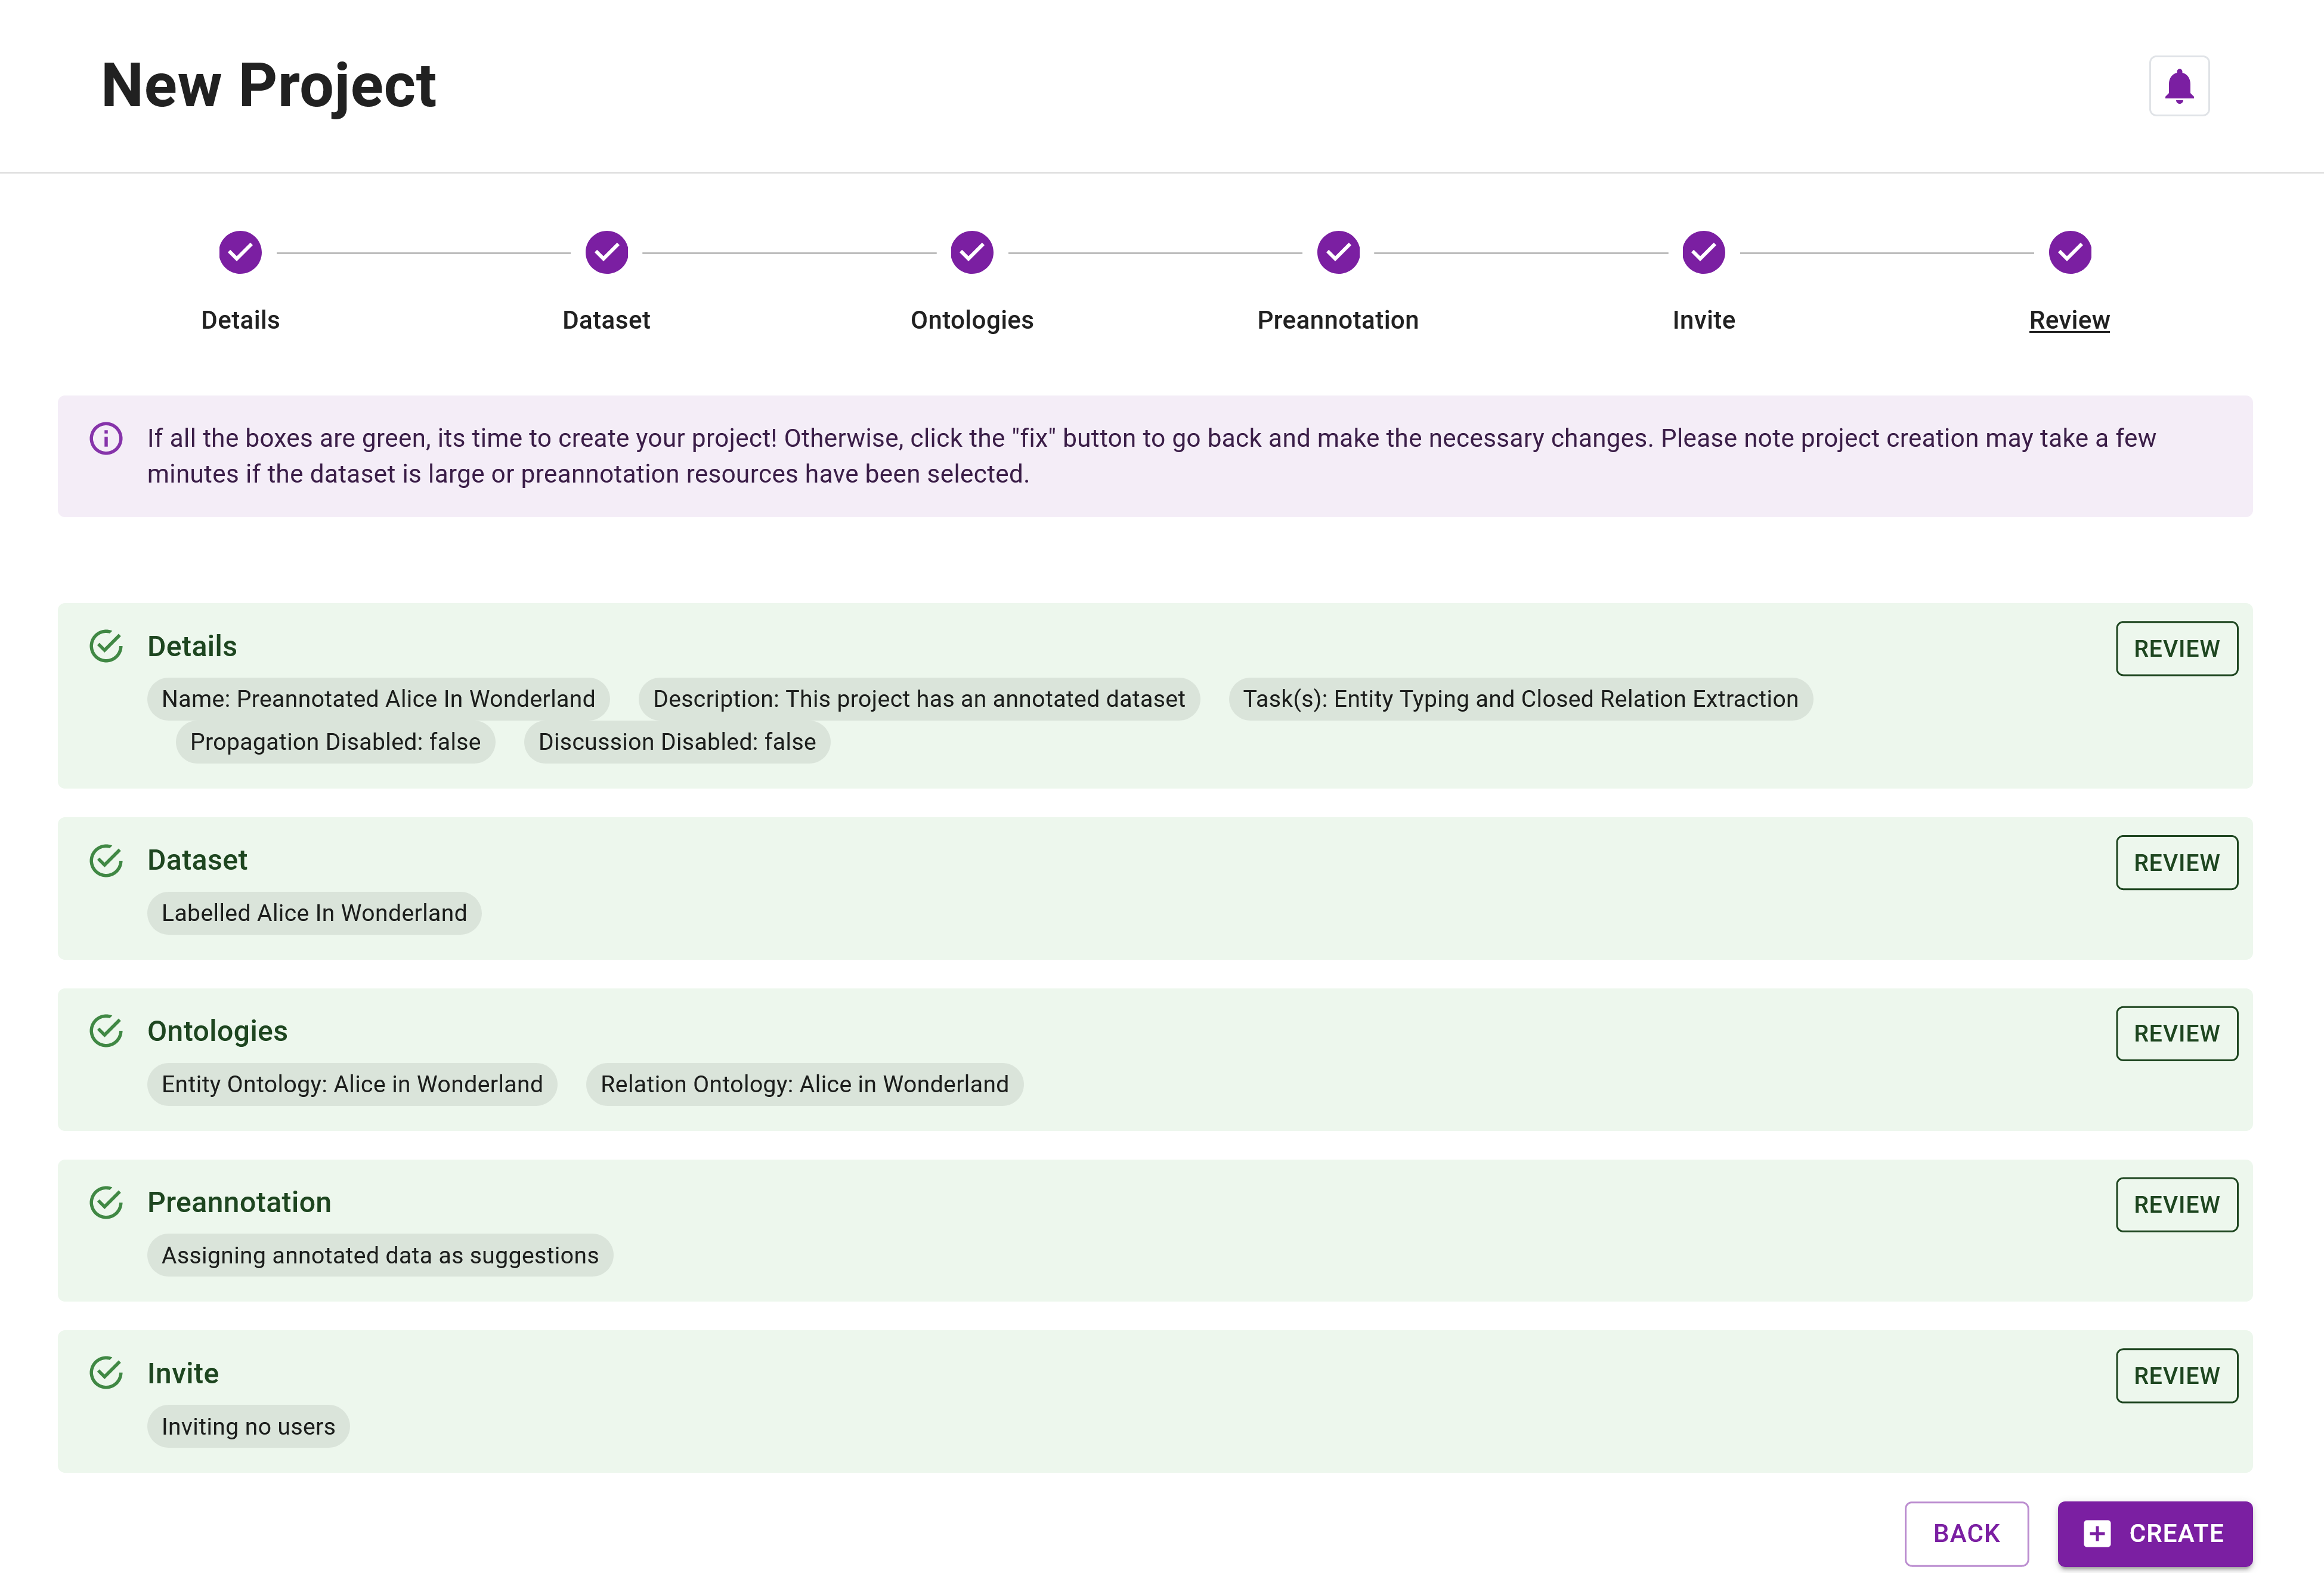
Project creation may take a few minutes for projects using large preannotated datasets. Please be patient during this process.
Project Annotation
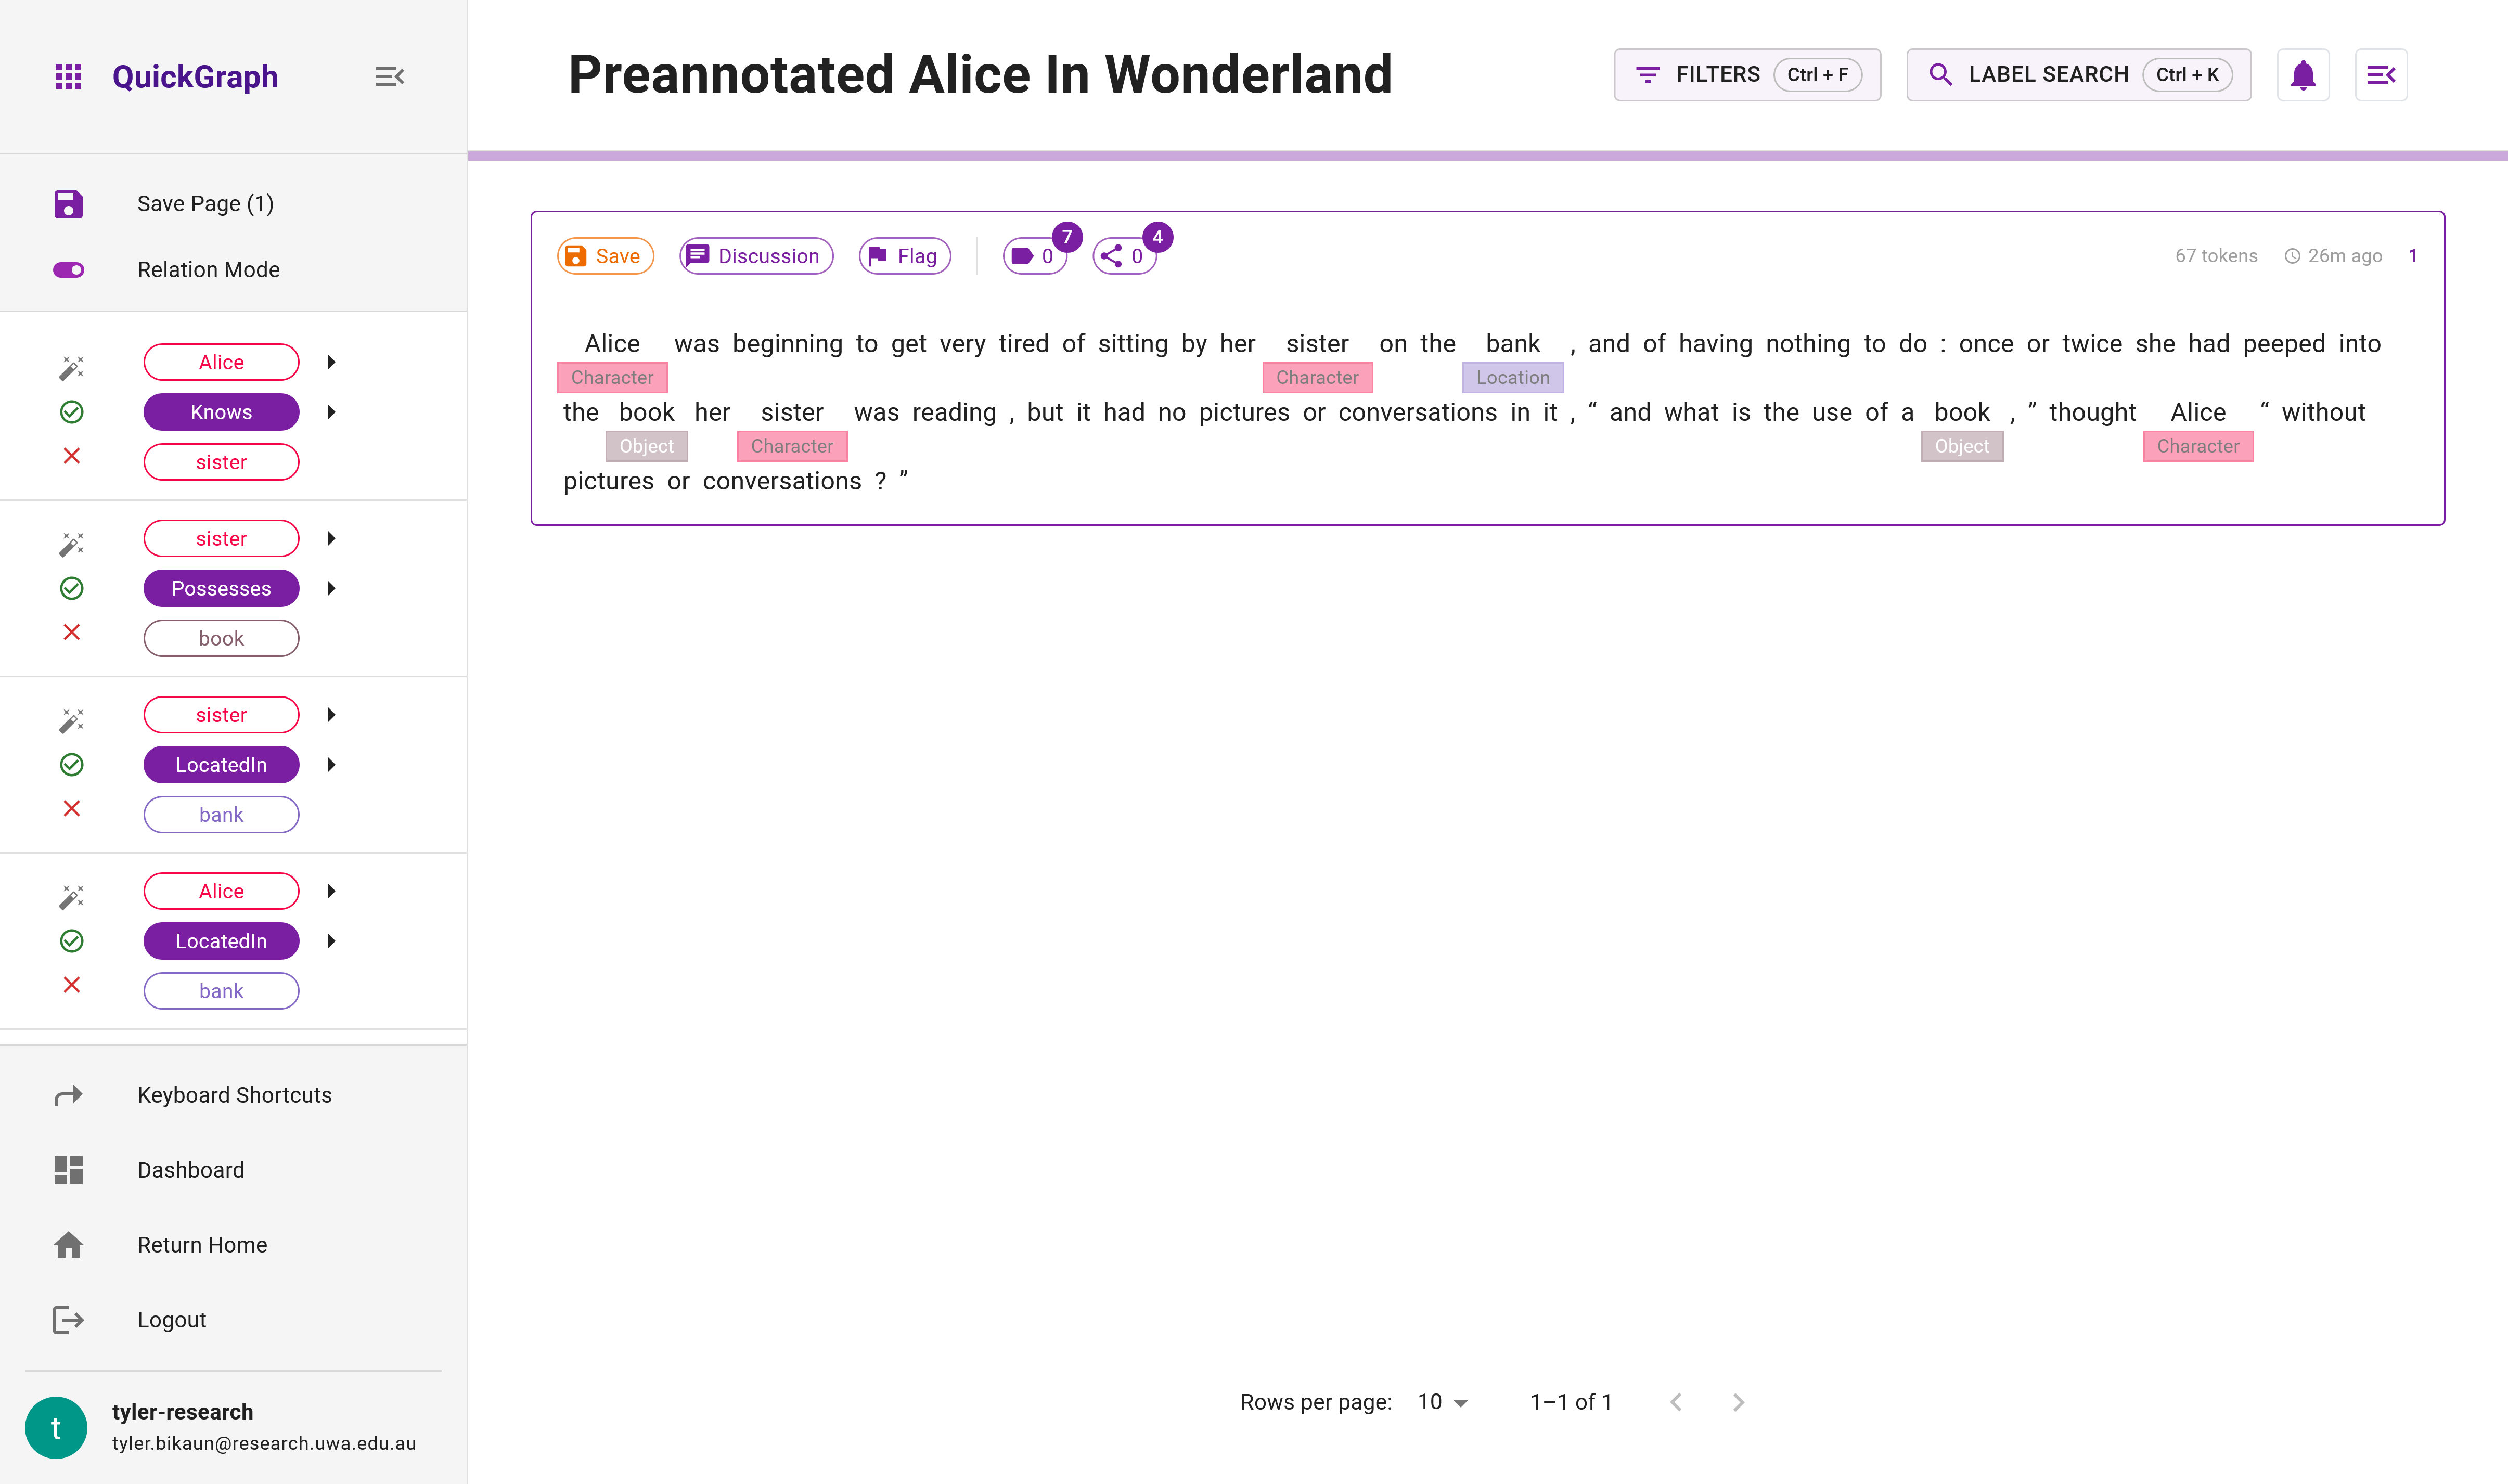
Step 21: Upon successful creation of your project, it's time to examine the Annotation View. You can access this by locating your project in the Project Explorer and clicking on the Annotate button. This will bring you to the interface depicted by Figure 12.
Switching to Relation Mode will reveal the complete array of preannotations we incorporated into the dataset. Initiating projects with preannotations is a highly effective method to expedite data collection by allowing for error corrections. It also minimises the steps needed to apply entity labels and relations.
Just like in standard projects, after inviting collaborators, you can assign them dataset items that are already preannotated. This facilitates a smoother and quicker start for them, further accelerating the data collection process.
Congratulations! 🎉 You've successfully created your first preannotated dataset and used it to establish a preannotated project. Now, you're ready to harness the power of preannotations for your future endeavors.