Introduction
Only project managers and ontology resource creators hold the necessary permissions to modify ontology resources.
This tutorial guides you through the process of altering the ontology resources within a project. This flexibility enables the evolution of your ontologies in alignment with your annotation process. The methods demonstrated here can be applied to both project and blueprint ontology resources.
For our example, we will modify the entity and relation ontologies of the "Alice In Wonderland" project, initially created in the Introduction Tutorial. If you haven't created the project yet, please do so before continuing. If the project is already set up, proceed to the project's dashboard.
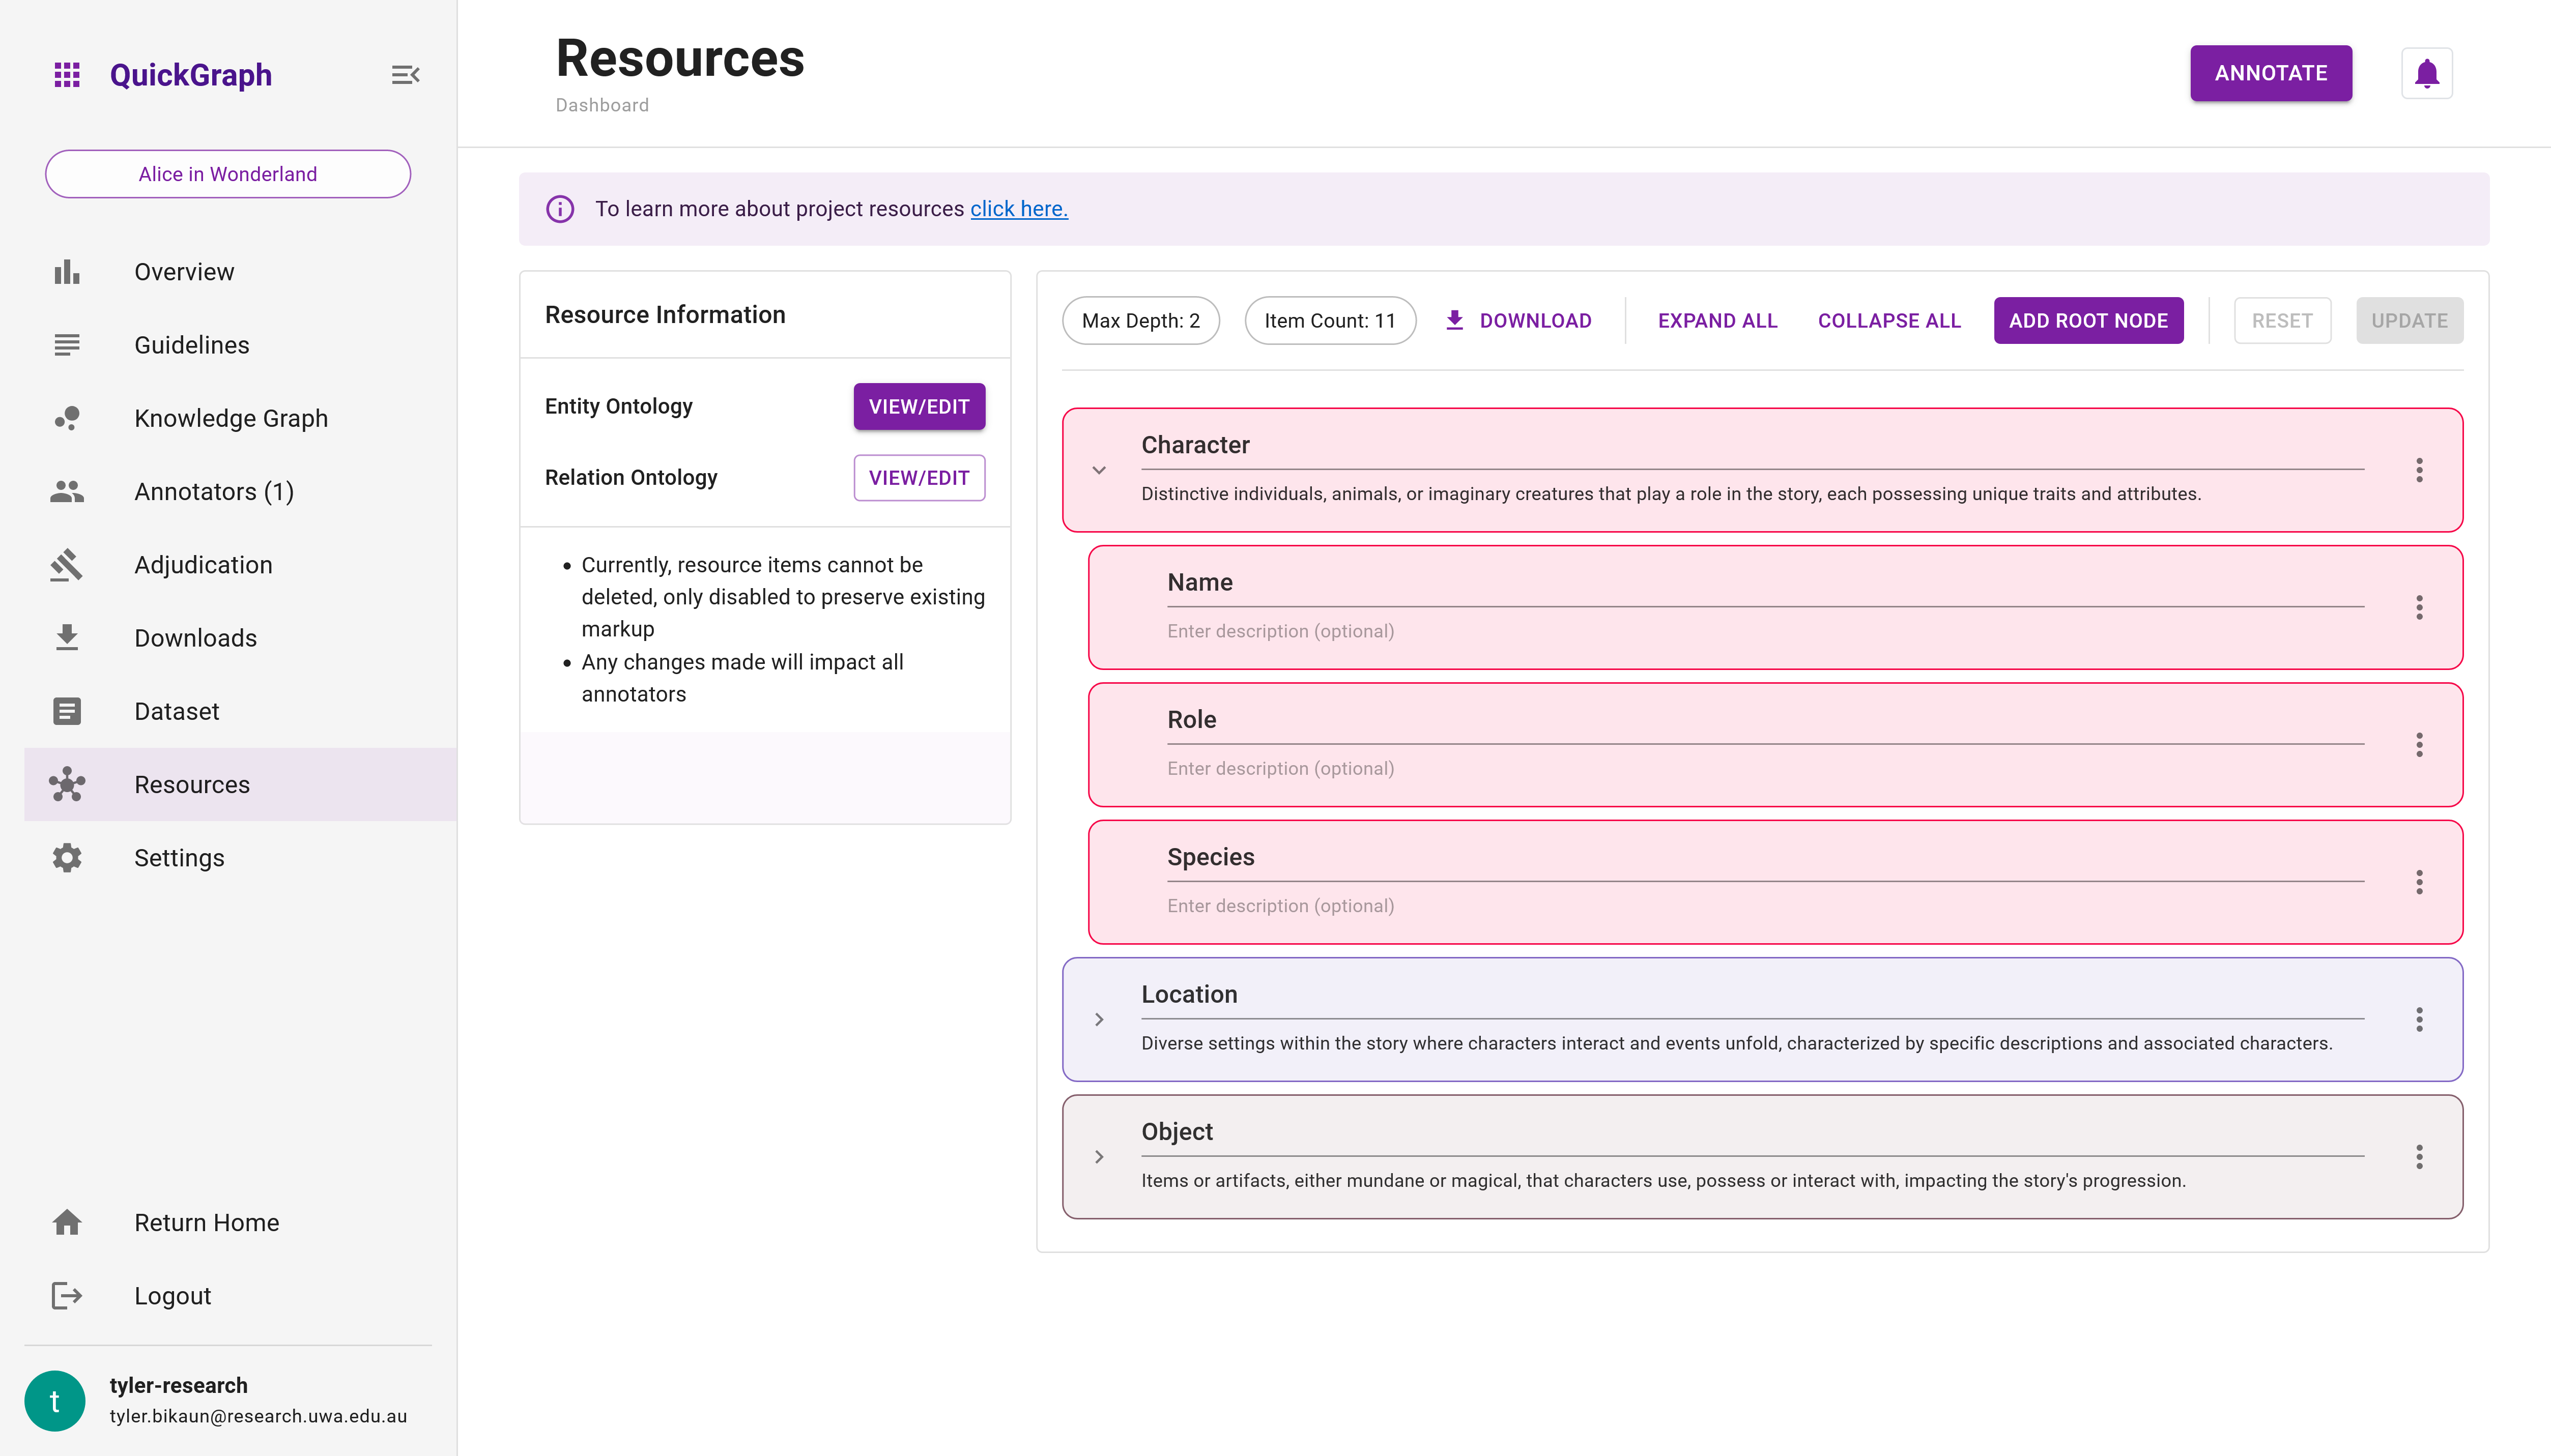
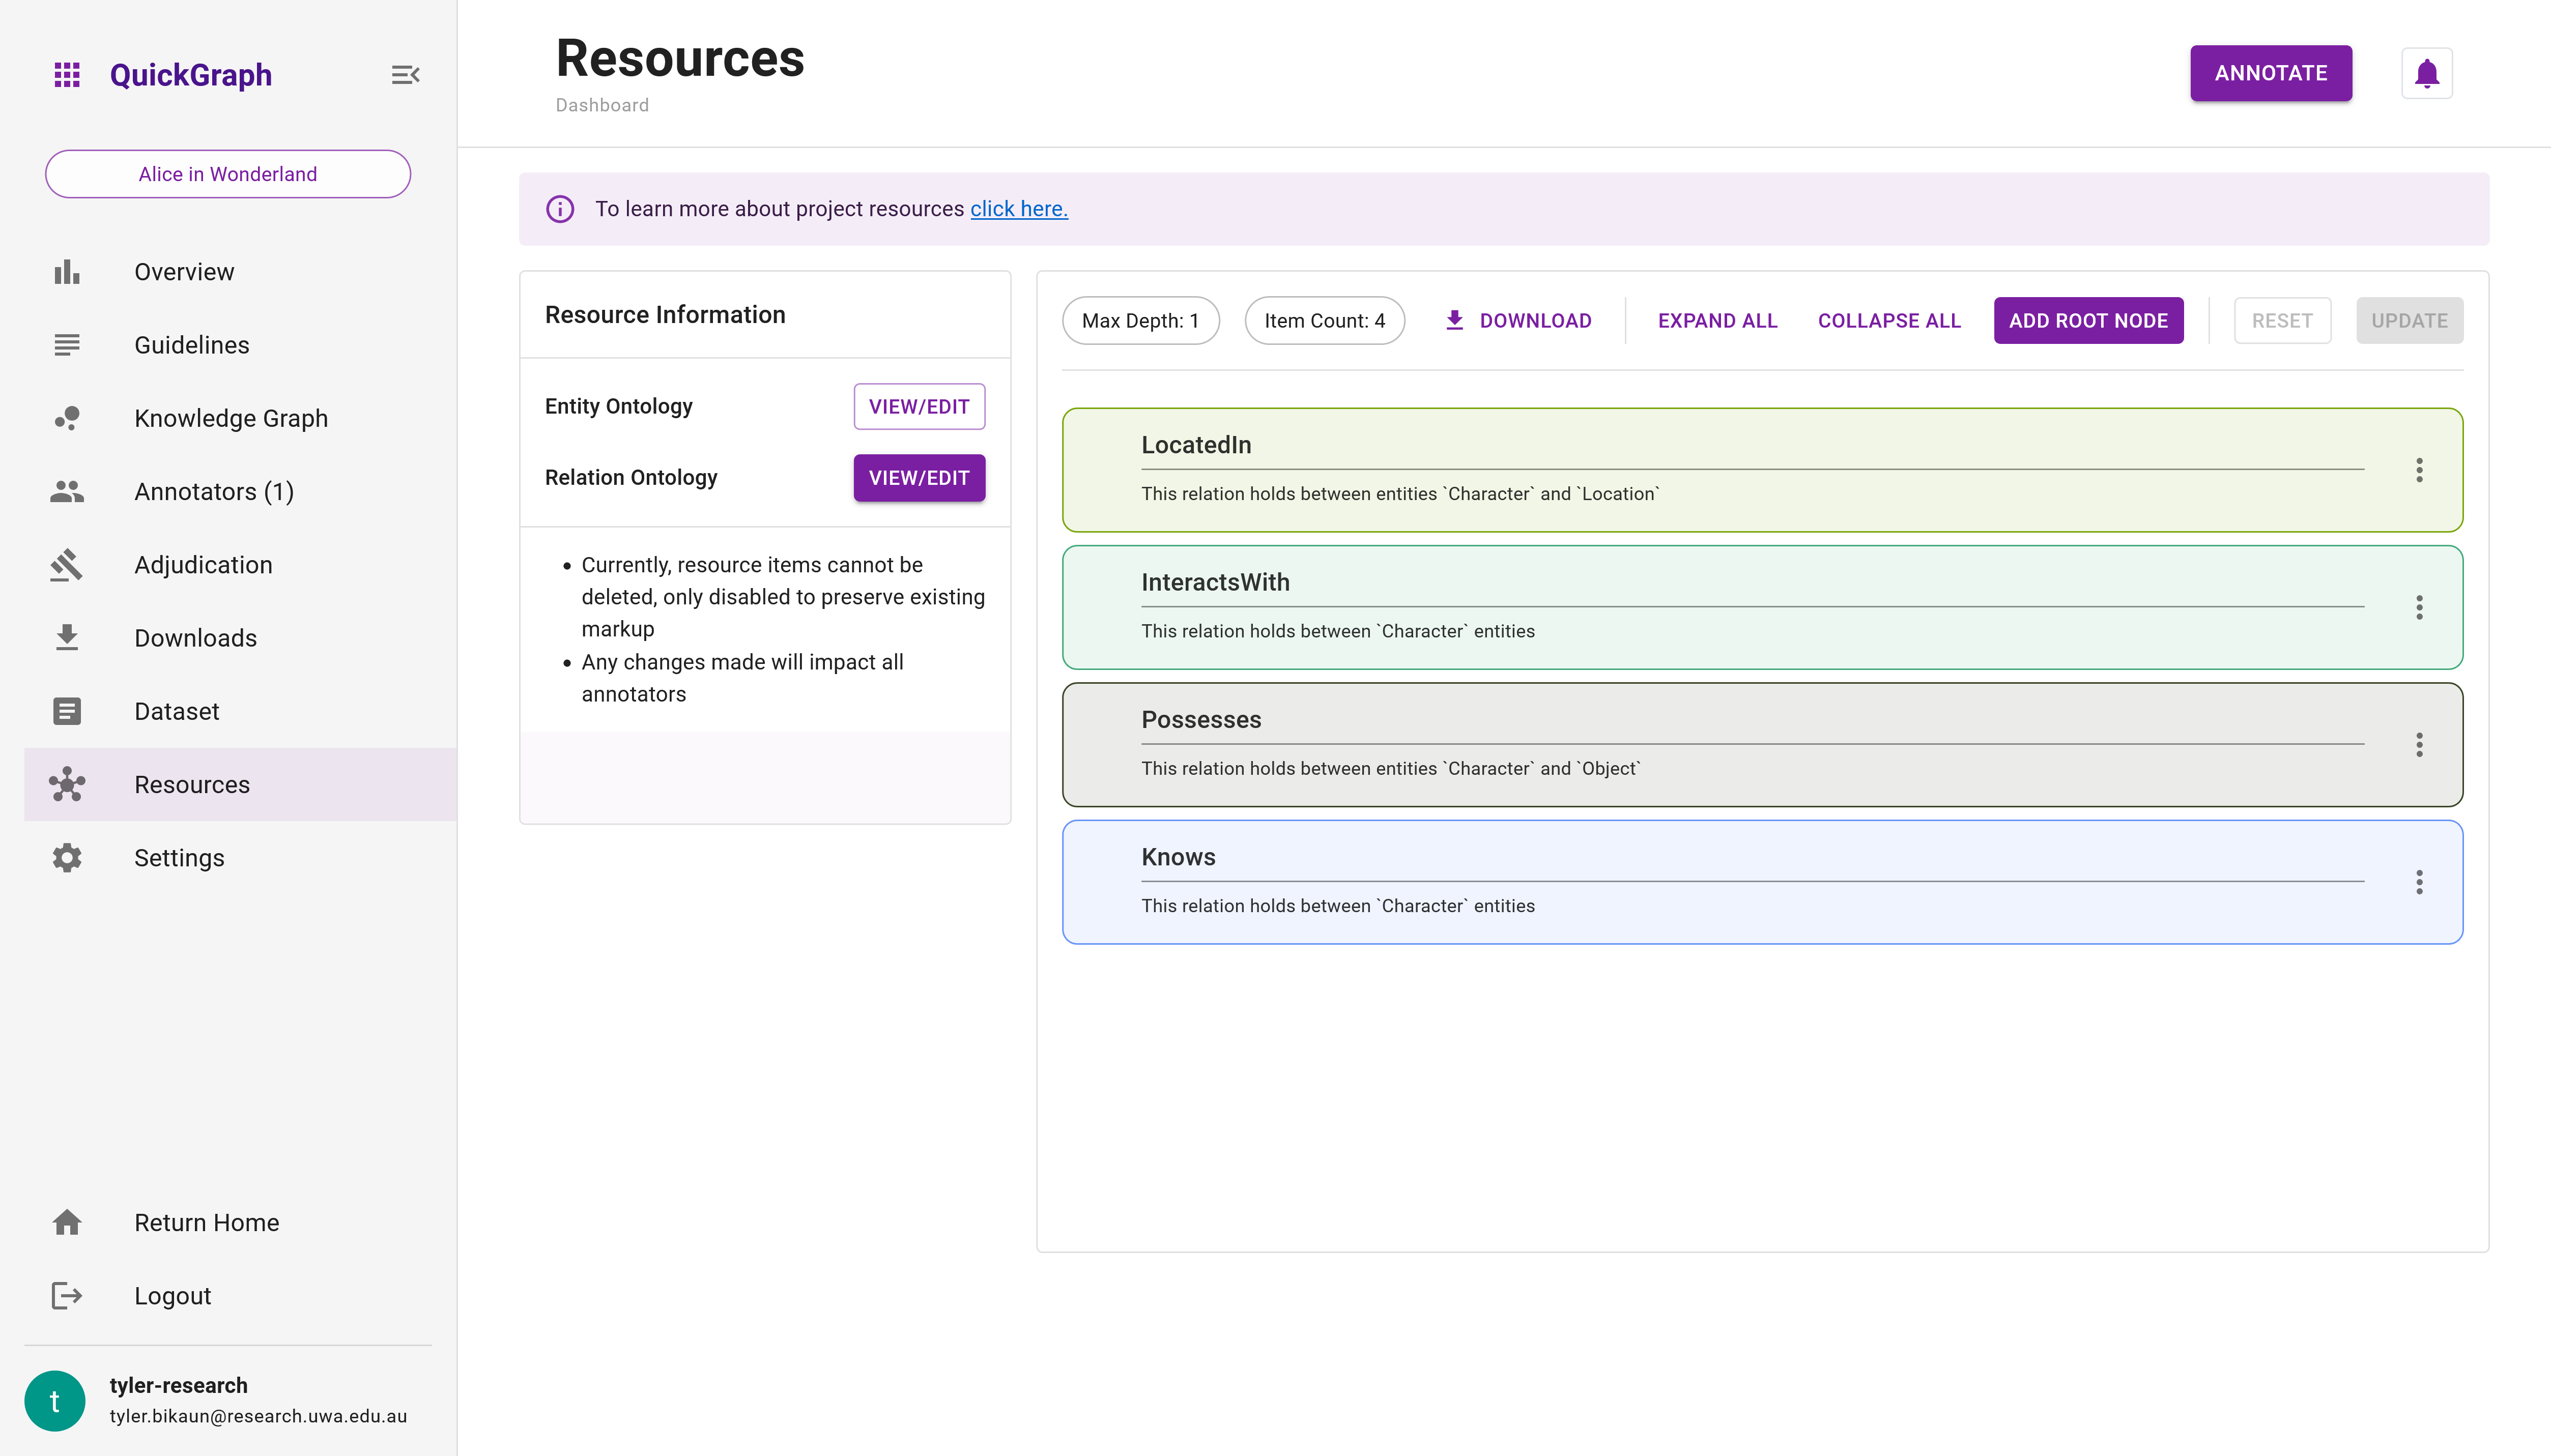
After reaching the dashboard, choose the Resources tab from the sidebar. As the "Alice In Wonderland" project involves entity and relation annotation, you will see two ontology resources for the project.
QuickGraph currently does not support rearranging or deleting items within the hierarchy. However, it does allow disabling items, as show in the steps below. We plan to include these features as part of our Planned Feature roadmap.
All updates to project resources will be visible by all project collaborators.
Updating the Entity Ontology
This section illustrates how to modify the Entity Ontology. You will learn how to change entity label colours, add new items, and disable existing ones.
Step 1: Proceed to the Resources tab of the "Alice In Wonderland" Project Dashboard (created in the Introduction Tutorial). Your screen should match Figure 1.
Step 2: Click on the View/Edit button next to the Entity Ontology.
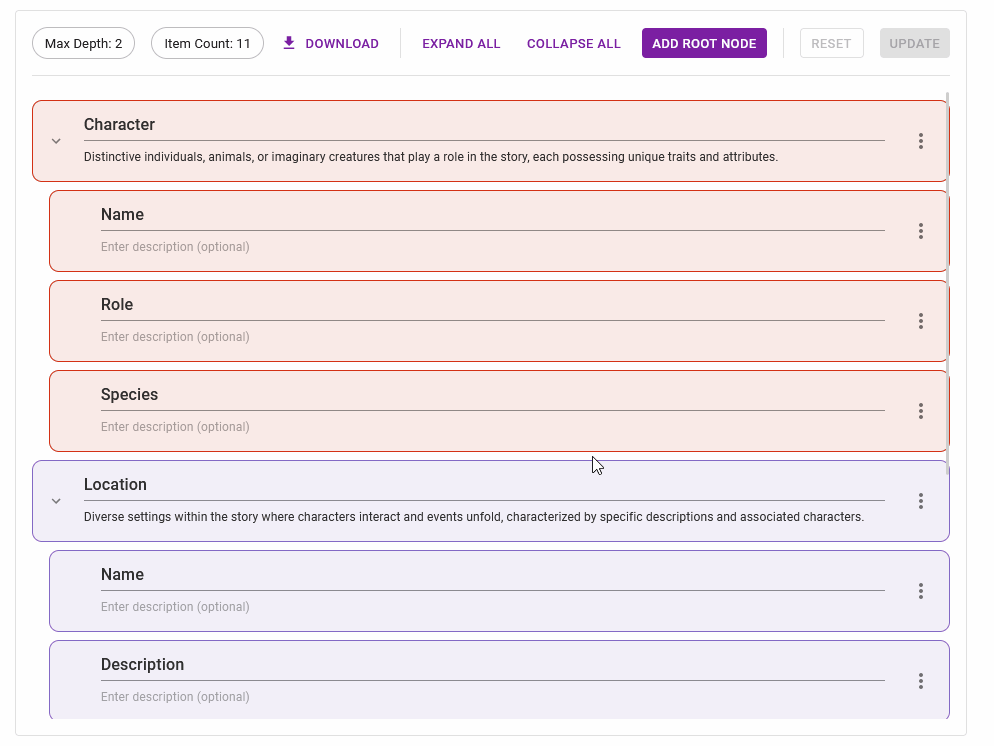
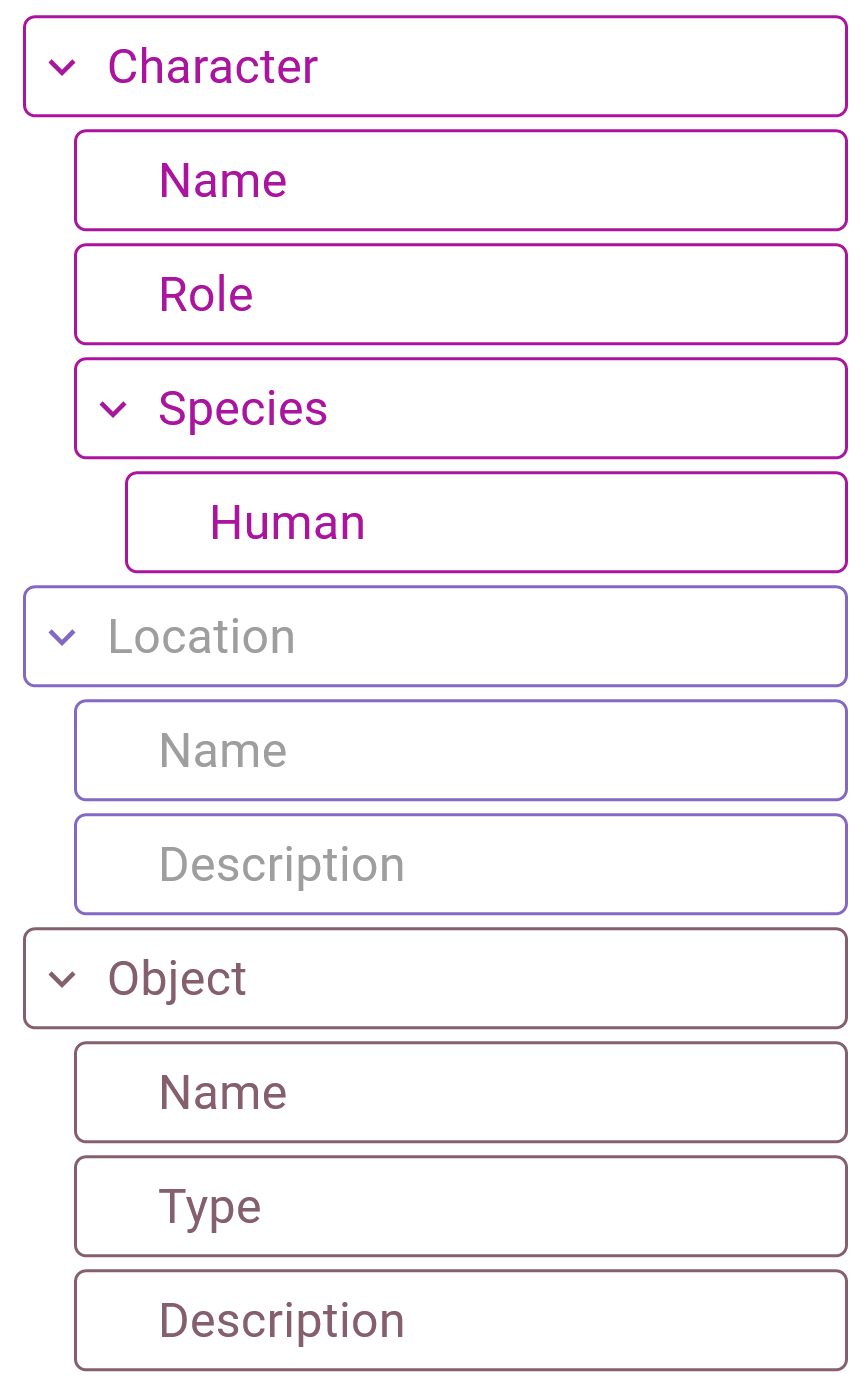
Refer to Figure 2 below as we alter the colour of the Character tree node, add a new sub-class called Human, and disable the Location branch.
Step 3: Expand the ontology resource by clicking the Expand All button.
Step 4: To modify the colour of the Character branch, selecct the menu icon beside the Character item. This opens a context menu. Click the Change colour option, which presents a colour picker. Choose the colour you prefer.
Step 5: To disable the Location branch, select the menu icon beside the Location item. Click the Enabled toggle switch (all items are enabled by default), this sets the item and all its descendants to disabled. Learn more here.
Step 6: To introduce a child class under Character/Species, click on the menu icon besides the Species item (you must have the tree expanded to view it). Select Add child which places a new child class below Species. Name the child Human or another name of your choosing. If you fail to provide a name, you won't be able to update the resouce as it would be deemed invalid.
Step 7: Click the Update button to store the changes.
With these steps, we have successfully updated our Enity Ontology!
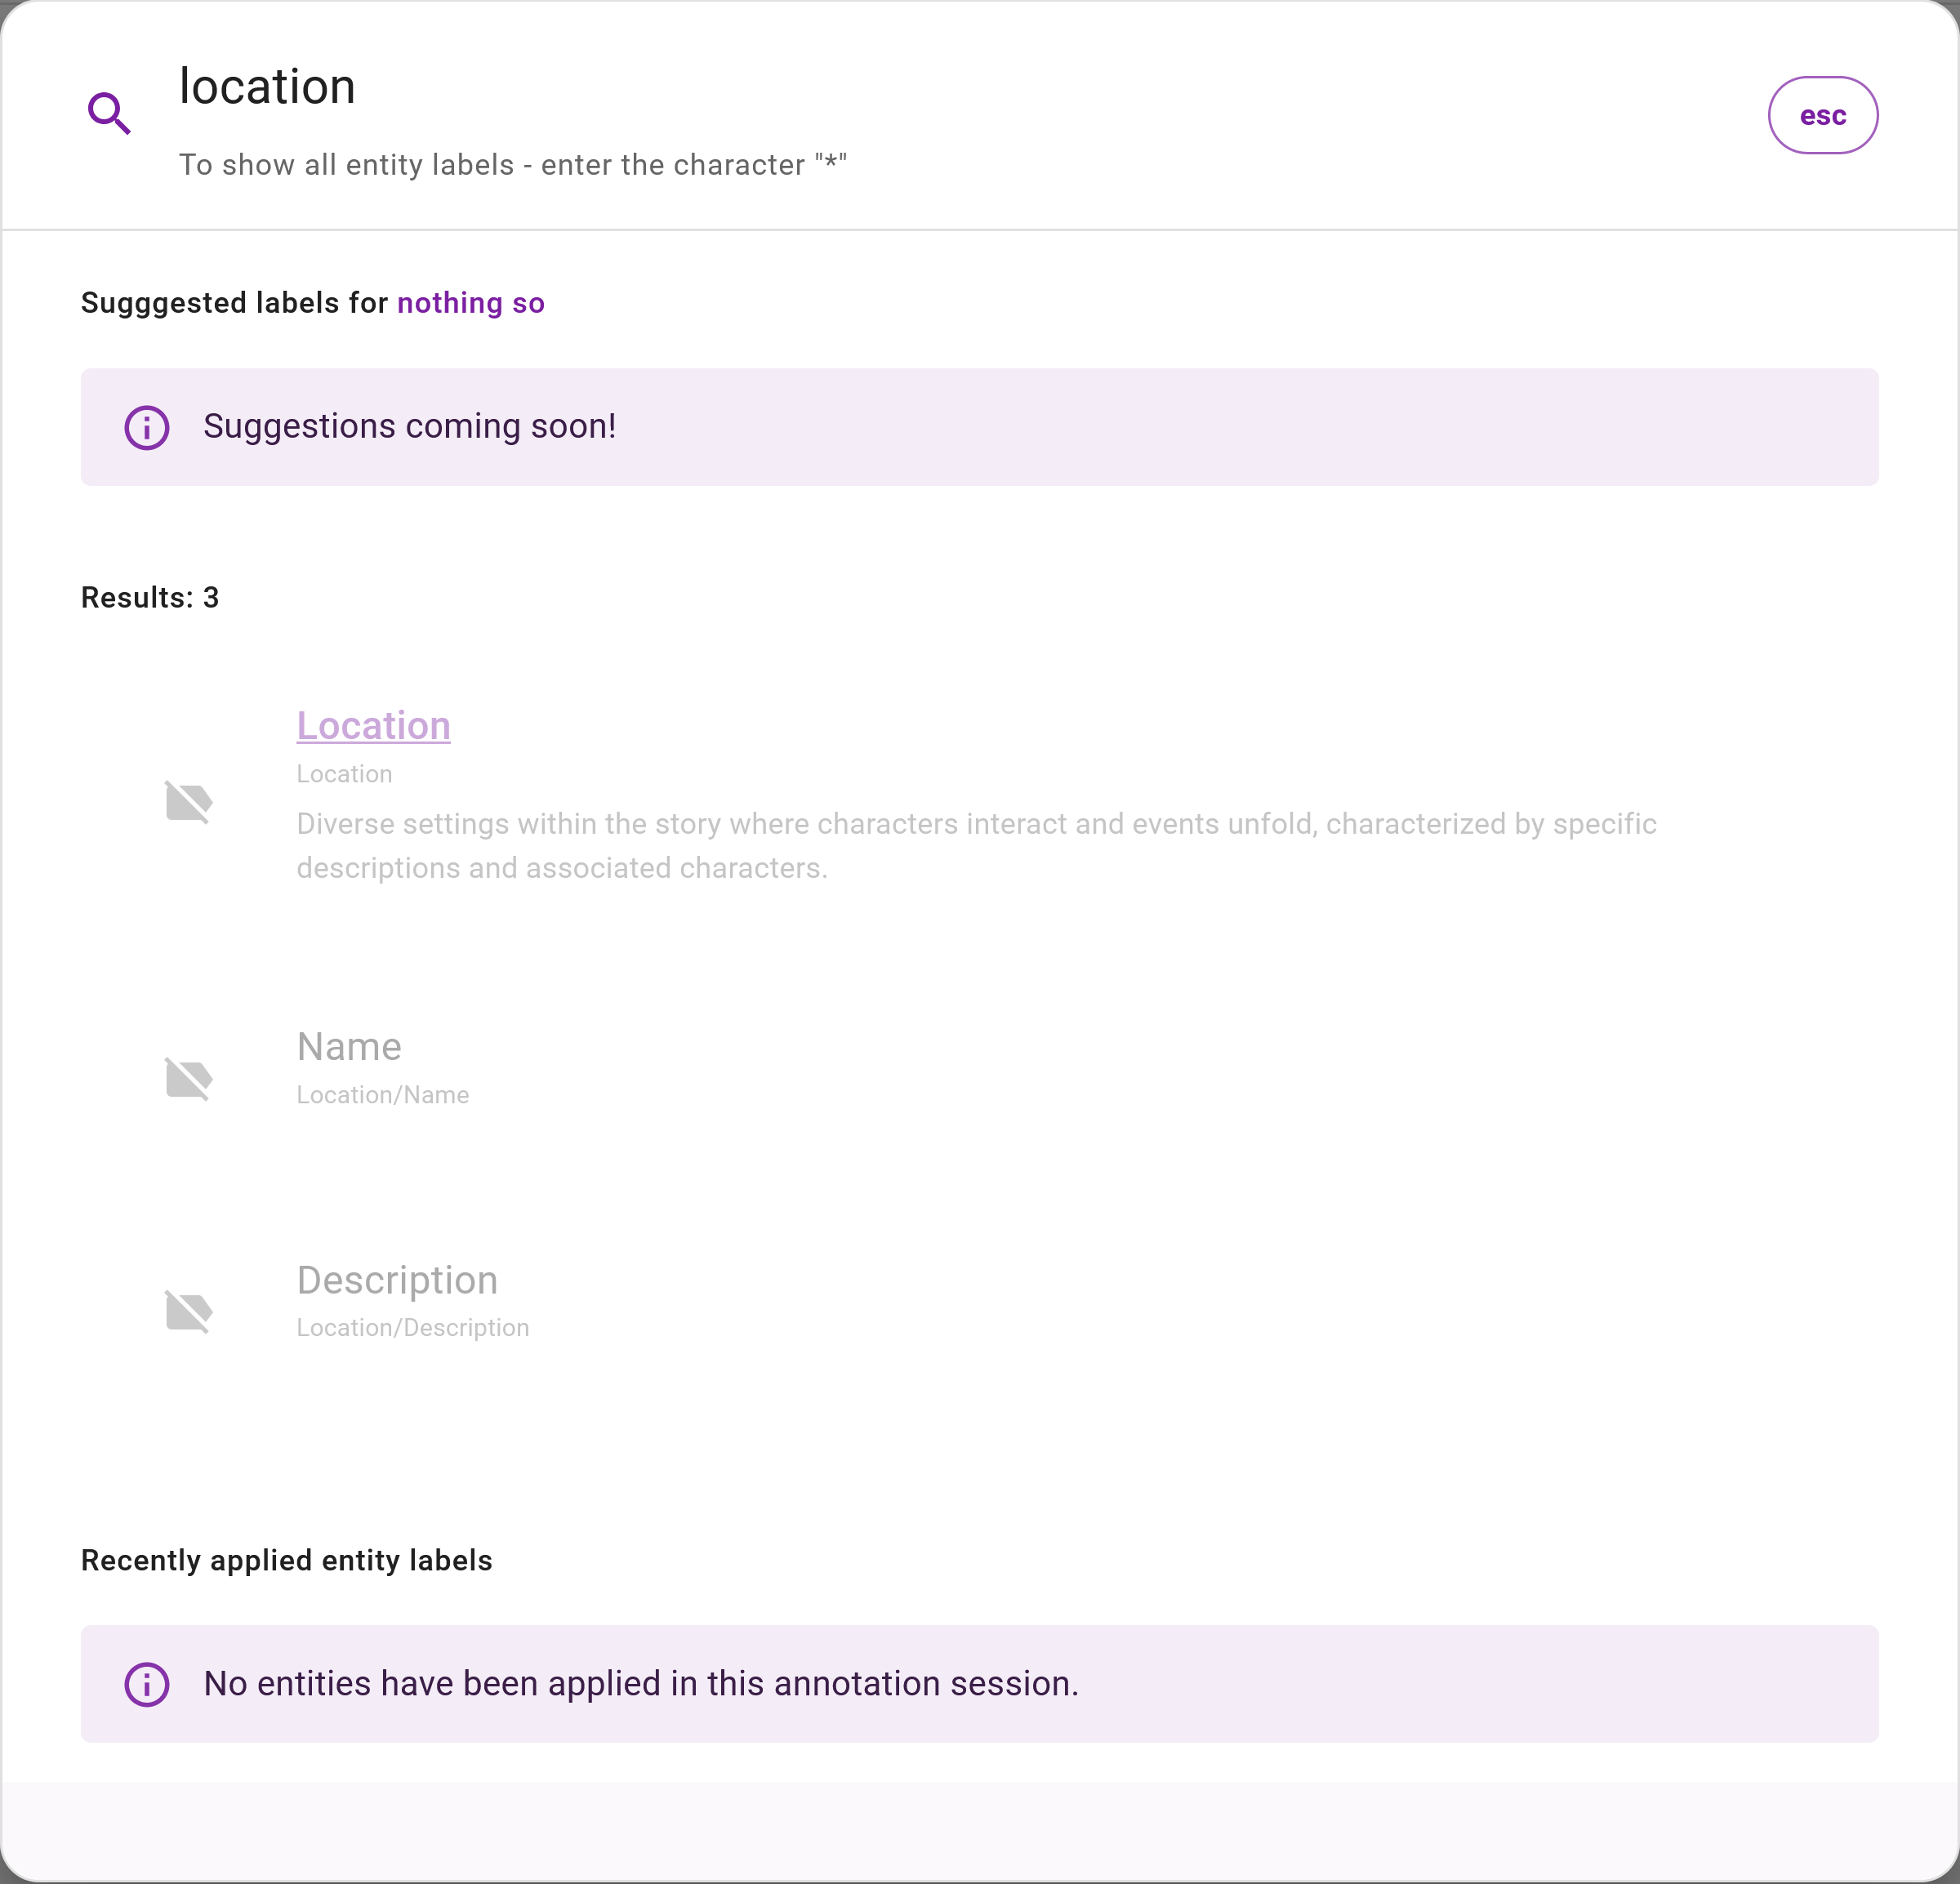
If you navigate to the "Alice In Wonderland" project's Annotation View and observe the Entity Hierarchy, you'll see the changes made (Figure 3). The new child Human is now present, and the Location segement of the tree has been disabled. Similarly, open the Label Search and search for Location. You'll notice that it, along with its descendants, have been disabled (Figure 4).
Step 8: Navigate to the "Alice In Wonderland" project's Annotation View.
Step 9: Expand the Entity Hierarchy.
Step 10: Open the Label Search and search for Location.
Please note, labels associated with the disabled entities will remain applied from previous annotations, however, new ones cannot be applied.
Updating the Relation Ontology
Just as we modified the Entity Ontology in the previous section, we will similarly update the Resource Ontology. This segment will guide you in adding new top-level root nodes and reiterate previous steps about changing relation label colours, introducing new child classes, and disabling certain nodes.
Before proceeding, make sure you are in the Resource tab of the "Alice In Wonderland" Project Dashboard (established in the Introduction Tutorial). Your screen should refkect Figure 5.
Step 11: Navigate to the Resources tab.
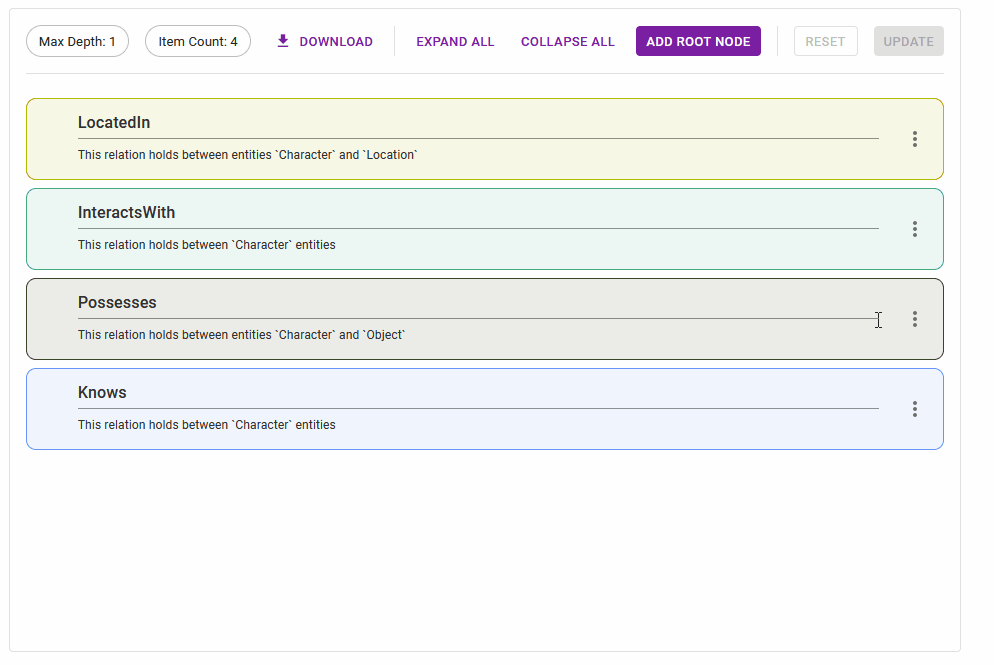
Step 12: Click on the Relation Ontology View/Edit button to expose the project's relation ontology.
Referring to Figure 6, we will implement a new sub-class named PossessesCurreny, modify the colour of the LocatedIn node, disable the InteractsWith node, and introduce a new root node called hasFriend.
Step 13: To add a child class under Possesses, click on the menu item next to it. Click Add child from the context menu to insert a new child class beneath Possesses. Name it PossessesCurrency or any name you prefer. If no name is provided, QuickGraph will not allow you to update due to invalidity.
Step 14: To change the colour of the LocatedIn item, click on the menu item besides it. Choose Change colour from the context menu to display the colour picker. Select your preferred colour.
Step 15: To disable the InteractsWith node, click on the menu item besides it. Click the Enabled toggle switch (all items are enabled by default), this sets the item to disabled. Learn more here.
Step 16: To introduce a top-level root node, click the Add Root Node button. This will append a new node at the tree's bottom. For large trees, you might need to scroll down to view the new node. Name the root node hasFriend or any name you prefer. Like child nodes, root nodes must be named; otherwise, QuickGraph will not allow you to update due to invalidity.
Step 17: Click the Update button to save the changes.
Congratulations on successfully modifying the relation ontology!
Please note, labels associated with the disabled relations will remain applied from previous annotations, however, new ones cannot be applied.
Upon navigating to the "Alice In Wonderland" project's Annotation View and attempting to apply a new relation, you will observe the changes we made reflected in the Relation Context Menu (see Figure 7). The newly added child PossessesCurrency is now visible, the root node hasFriend is listed, and the InteractsWith node is no longer available as it's been disabled (enabling it will make it reappear).
Step 18: Navigate to the "Alice In Wonderland" project's Annotation View.
Step 19: Toggle the annotation mode to Relation Mode.
Step 20: Click on any source and target entities to observe the updated relation context menu.
