Creating your first project
👋 Welcome to the QuickGraph tutorial! In this section of the tutorial we will sign up and create an account, or log in if we already have one, and step through the process of creating our first entity and relation annotation project to create a knowledge graph from the book Alice's Adventures in Wonderland by Lewis Carroll. Let's begin!
Logging in
Before we can create our first project, we need to either sign up or log in.
Step 1: Navigate to QuickGraph's landing page and click on either Get Started or Log In and then click on Enter after you've authenticated. This will take you to your personalised home page.
If you do not have an account, please ensure that you have reviewed QuickGraph's Privacy Policy and Terms and Conditions before creating one.
Creating your first project
Once you log in, you'll land on your personalised home page. If it's your first time logging in, you'll notice that there are no existing projects or activity. Before we can create our first project, we need to create two ontology resources to represent the entities and relations we wish to tag our dataset with. Follow the steps below to create the entity ontology, relation ontology, and dataset. After these have been created, we'll use them to create our first project!
It is often best to create ontology resources prior to datasets as creating preannotated datasets require you to select existing ontology resources. However, if you do not plan to upload a preannotated dataset, you can create datasets and resources in any order.
Creating an entity ontology resource
There are many ways to navigate to the Resource Creator:
- Click on the
Resourceslink in the sidebar and click onCreate New Resource. - Click on the
Resourcesdropdown in the sidebar and click onNew Resource.
Step 2: Navigate to the Resource Creator.
After navigating to the Resource Creator, we can create our first resource! The process for creating a resource in QuickGraph is straightforward - enter its details, supply the resource, review, and create!
To learn more about the various features and capabilities of QuickGraph ontology resources, including in-situ modification and other valuable functionalities, click here.
You should now be on the the Details step of the Resource Creator. Let's add some details.
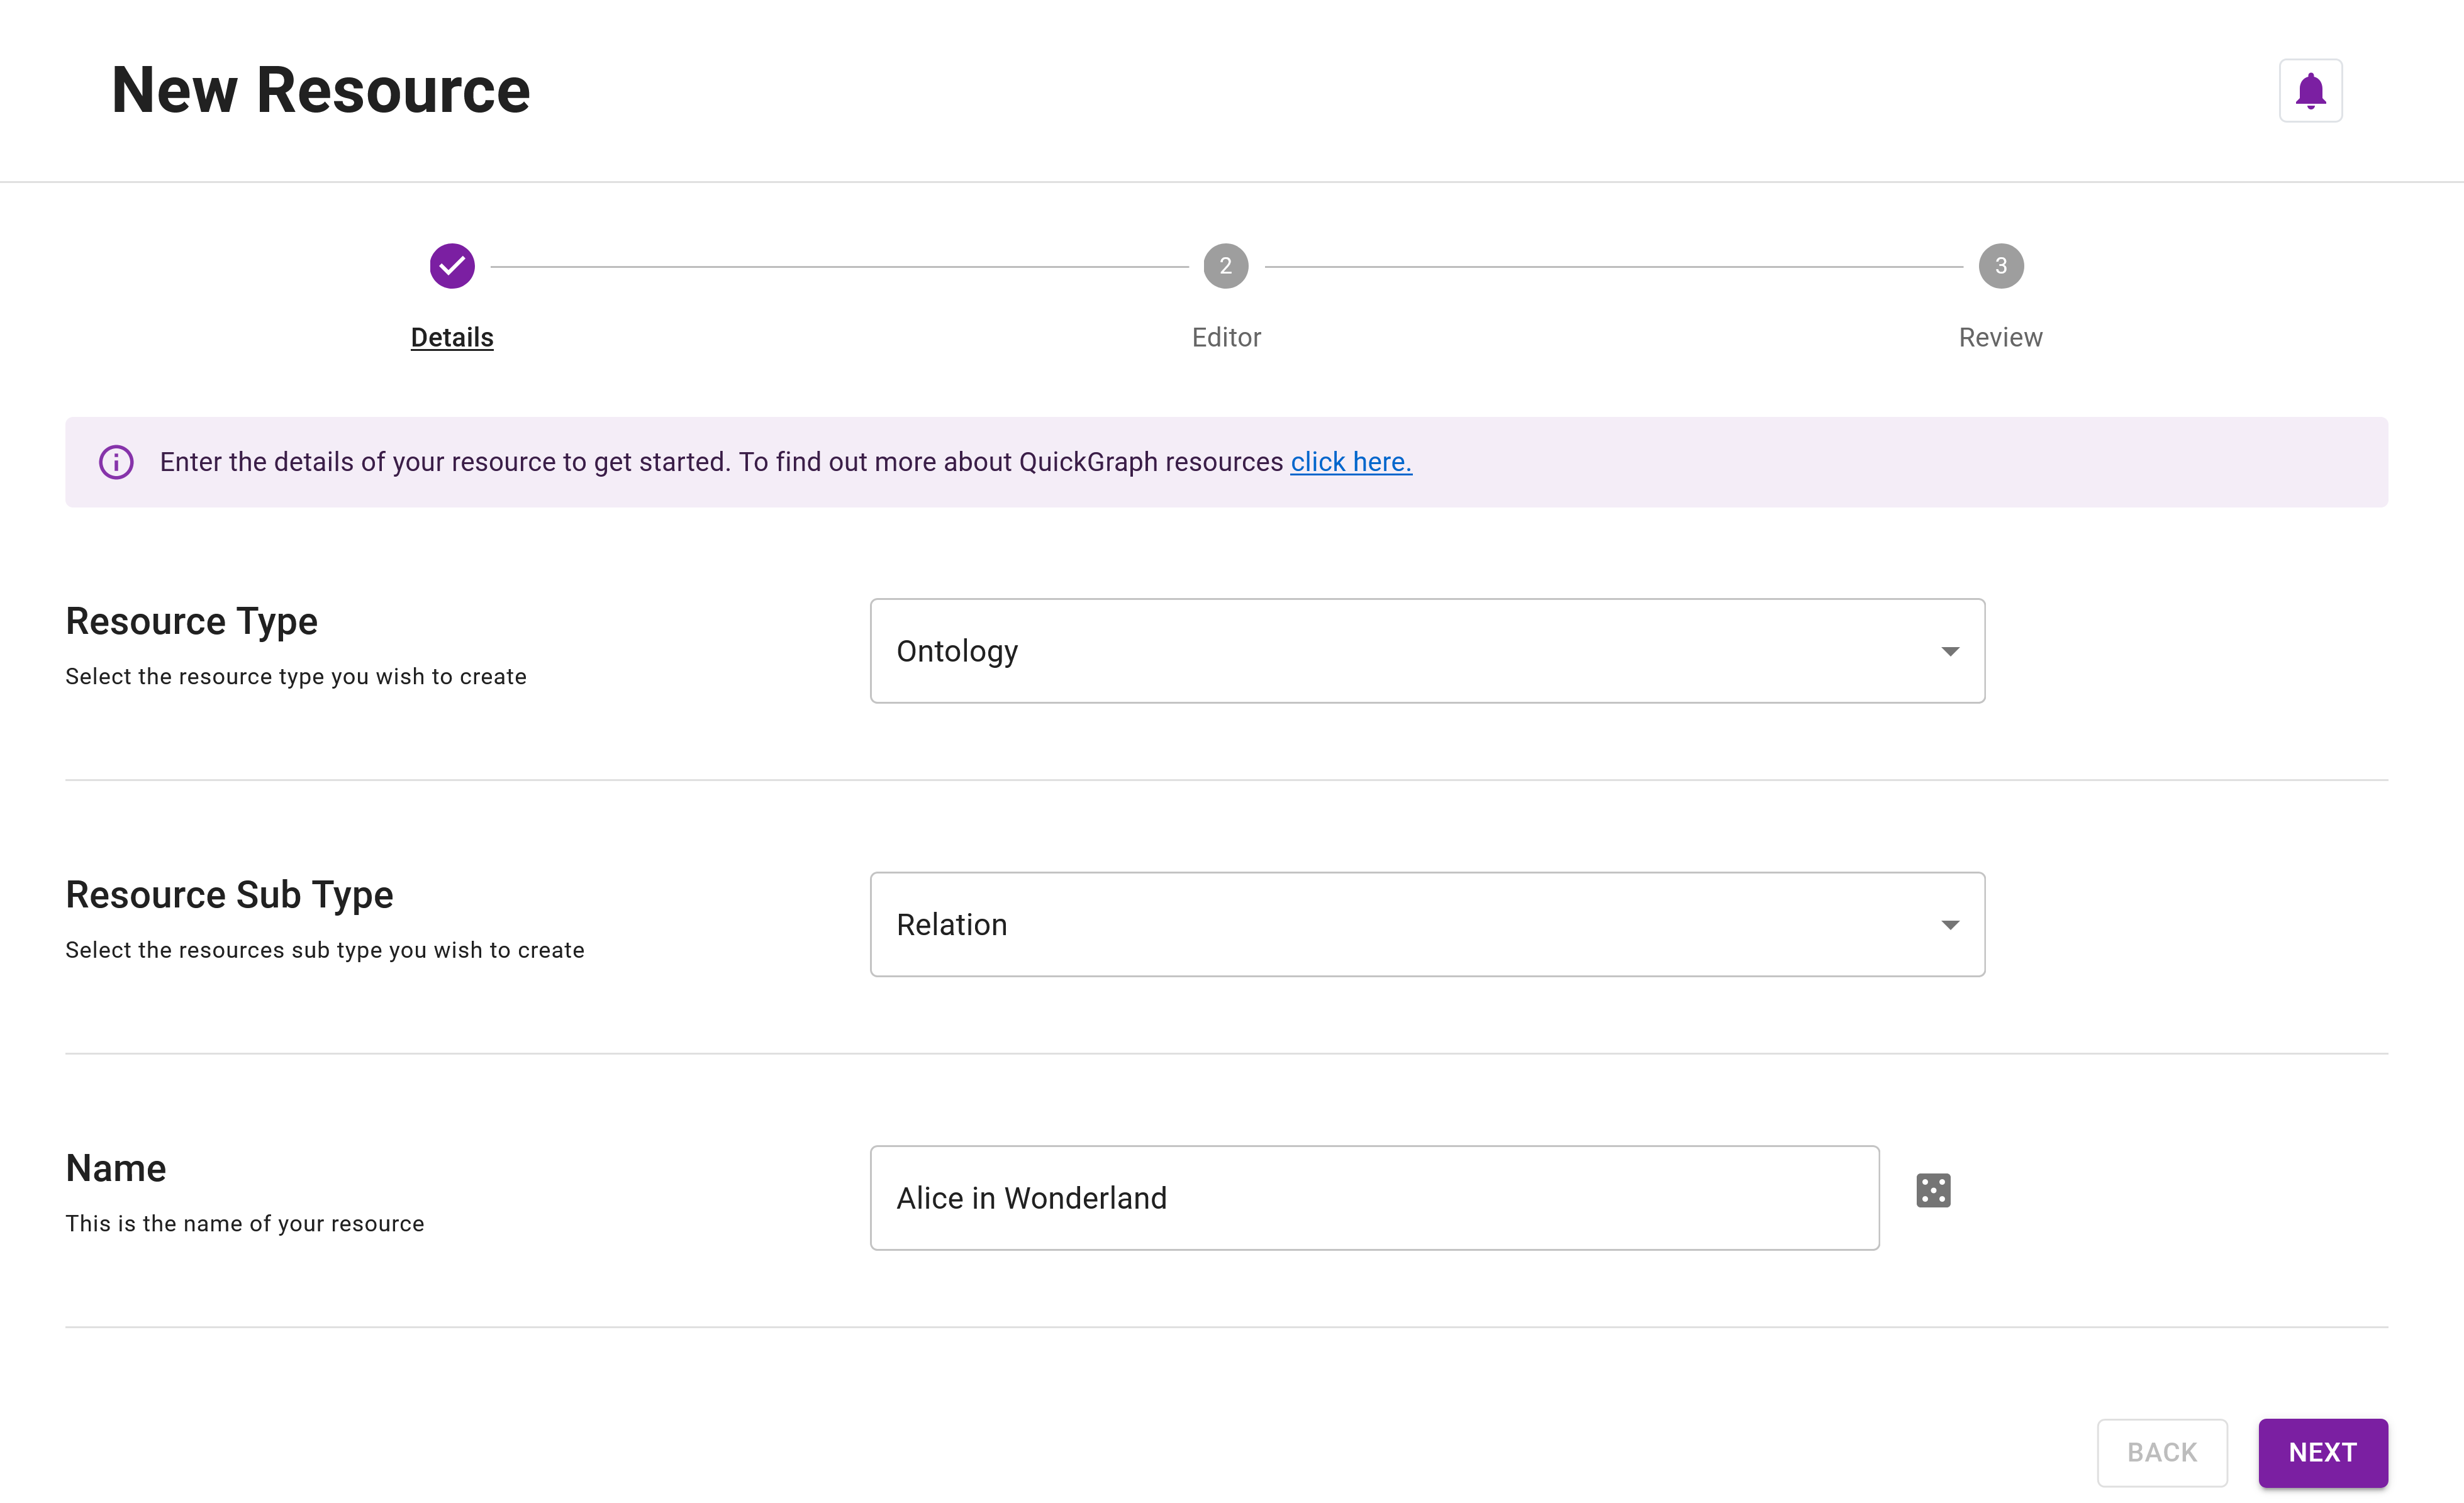
Step 3: Select the Resource Type Ontology.
Step 4: Select the Resource Sub Type Entity.
Step 5: Give your resouce a name, for example, Alice In Wonderland.
That's it for the details! Your screen should now resemble Figure 1.
Step 6: Click Next to navigate to the Resource Editor step.

You should now be on the Resource Editor step. The JSON data below represents our first entity ontology that captures simple lexical semantics that we expect in the book corpus we're going to annotate.
Step 7: Copy and paste the JSON data into the editor (see Figure 2).
[
  {
    "name": "Character",
    "description": "Distinctive individuals, animals, or imaginary creatures that play a role in the story, each possessing unique traits and attributes.",
    "children": [
      {
        "name": "Name",
        "children": []
      },
      {
        "name": "Role",
        "children": []
      },
      {
        "name": "Species",
        "children": []
      }
    ]
  },
  {
    "name": "Location",
    "description": "Diverse settings within the story where characters interact and events unfold, characterized by specific descriptions and associated characters.",
    "children": [
      {
        "name": "Name",
        "children": []
      },
      {
        "name": "Description",
        "children": []
      }
    ]
  },
  {
    "name": "Object",
    "description": "Items or artifacts, either mundane or magical, that characters use, possess or interact with, impacting the story's progression.",
    "children": [
      {
        "name": "Name",
        "children": []
      },
      {
        "name": "Type",
        "children": []
      },
      {
        "name": "Description",
        "children": []
      }
    ]
  }
]
At the most basic, QuickGraph only requires a tree structured data containing keys "name" and "children". However, there are additional optional fields that can be supplied that will enhance the annotation process, such as "description" which we've included here (refer to Concept - Resources for more details).
If there are any problems with the data you've entered, the editor will specify the location and type of the issue identified. See the Resource Editor - Validator for more details.

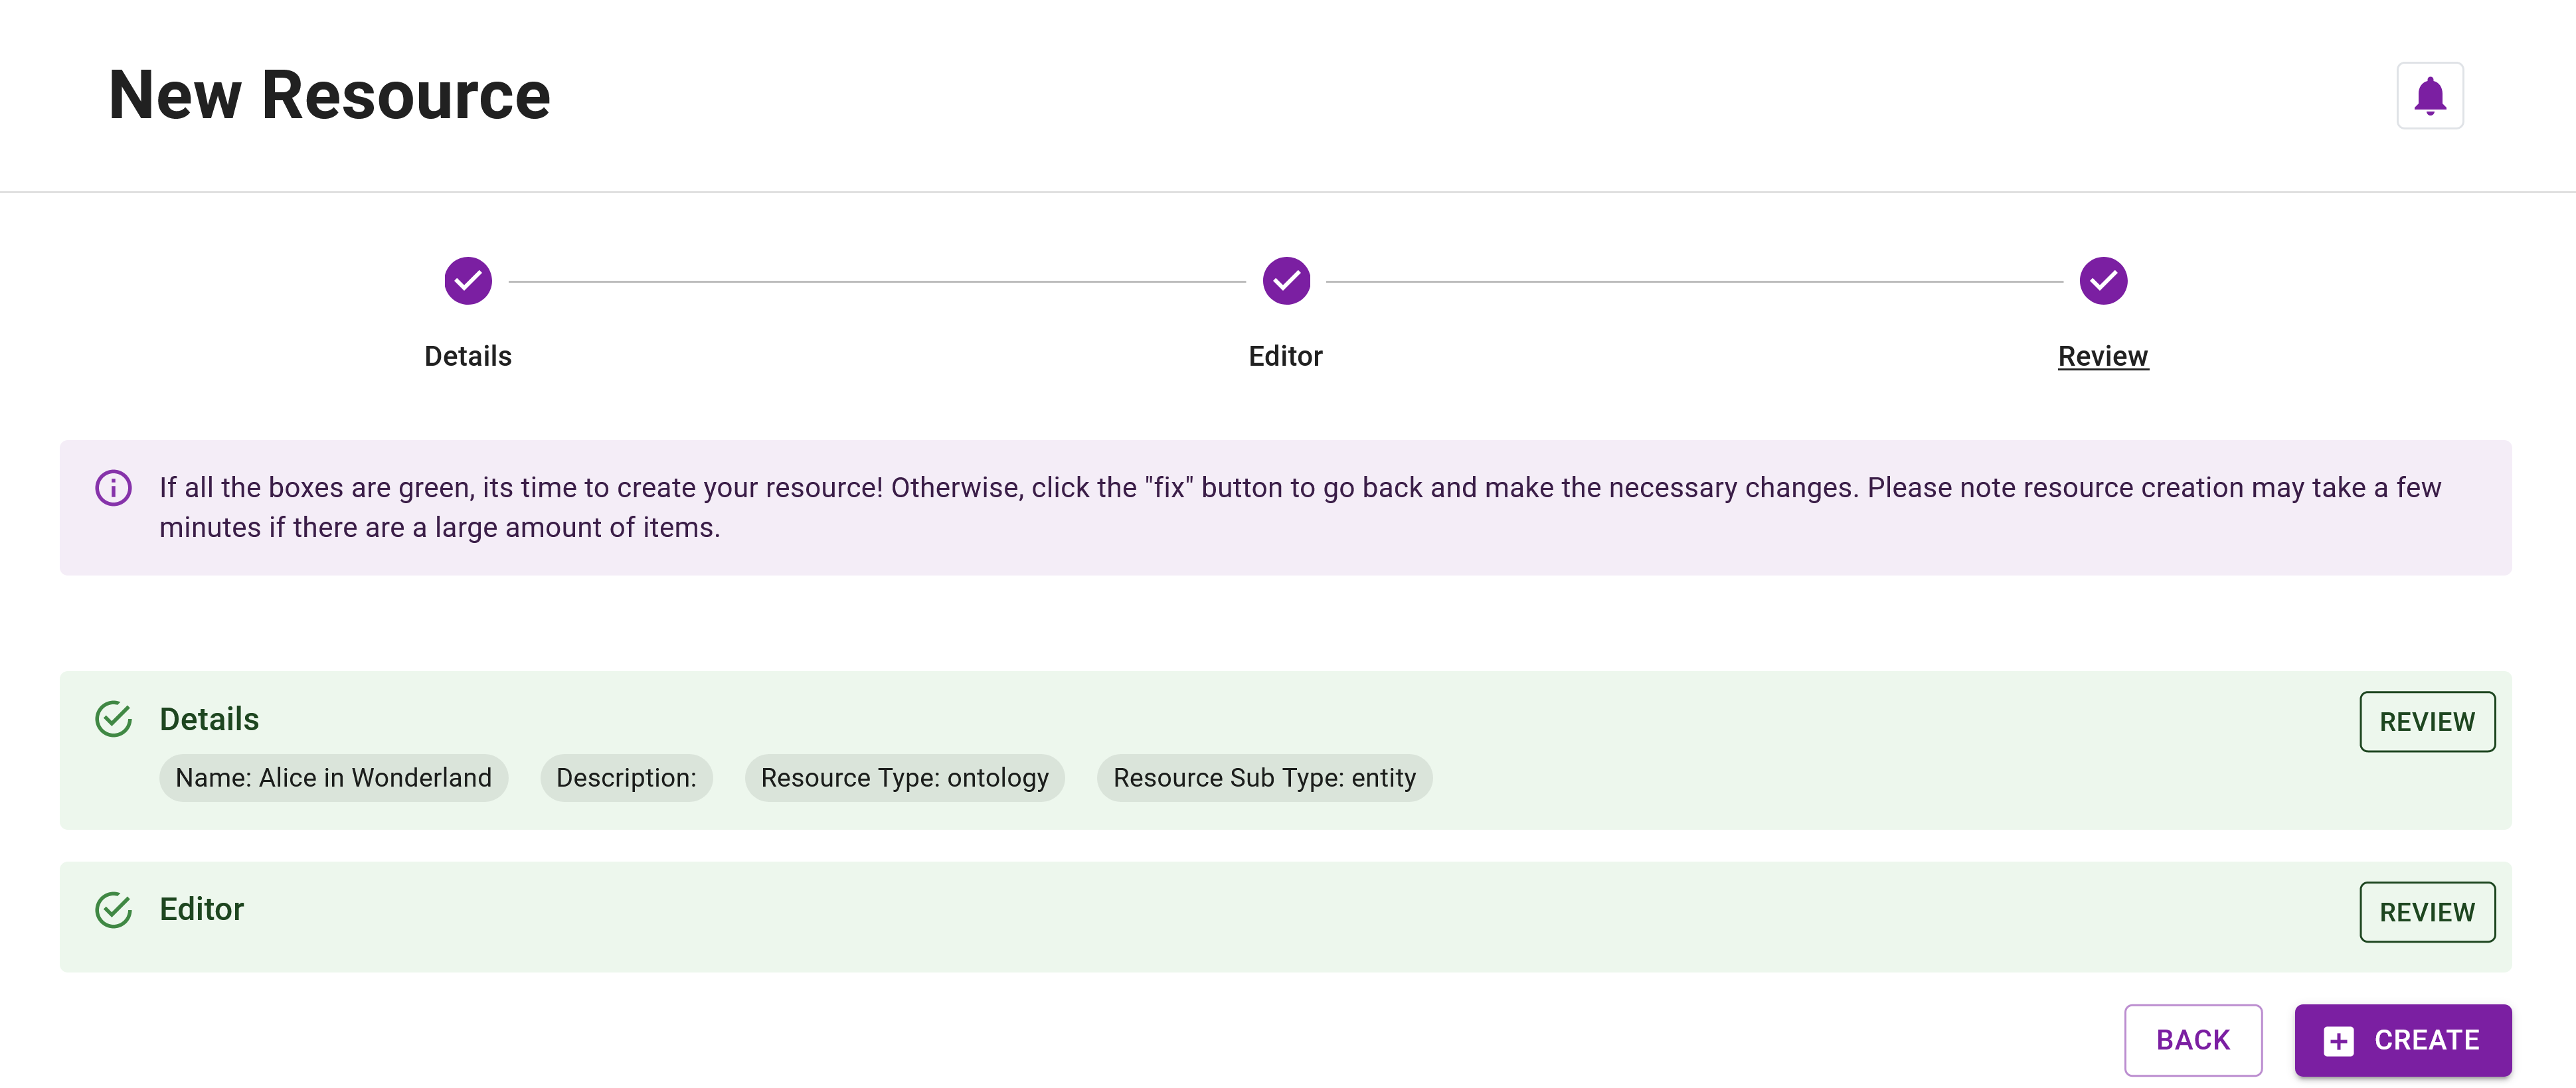
Step 8: Click Next to navigate to the Review step.
Step 9: If all the boxes are green, click Create to create the resource. Otherwise, click Fix to check if you have any errors or have missed any details. The Review step should resembly Figure 3.
After QuickGraph has created the resource, you'll be redirected to the Resources Explorer. To create the relation ontology resource, navigate back to the Resource Creator following the instructions at the start of this process.
Creating a relation ontology resource
Following the same steps as above for the entity resource, we'll create a hierarchical relation ontology resource. You should now be back at the Details step of the Resoure Creator.
Step 10: Select the Resource Type Ontology.
Step 11: Select the Resource Sub Type Relation.
Step 12: Give your resource a name, for example, Alice In Wonderland.
That's it for the details! Make sure it looks like Figure 4.
Step 13: Click Next to navigate to the resource Editor.
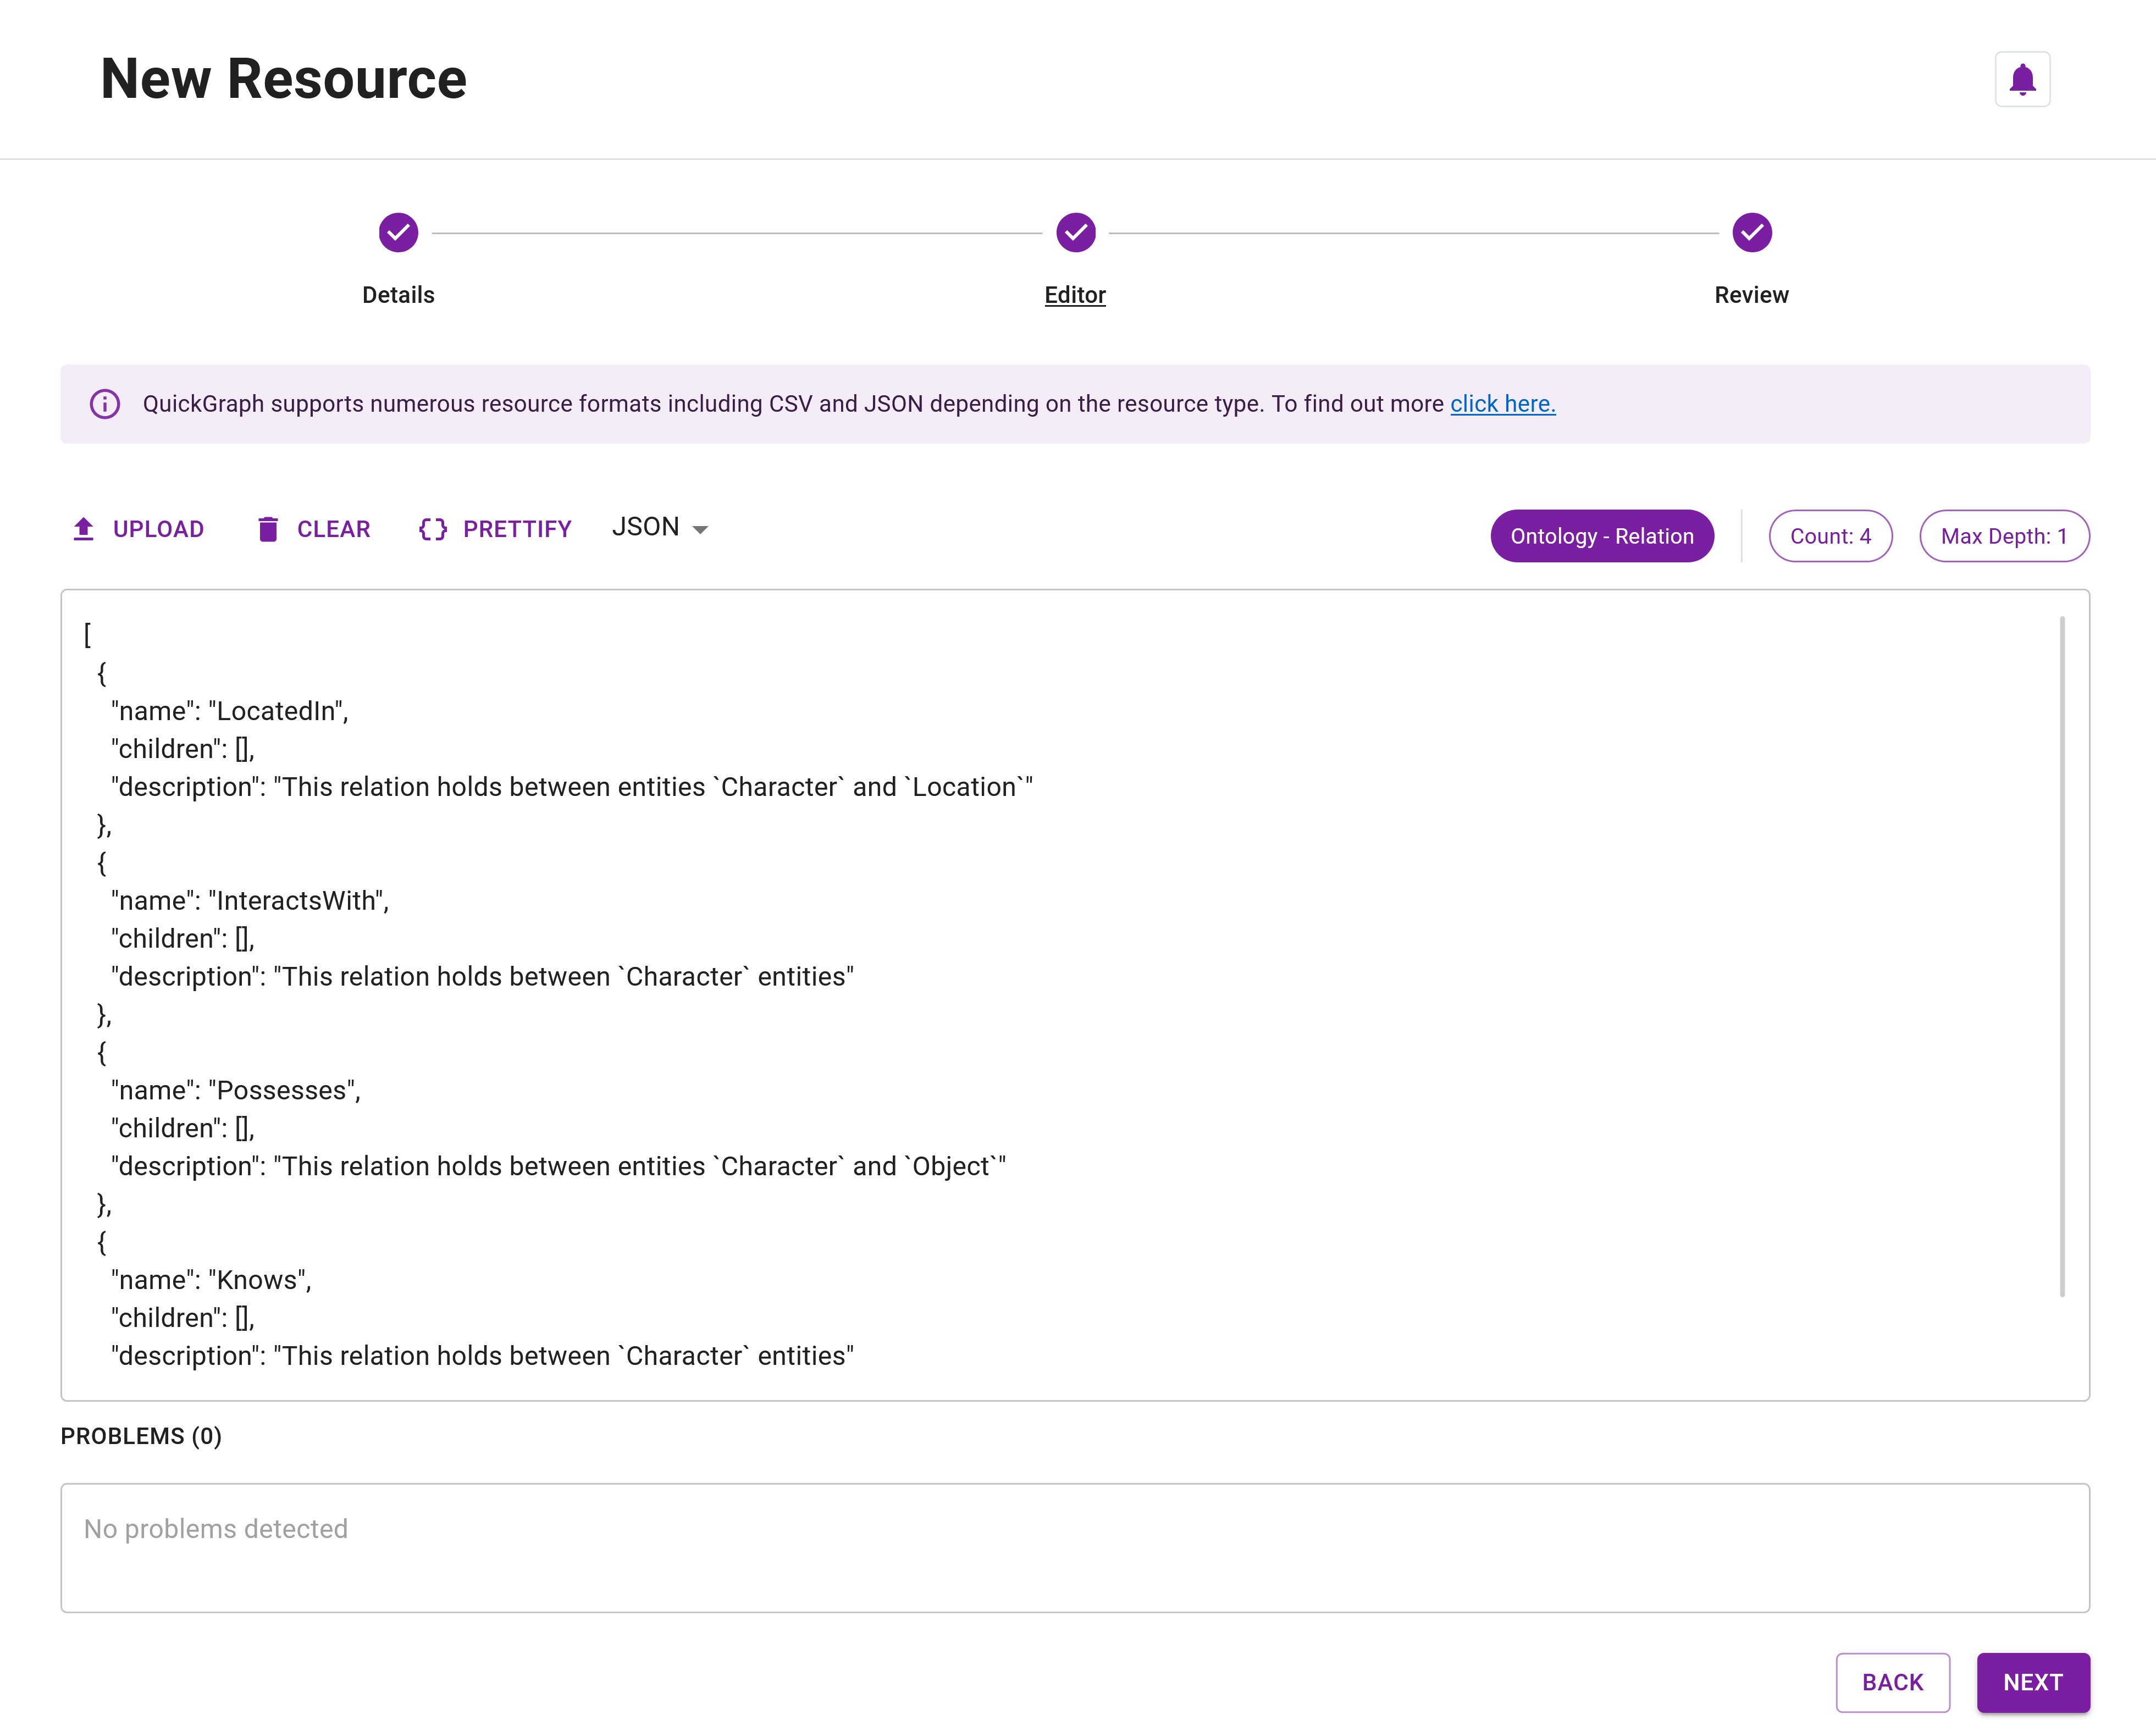
The JSON data below represents our first relation ontology that captures simple relations between the entities we previously defined.
Step 14: Copy and paste the JSON data into the editor. Your screen should resemble Figure 5.
[
  {
    "name": "LocatedIn",
    "children": [],
    "description": "This relation holds between entities `Character` and `Location`"
  },
  {
    "name": "InteractsWith",
    "children": [],
    "description": "This relation holds between `Character` entities"
  },
  {
    "name": "Possesses",
    "children": [],
    "description": "This relation holds between entities `Character` and `Object`"
  },
  {
    "name": "Knows",
    "children": [],
    "description": "This relation holds between `Character` entities"
  }
]
We've added some helpful descriptions to the relations to help annotators recall their domains and ranges. Support for explicit constraints on entities and relations is currently disabled in QuickGraph, but will reintroduced in the future - see Planned Features for more information.
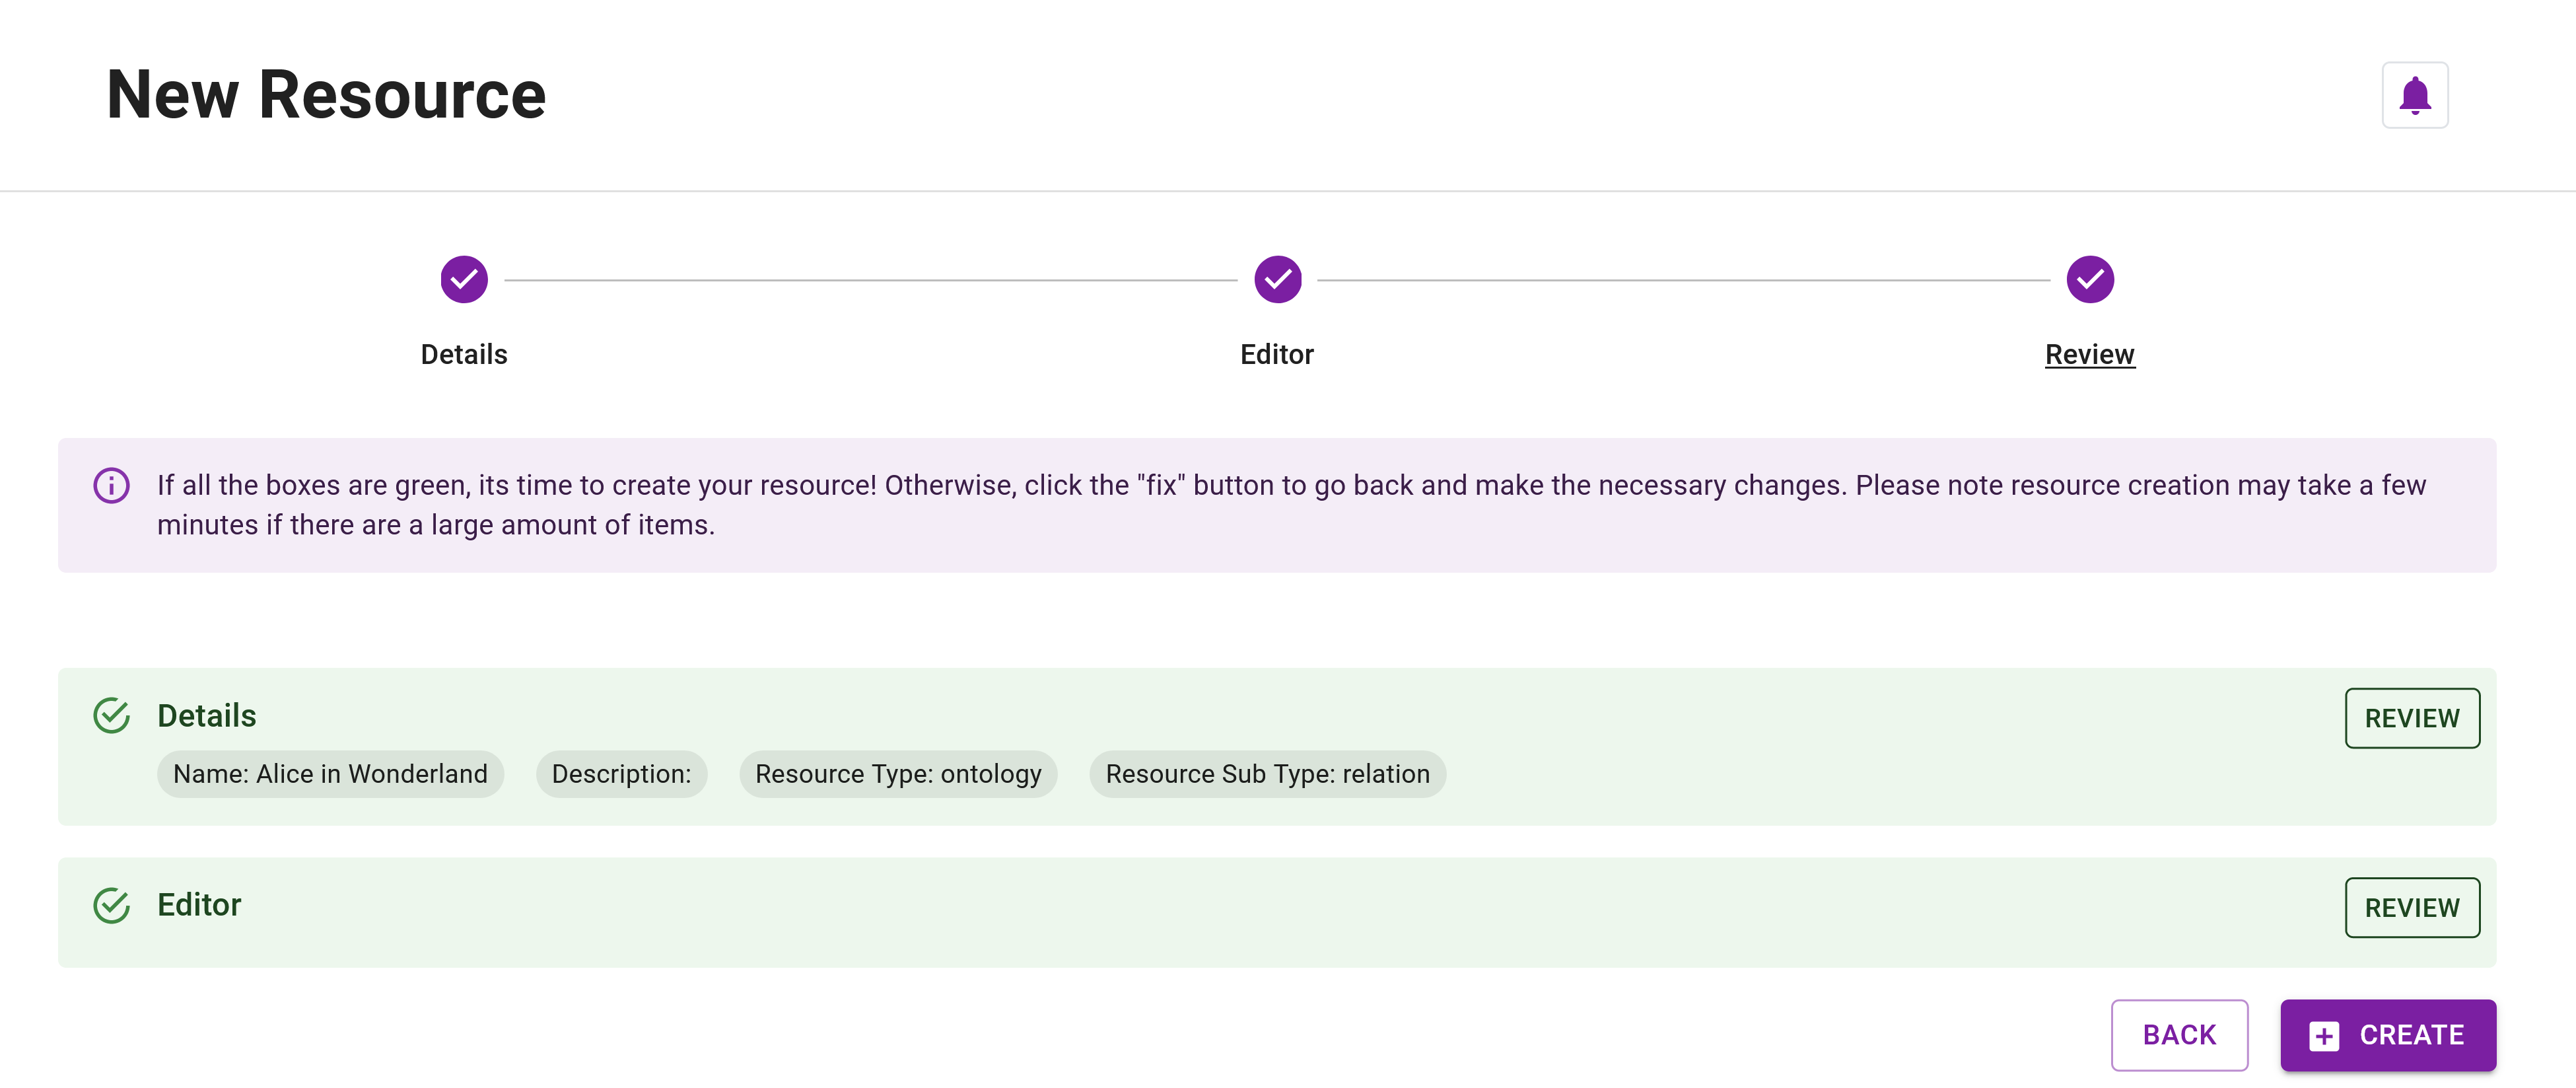
Step 15: Navigate to the Review step and action any necessary fixes if required, otherwise click on Create to create the resource. This step should look like Figure 6.
Creating a dataset
Now that we've created our ontology resources, we can create our first dataset! Similar to resources, there are numerous ways to navigate to the Dataset Creator in QuickGraph, such as:
- Click on the
Datasetslink in the sidebar and click onCreate New Dataset. - Click on the
Datasetdropdown in the sidebar and click onNew Dataset.
After navigating to the Dataset Creator, we can create our first dataset. The process is purposely very similar to creating resources. However, there are more steps and options. For this dataset, we'll take the simplest approach which is copy and pasting a set of newline separated texts (supplied below) into the Dataset Editor.
Step 16: Navigate to the Dataset Creator.
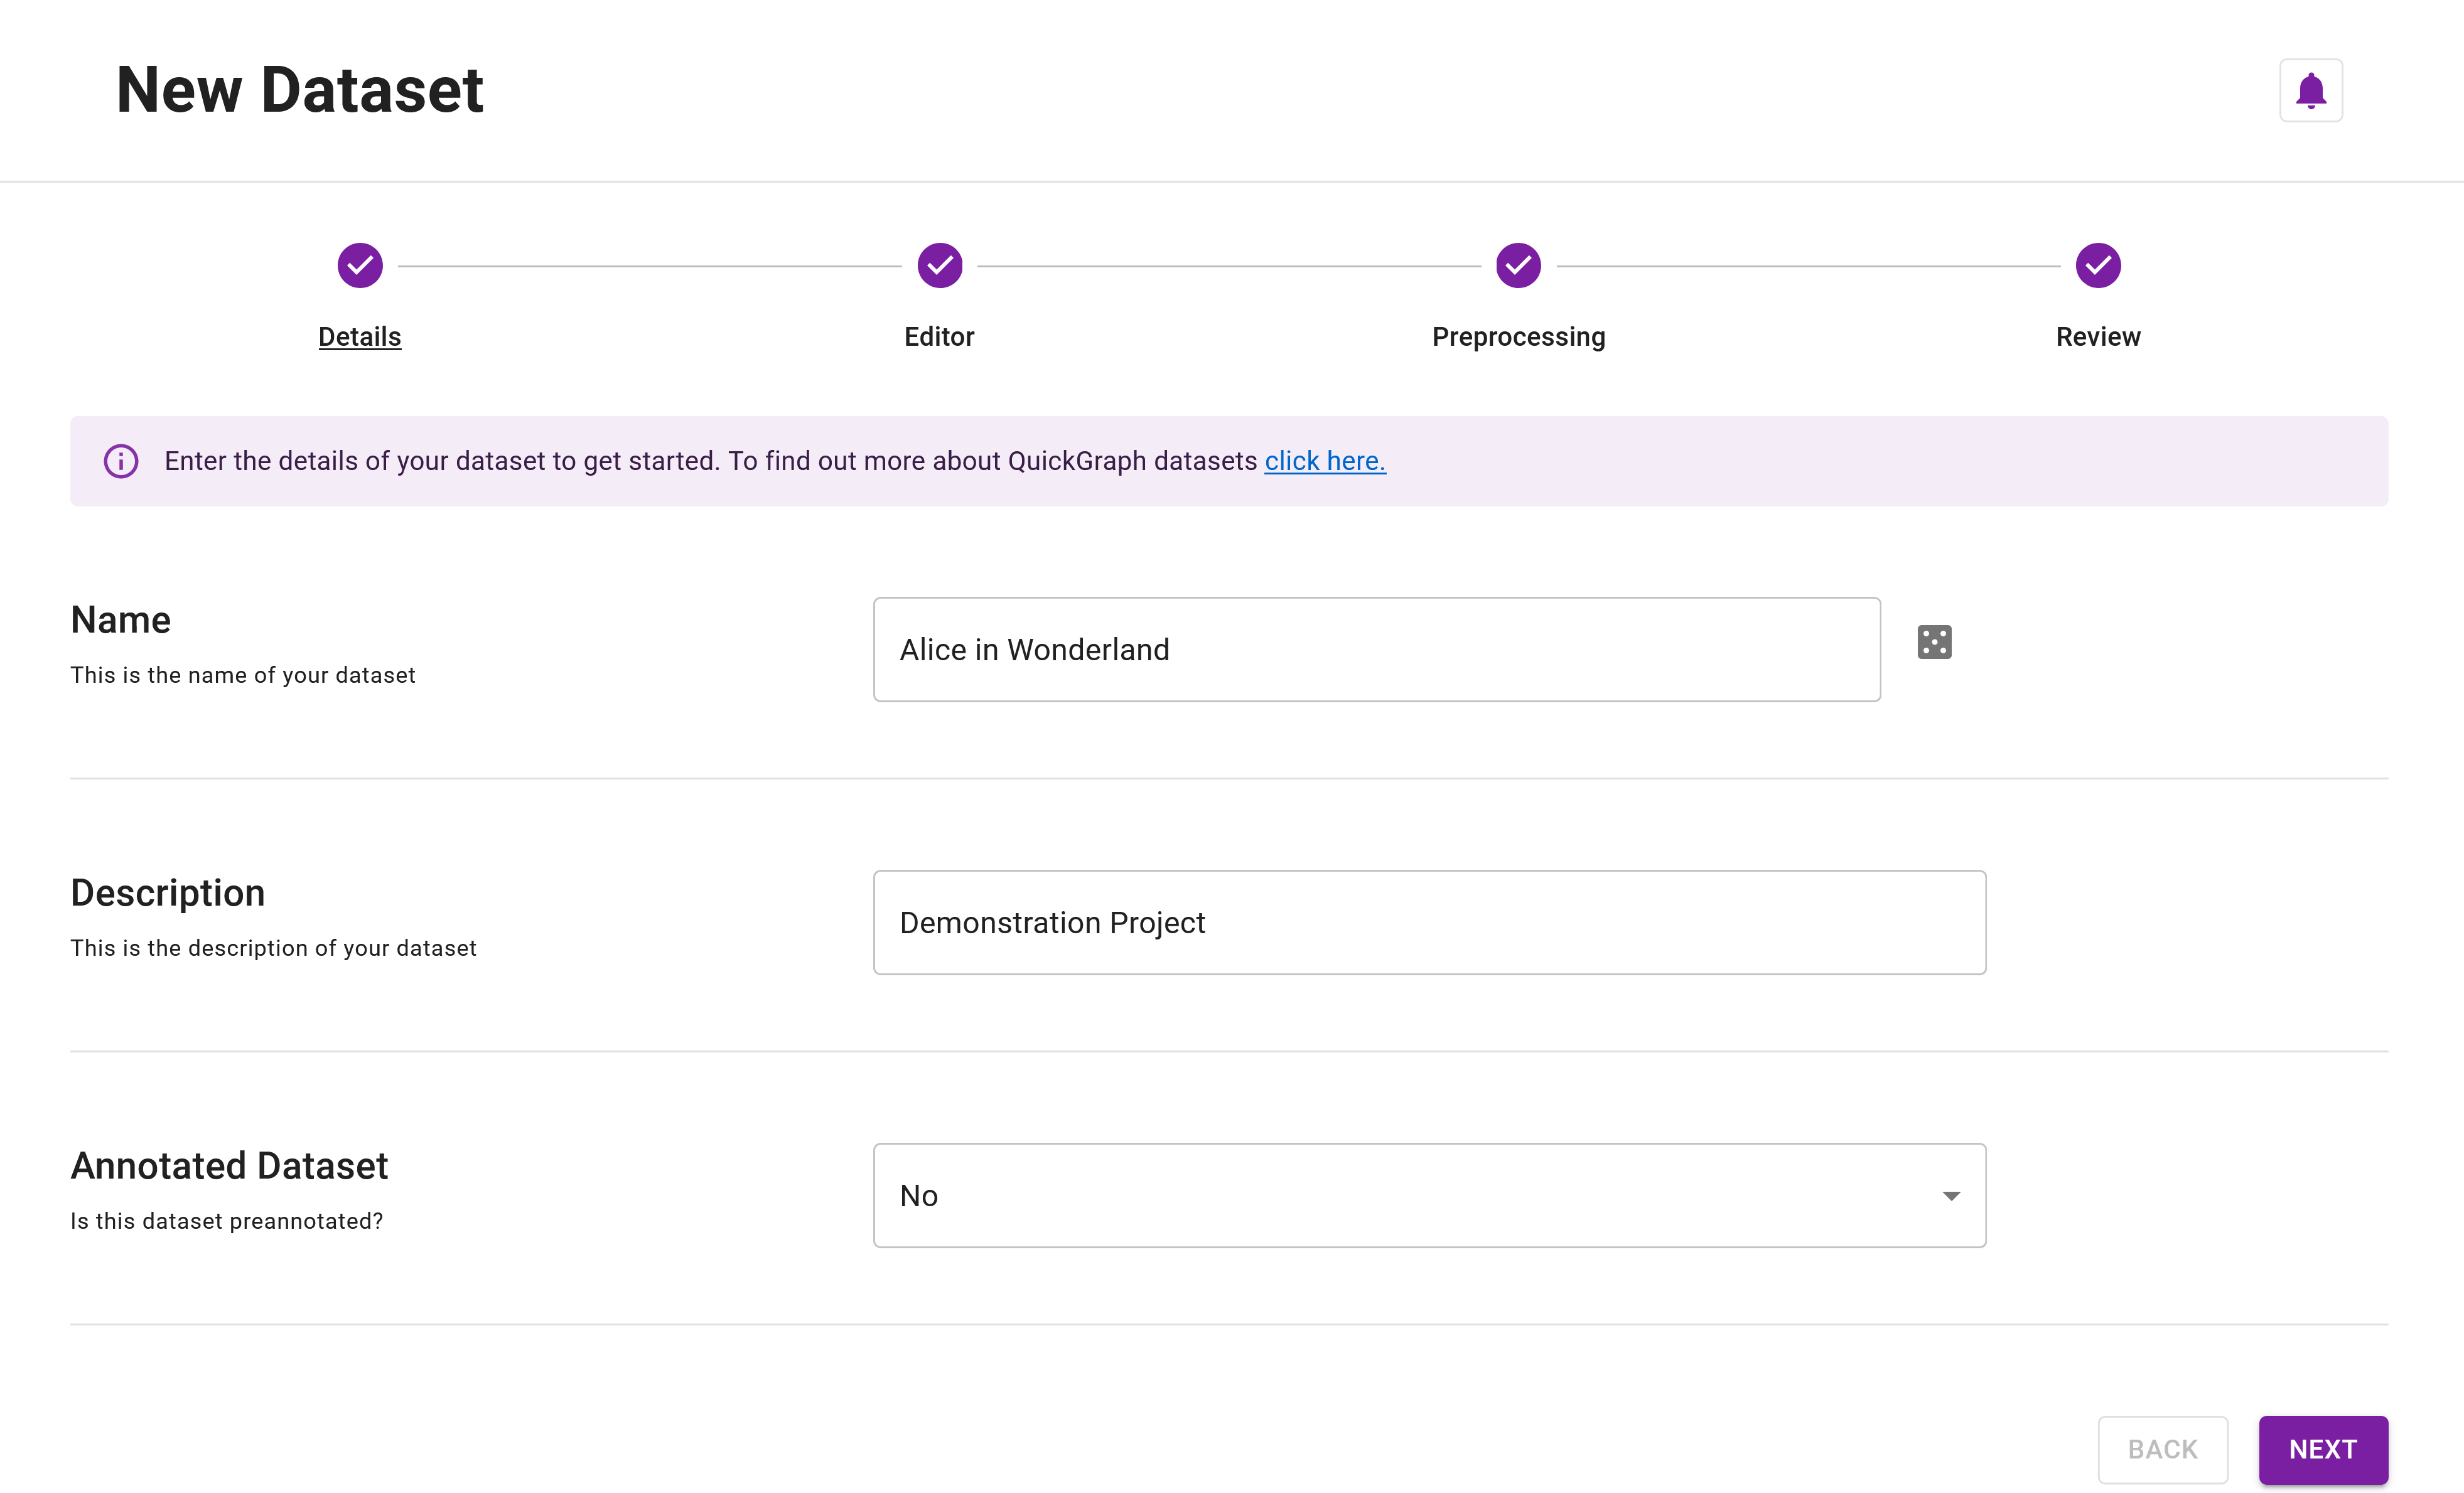
On the Details step of the Dataset Creator:
Step 17: Enter your dataset name, for example, Alice In Wonderland.
Step 18: (Optional) Provide a description for your dataset, for example, My first dataset.
Step 19: Ensure that the Annotated Dataset field is set to No.
Your Details step should resemble Figure 7.
Step 20: Click Next to progress to the Dataset Editor.
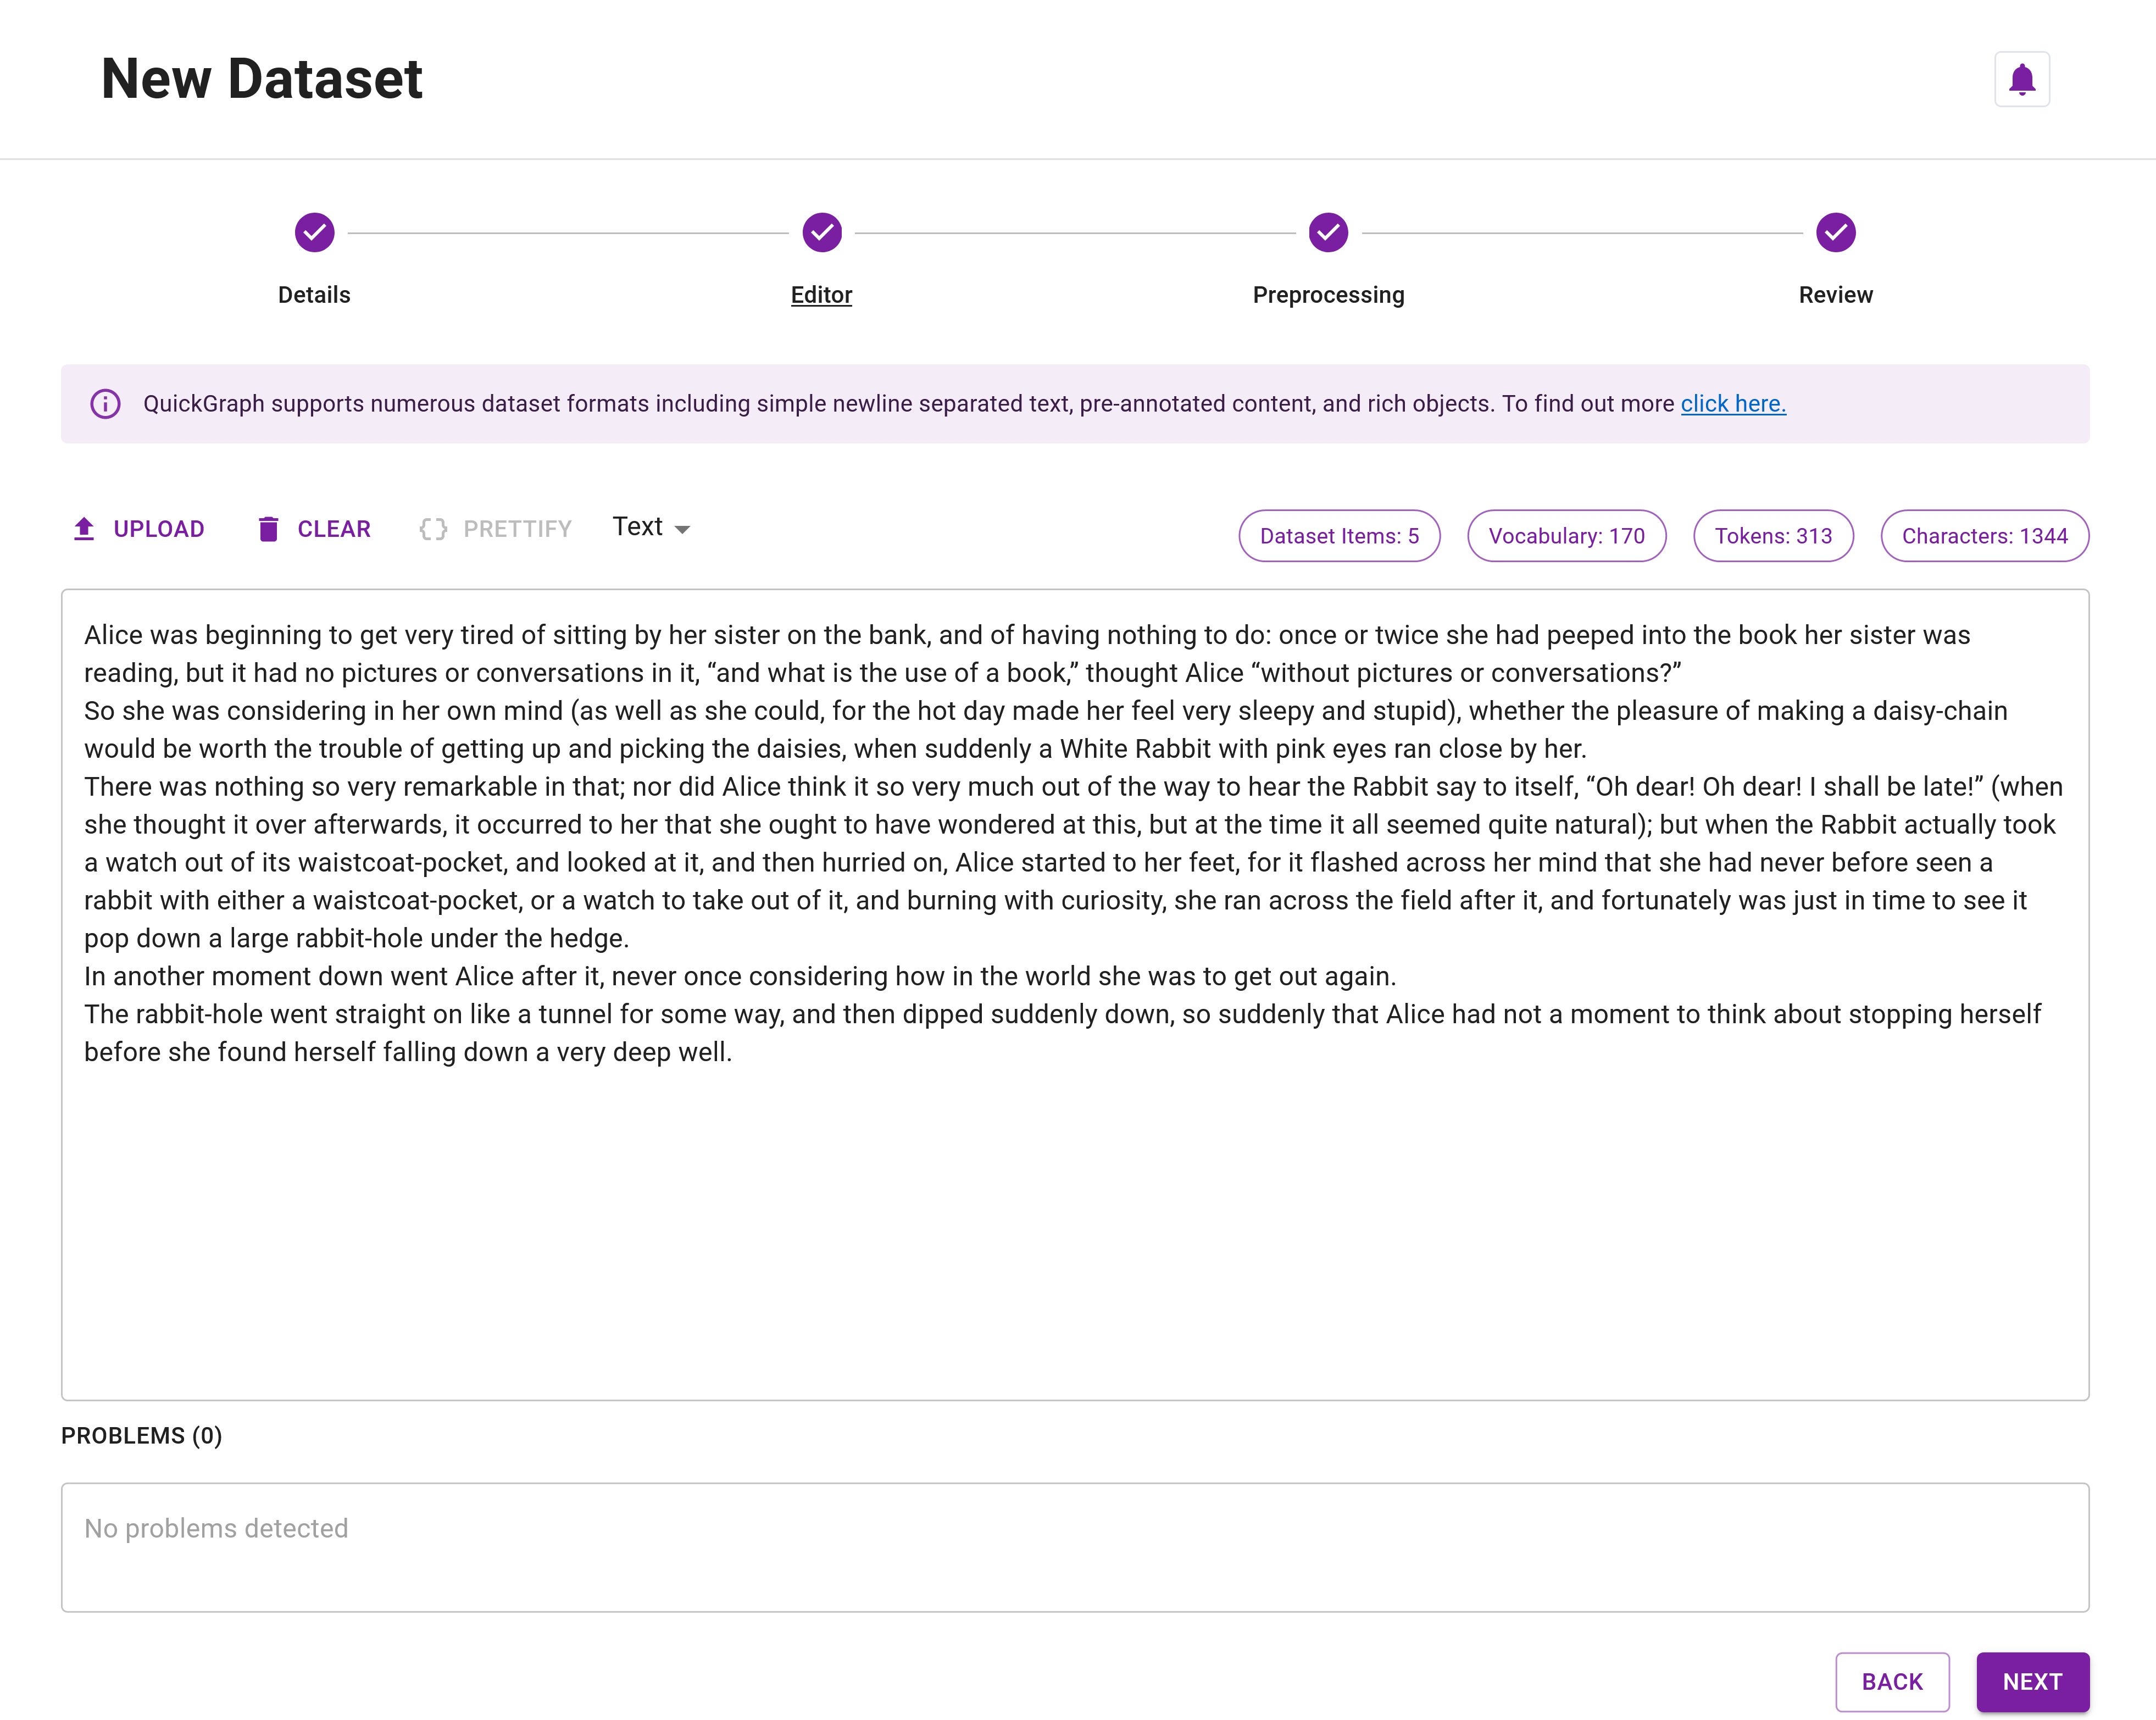
The text data below is a few newline separated paragraphs from the book corpus.
Alice was beginning to get very tired of sitting by her sister on the bank, and of having nothing to do: once or twice she had peeped into the book her sister was reading, but it had no pictures or conversations in it, “and what is the use of a book,” thought Alice “without pictures or conversations?”
So she was considering in her own mind (as well as she could, for the hot day made her feel very sleepy and stupid), whether the pleasure of making a daisy-chain would be worth the trouble of getting up and picking the daisies, when suddenly a White Rabbit with pink eyes ran close by her.
There was nothing so very remarkable in that; nor did Alice think it so very much out of the way to hear the Rabbit say to itself, “Oh dear! Oh dear! I shall be late!” (when she thought it over afterwards, it occurred to her that she ought to have wondered at this, but at the time it all seemed quite natural); but when the Rabbit actually took a watch out of its waistcoat-pocket, and looked at it, and then hurried on, Alice started to her feet, for it flashed across her mind that she had never before seen a rabbit with either a waistcoat-pocket, or a watch to take out of it, and burning with curiosity, she ran across the field after it, and fortunately was just in time to see it pop down a large rabbit-hole under the hedge.
In another moment down went Alice after it, never once considering how in the world she was to get out again.
The rabbit-hole went straight on like a tunnel for some way, and then dipped suddenly down, so suddenly that Alice had not a moment to think about stopping herself before she found herself falling down a very deep well.
For newline separated text datasets, QuickGraph will treat each separated text as an individual dataset item. If you wish to have paragraphs composed of multiple newline separated texts as dataset items, please see Concepts: Datasets.
Step 21: Copy and paste the text data into the editor like in Figure 8 below. Similarly to the Resource Editor, you'll be prompted with any validation errors that arise in the supplied data.
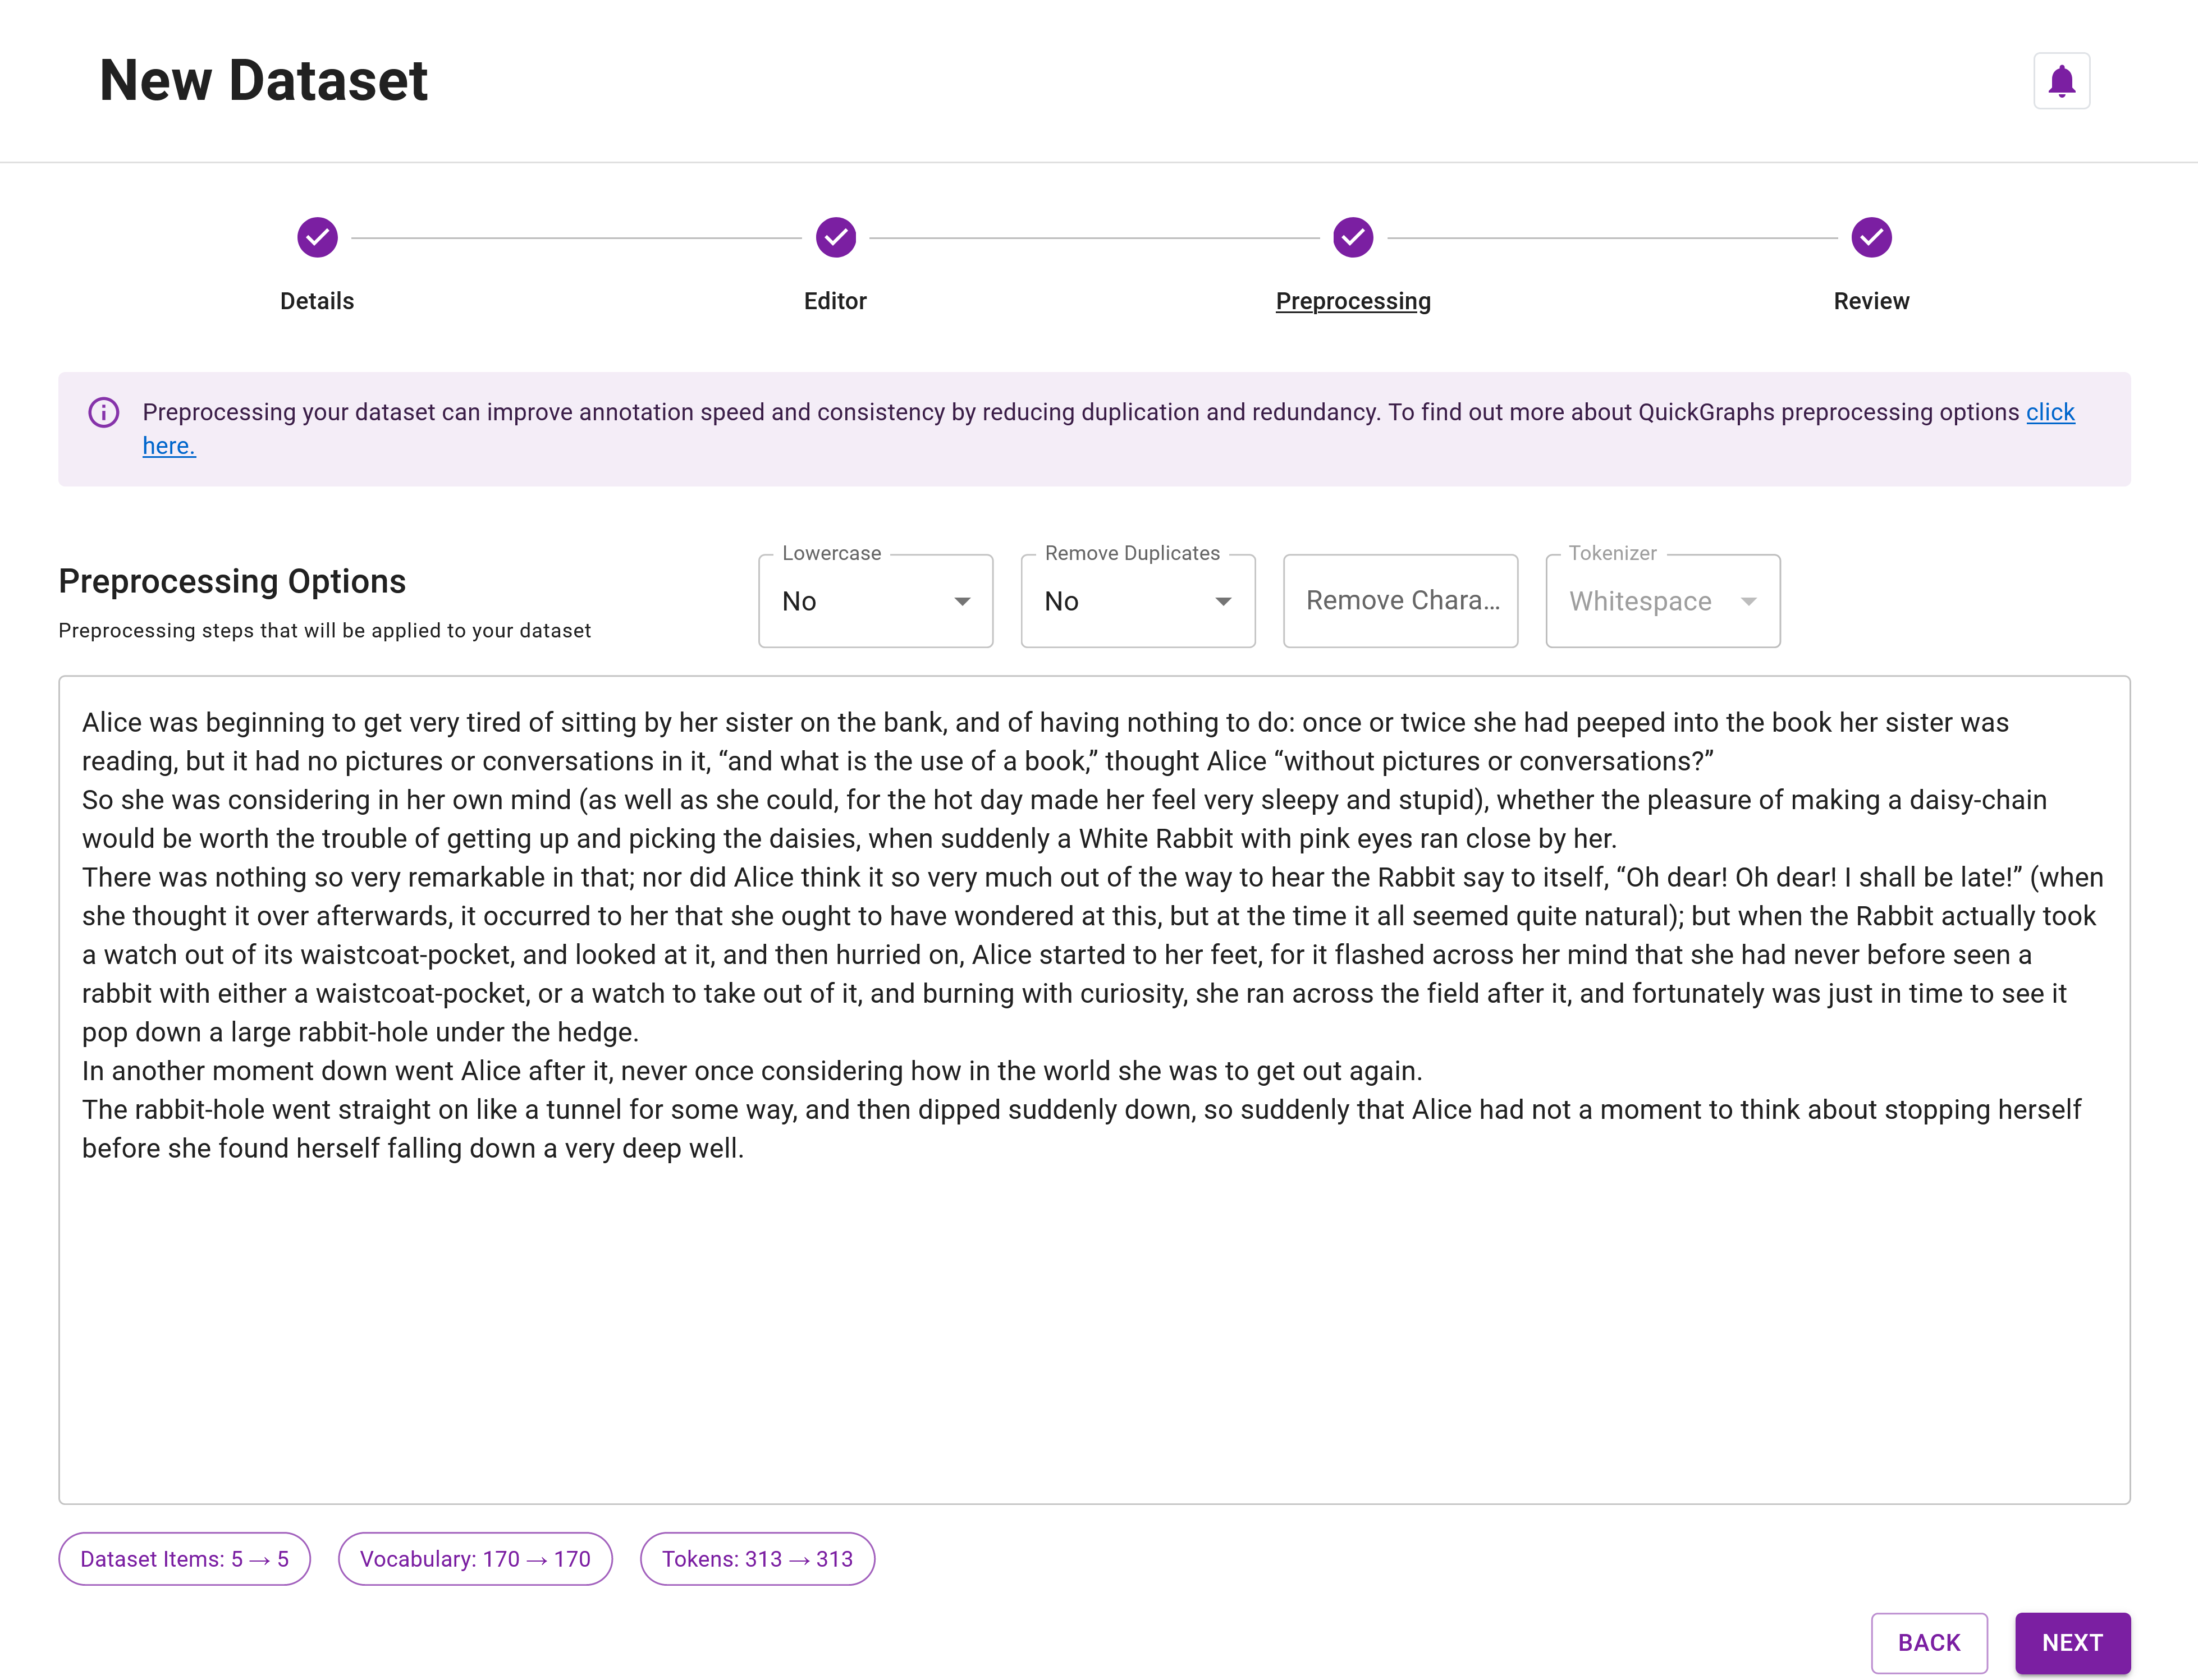
Step 22: Click Next to progress to the Dataset Preprocessing step. Here, you can select various preprocessing options on the text dataset, removing the need for preprocessing in external environments. We'll leave these as the defaults. Your preprocessing should look like that in Figure 9 below.
Step 23: Once you've supplied the dataset details, data and specified the preprocessing options, navigate to the Review step by clicking Next. If all the boxes are green, click Create to create the dataset. Otherwise, click Fix to check if you have any errors or have missed any details. This step should look like Figure 10.
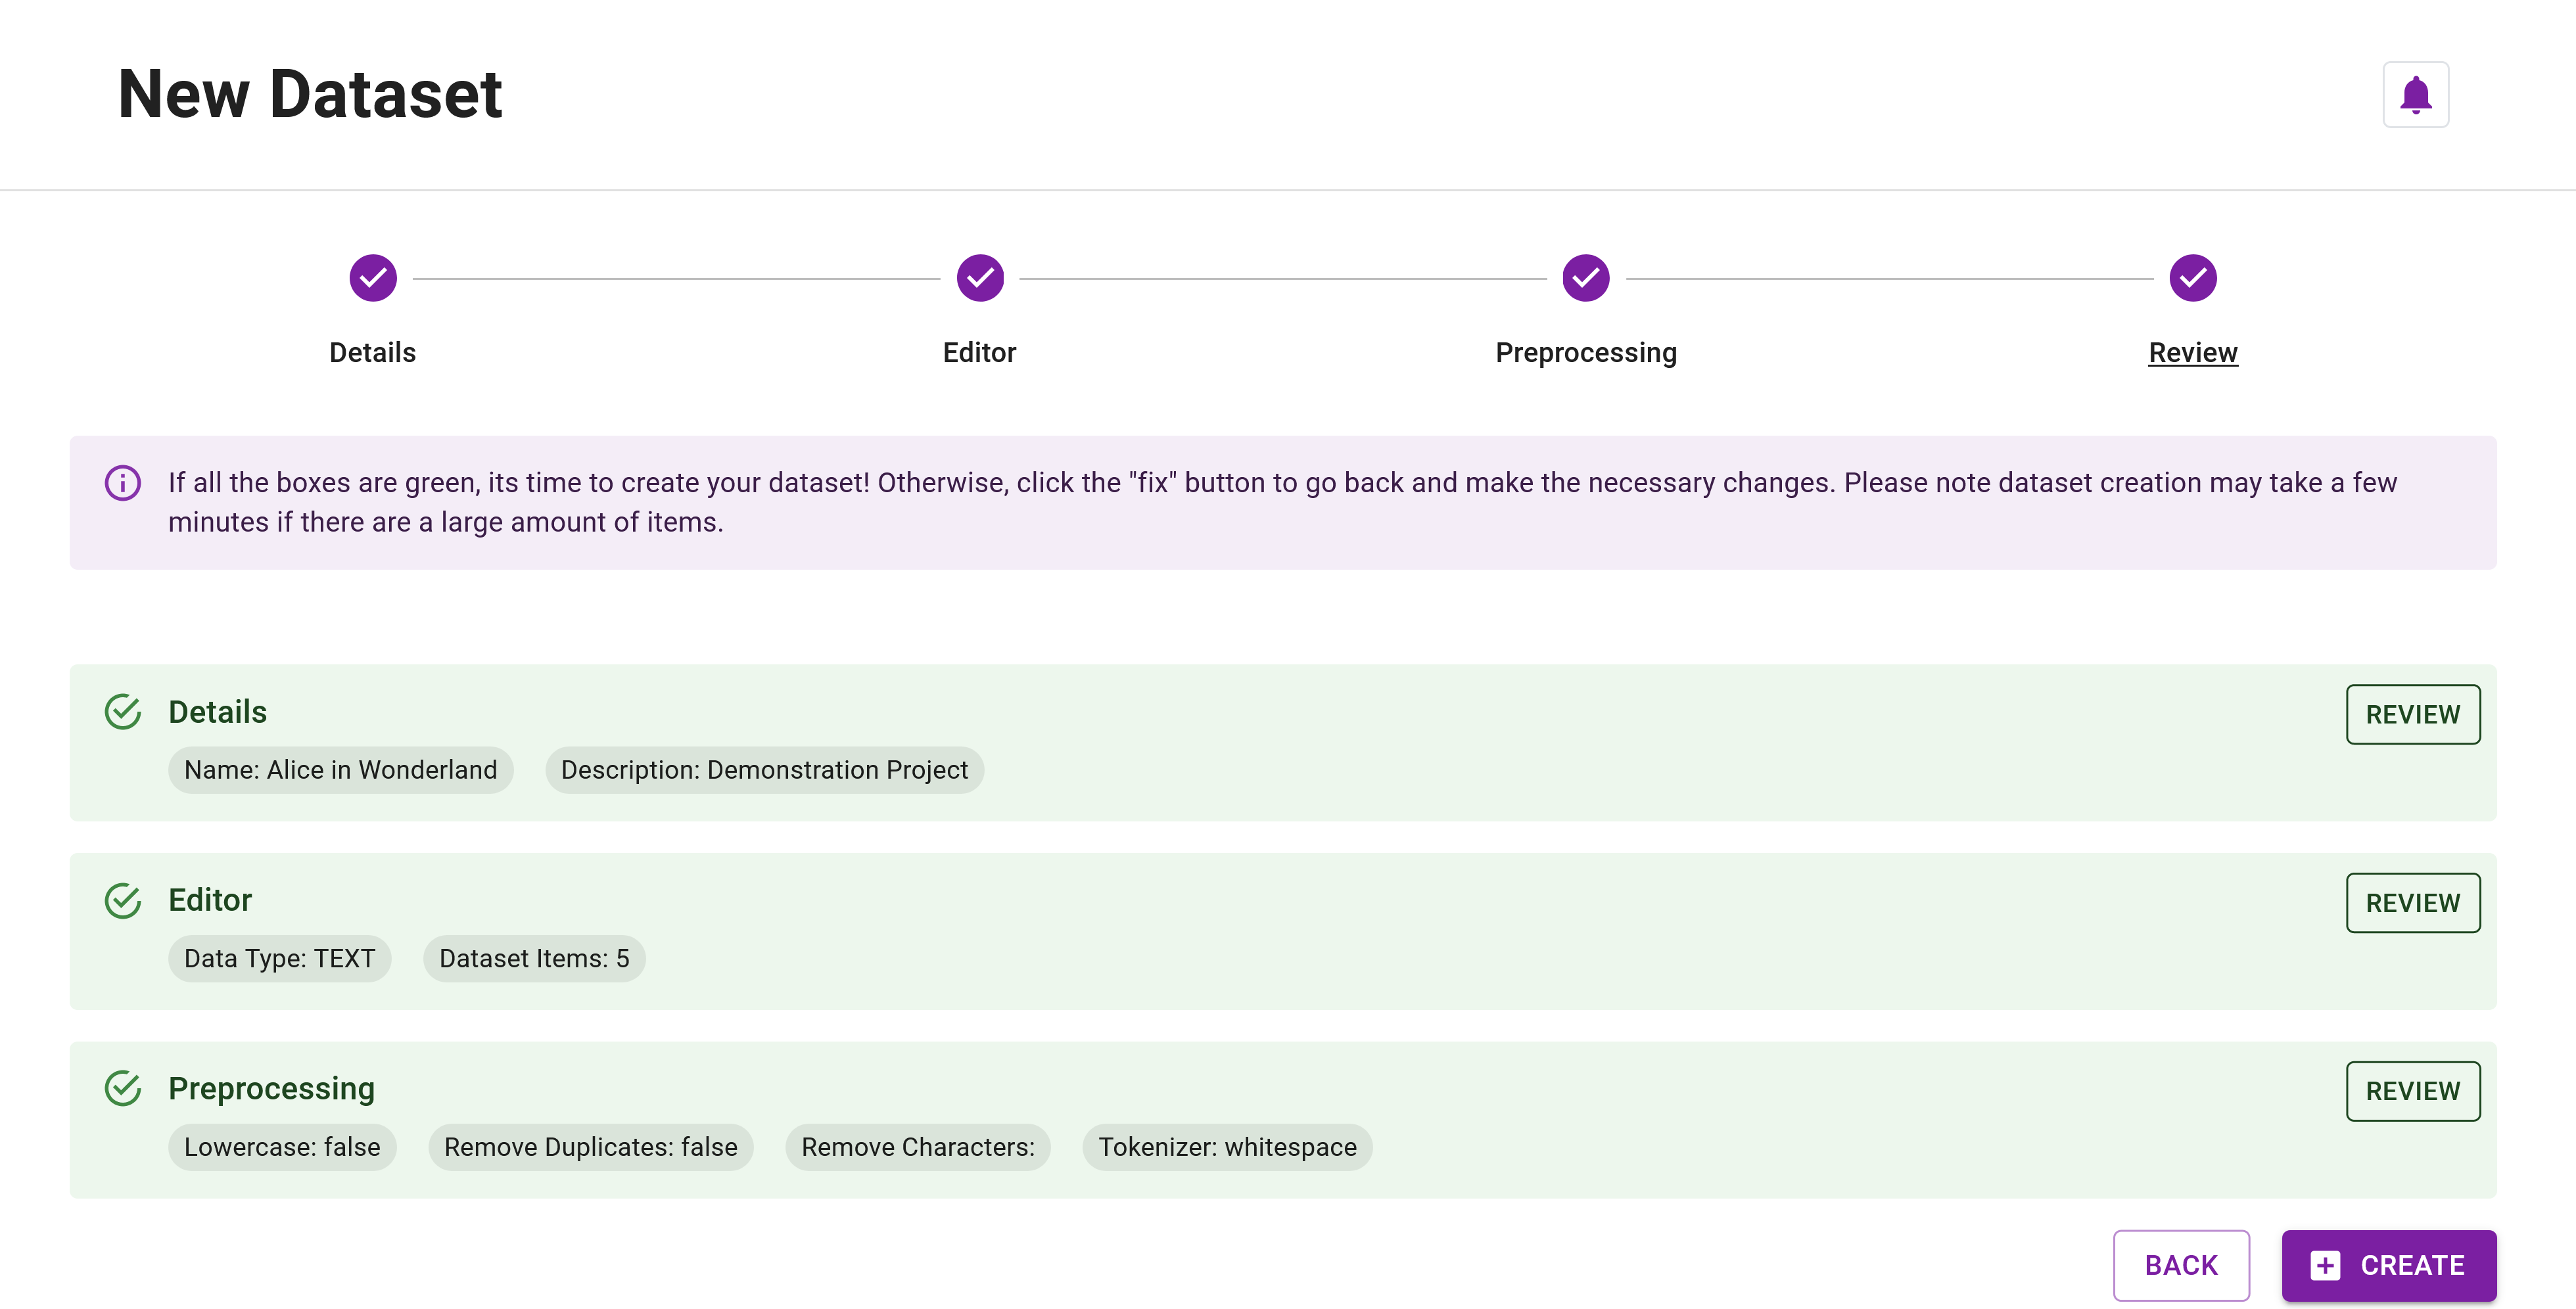
After QuickGraph has created the dataset, you'll be redirected to the Datasets Explorer. That is it for creating our first dataset!
Putting it all together - creating a project
🥳 Congratulations - You've created your first entity and relation ontology resources and dataset! Now we can create our first project. Similar to creating resources and datasets, we can navigate to the Project Creator in numerous ways:
- Click on the
Projectslink in the sidebar and click onCreate New Project. - Click on the
Projectsdropdown in the sidebar and click onNew Project.
After navigating to the Project Creator, we can create our first project. As you can see, QuickGraph tries to maintains a cohesive and user-friendly UI/UX, to enhance the overall user experience and make it more enjoyable to use.
Step 24: Navigate to the Project Creator.
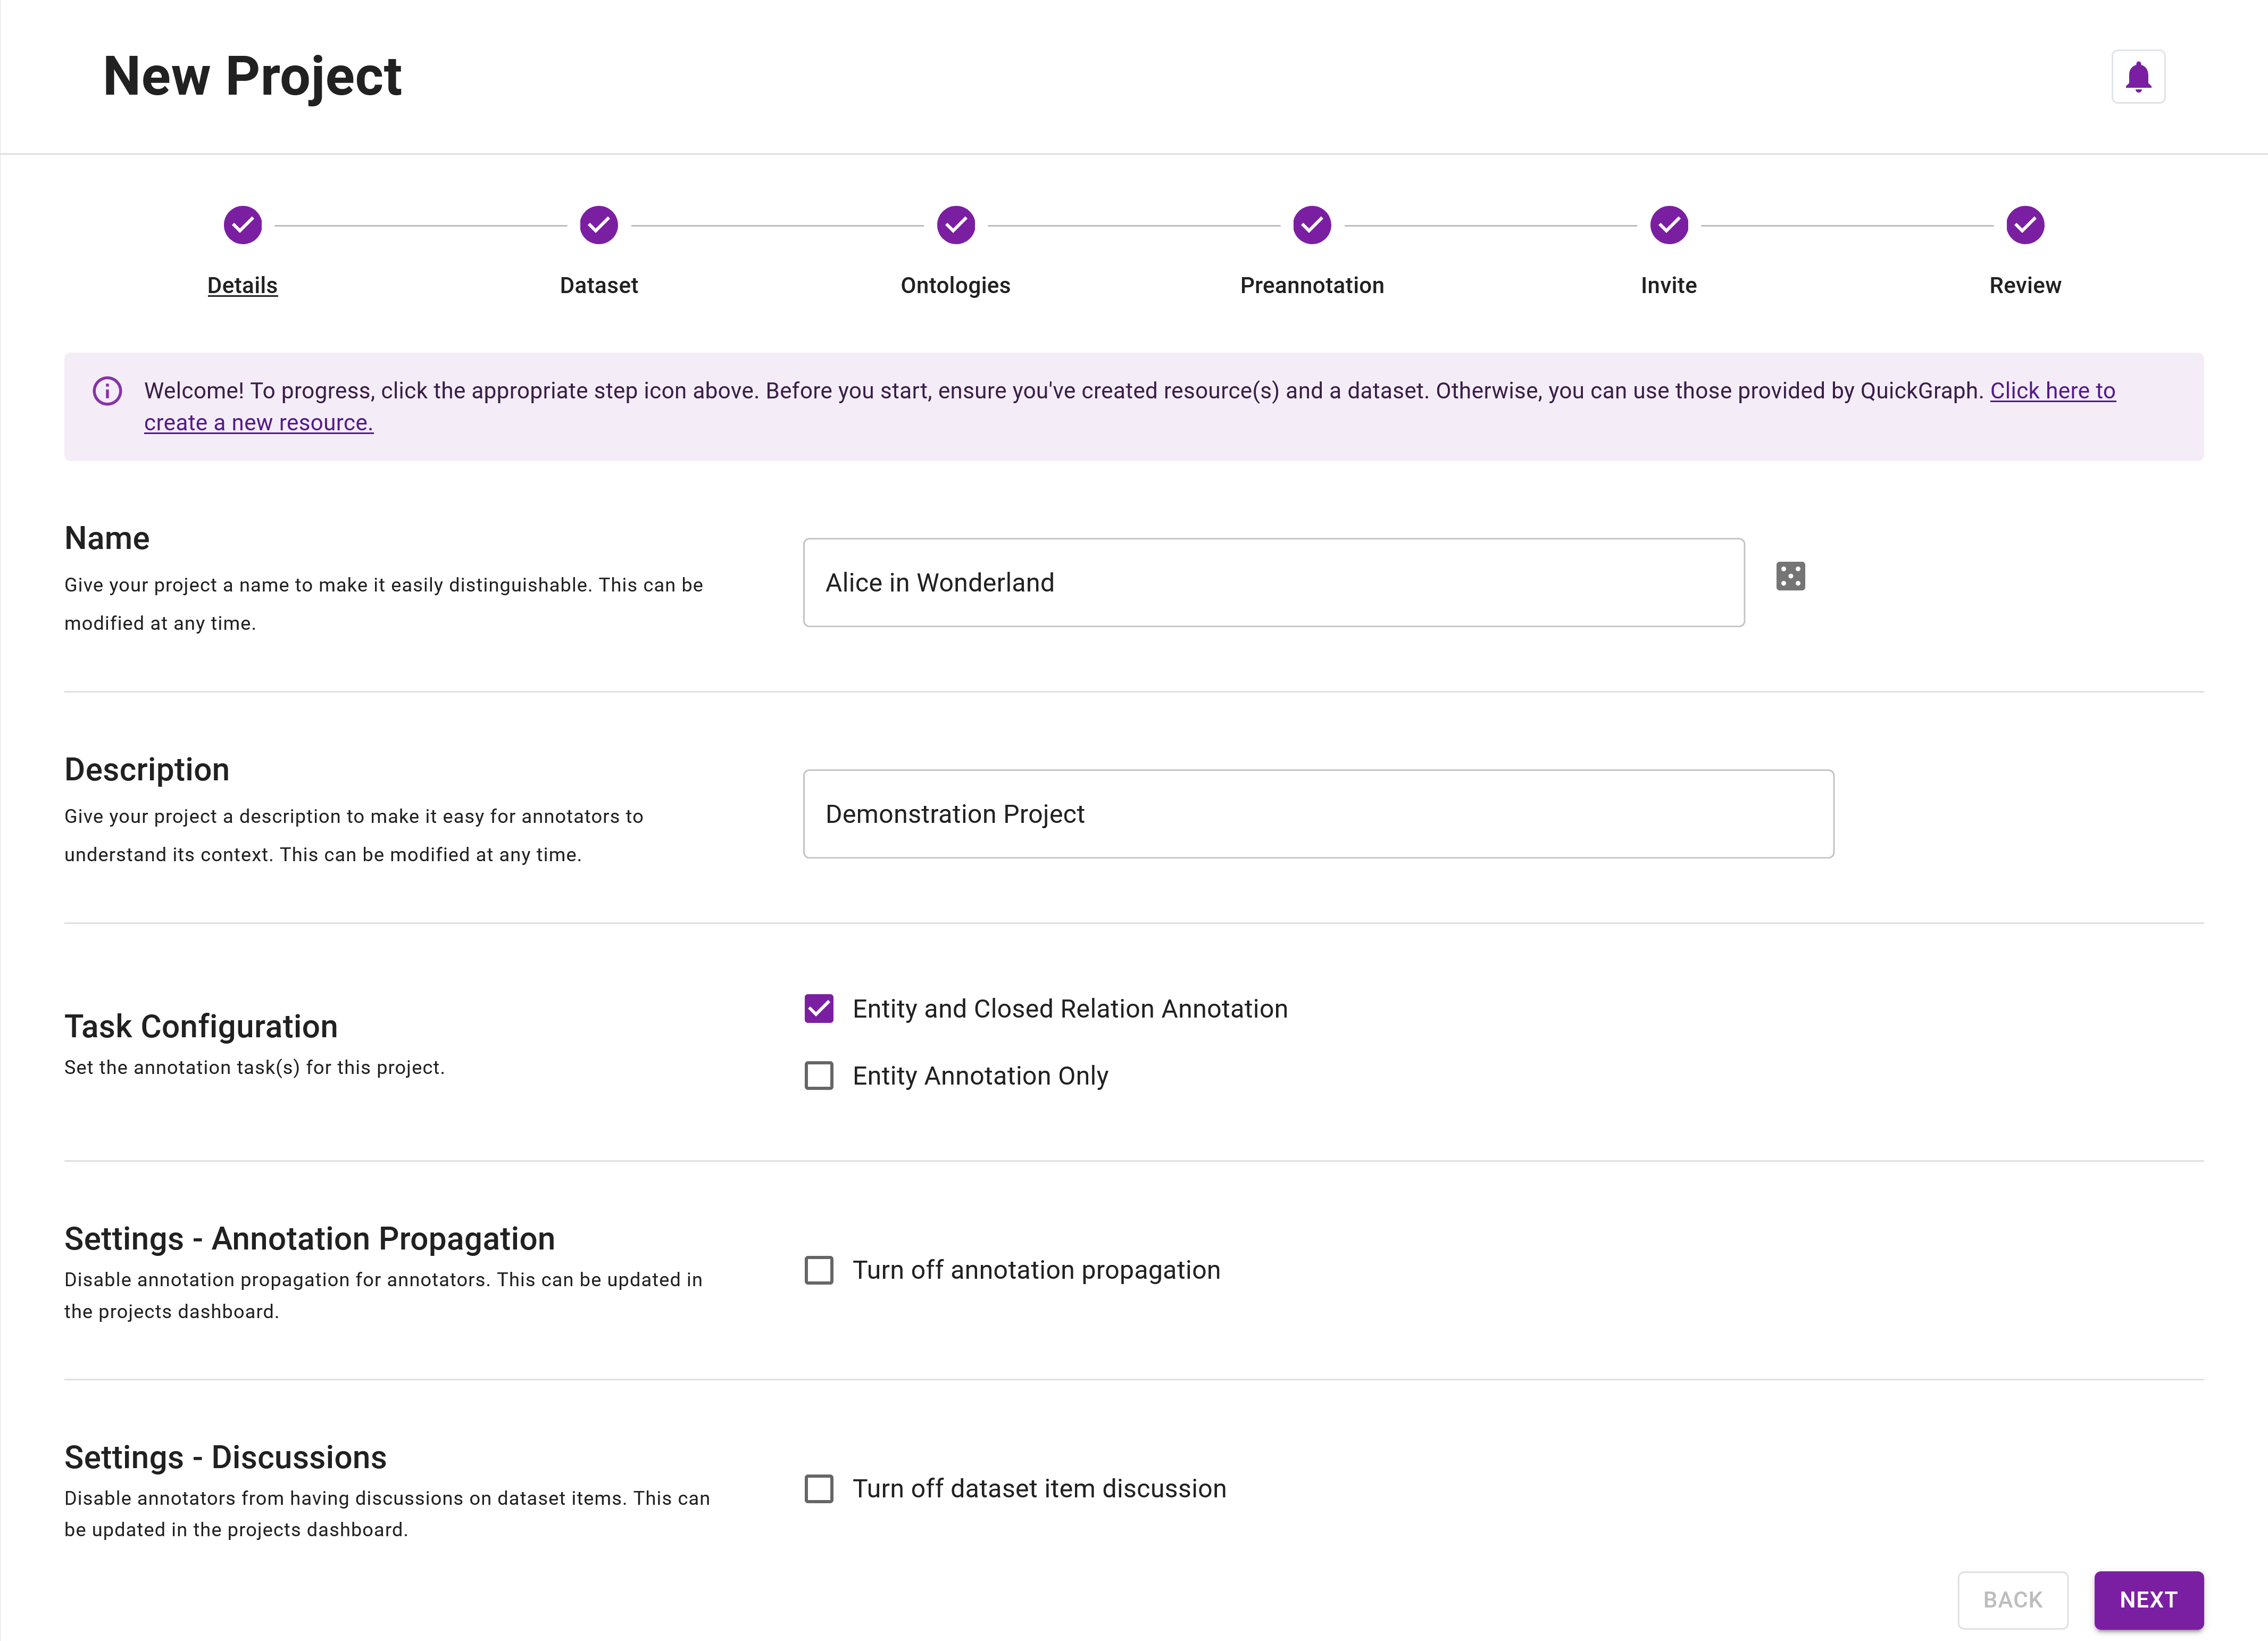
There are a few steps to creating a project, but we'll keep it simple. On the Details step of the Project Creator:
Step 25: Name your project, for example, Alice In Wonderland.
Step 26: Specify the projects Task Configuration as Entity and Closed Relation Annotation.
Leave the rest as blank or the defaults - we don't need to worry about those for now. Figure 11 displays the expected inputs.
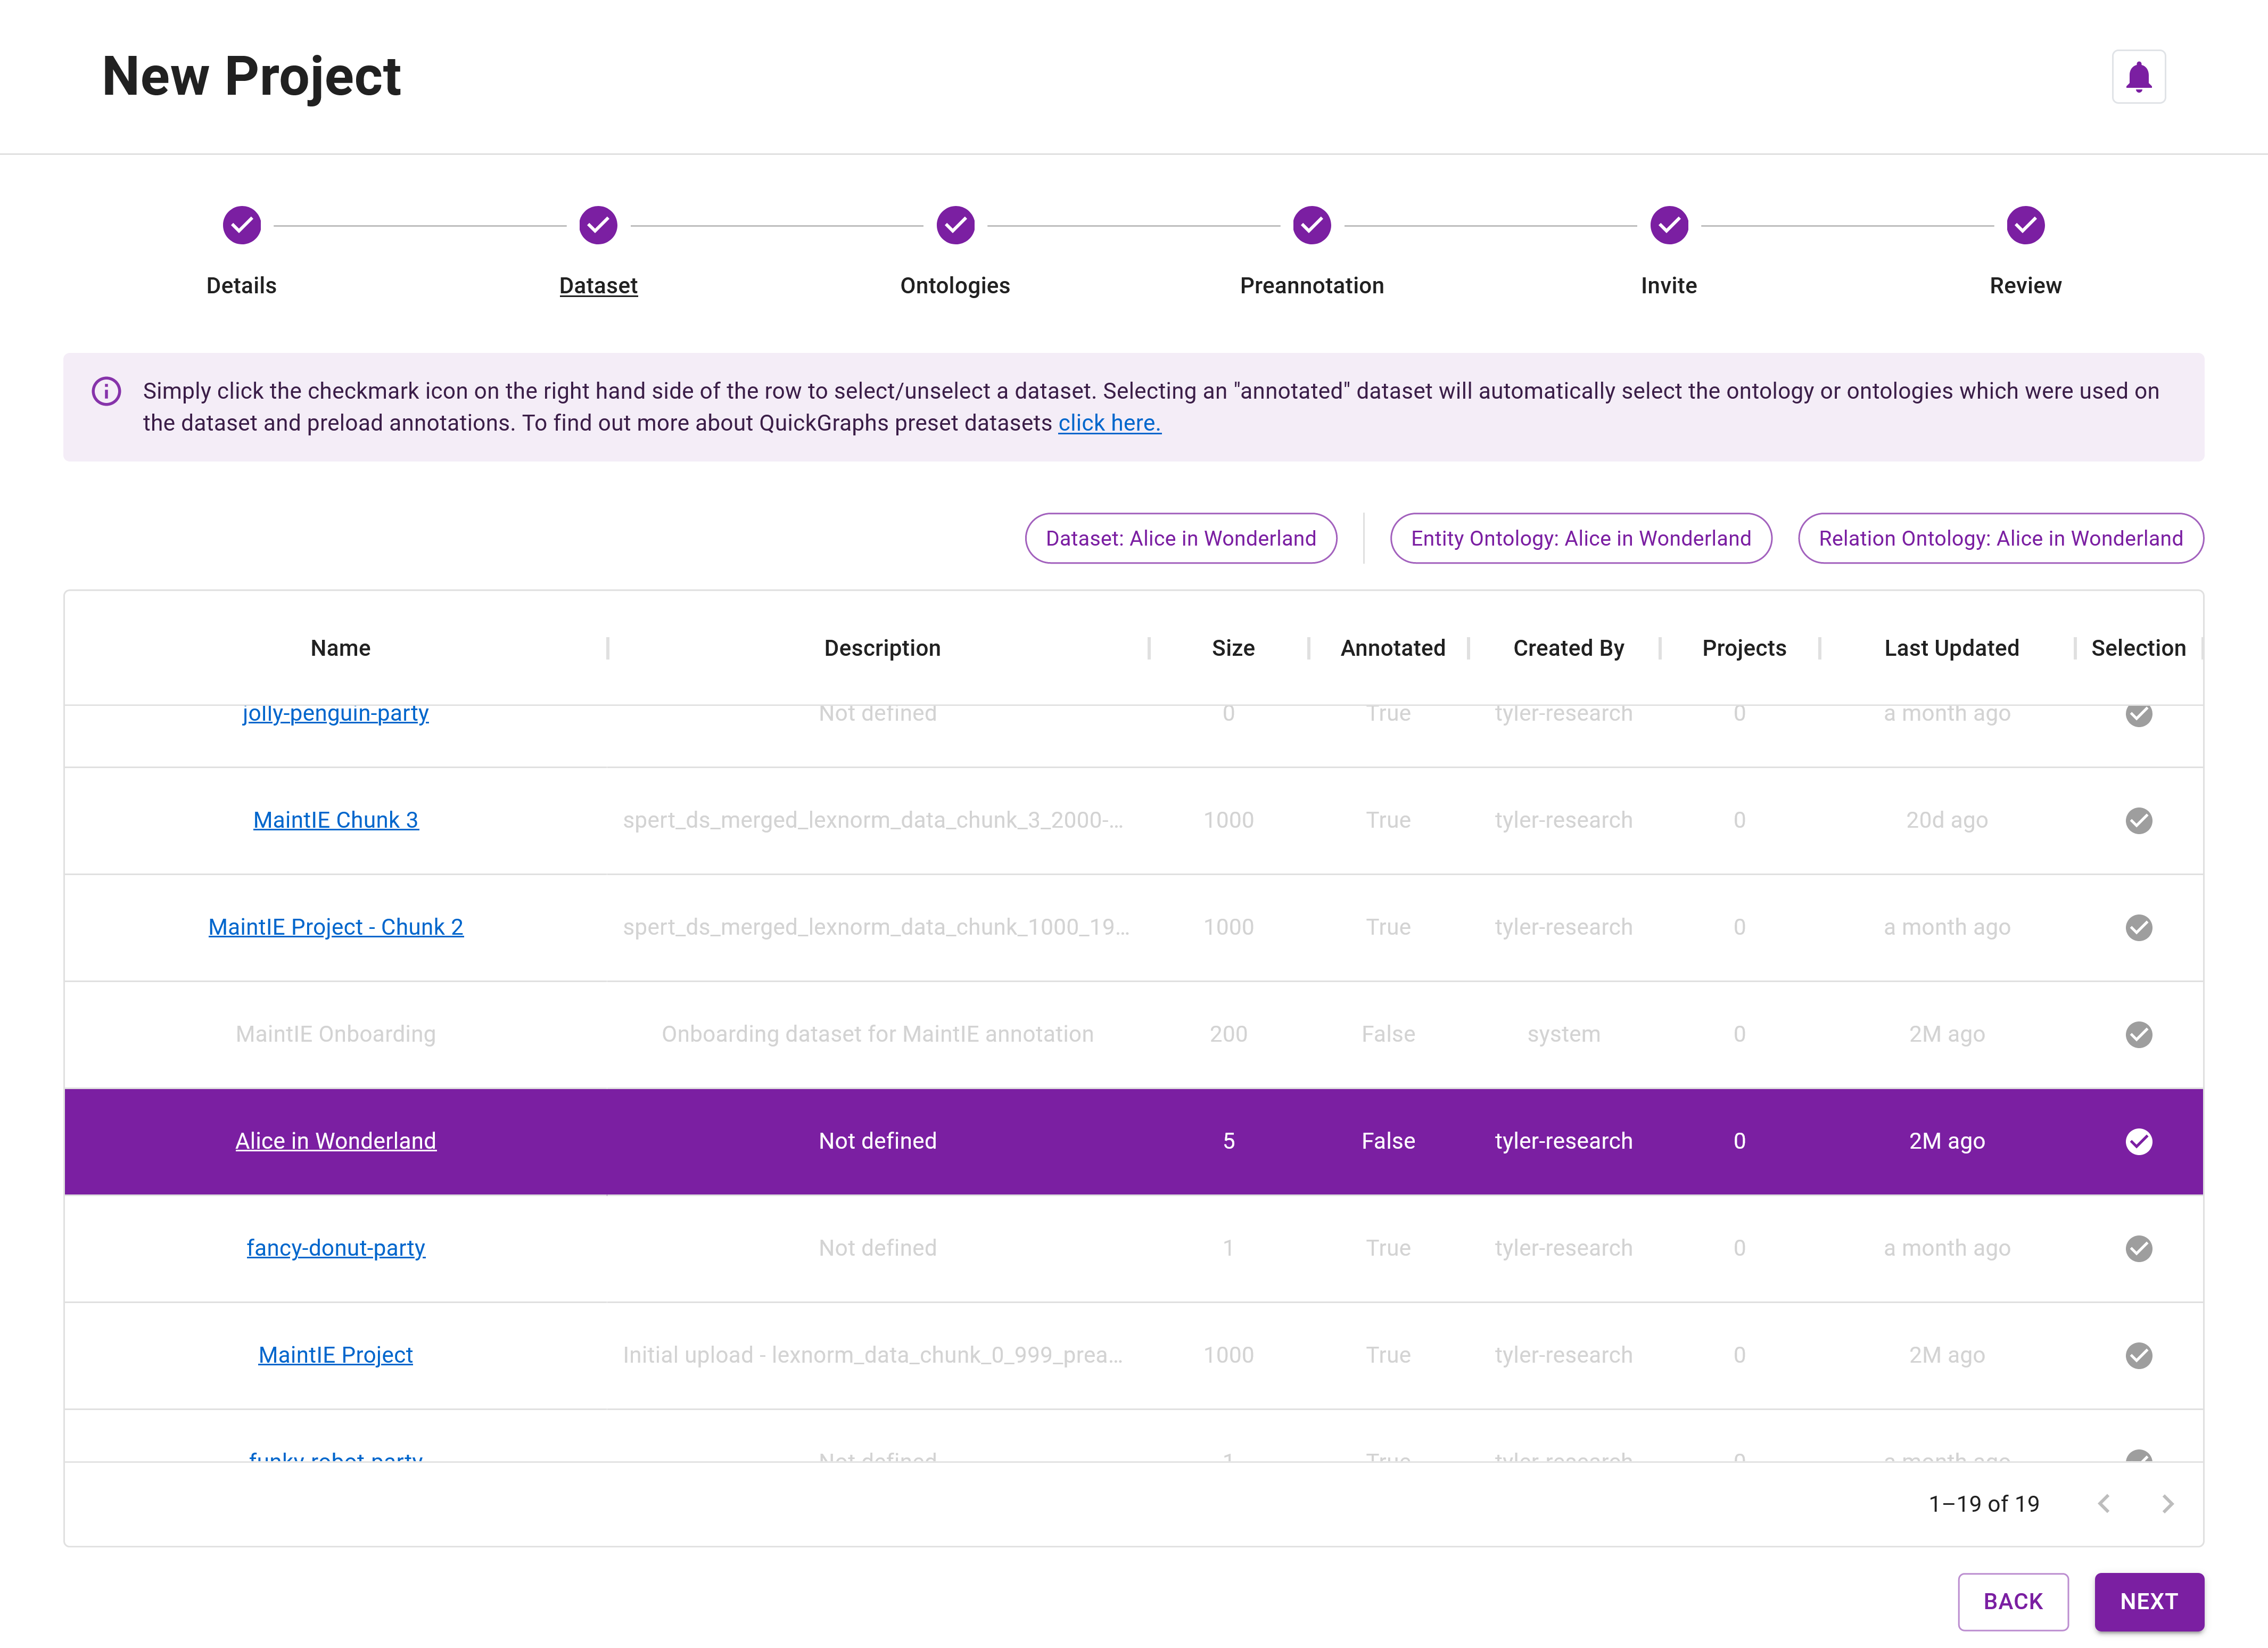
Step 27: Click Next to progress to the Dataset step. Here you'll see the dataset you've created called Alice in Wonderland with a size of 5 items.
Step 28: Click on the selection checkmark icon (✔) on the right-most column to select the dataset - it will highlight when selected.
Easy! If you are stuck - simply check out Figure 12 below.
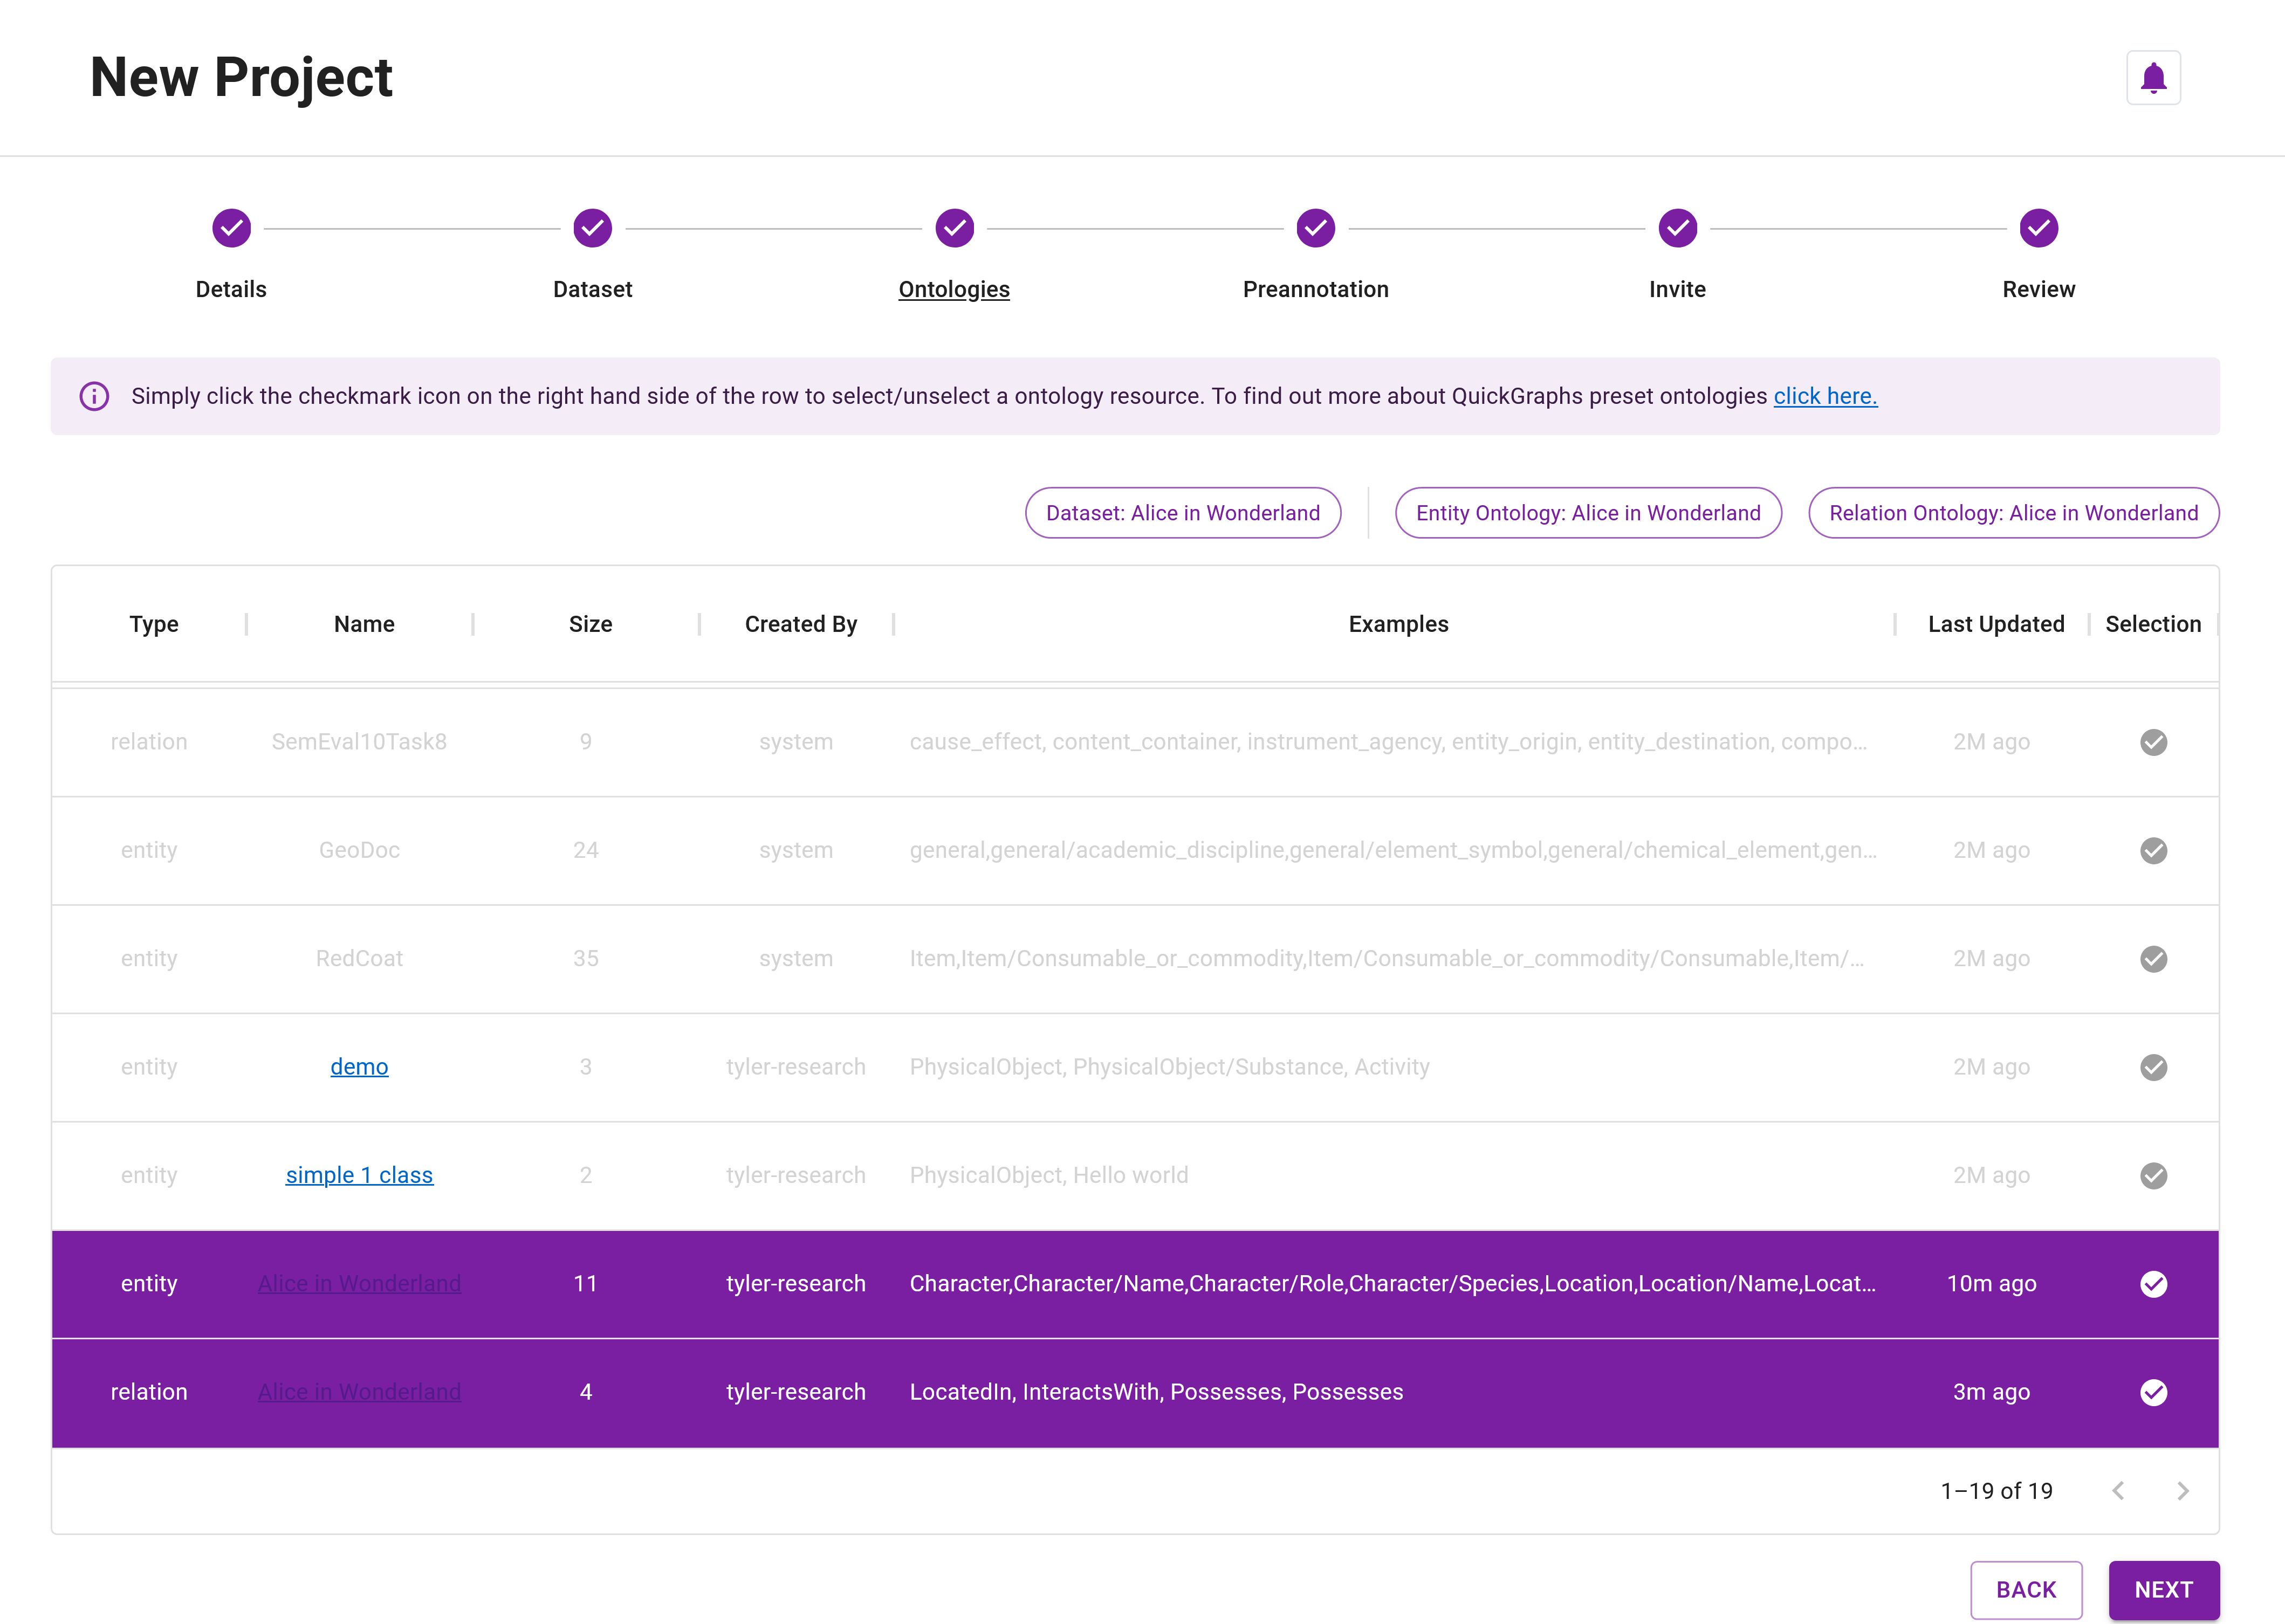
Step 29: Click Next to progress to the Ontologies step. Here you'll see the entity and relation resources you've created called Alice in Wonderland (you might need to scroll down and/or paginate the table) with sizes 11 and 4, respectively. Although they have the same name, we can differentiate them using the Type column.
Step 30: Similar to the dataset, click the checkmark icon (✔) on the right-most column to select the two resources.
That's it! If you're lost, checkout Figure 13 below.
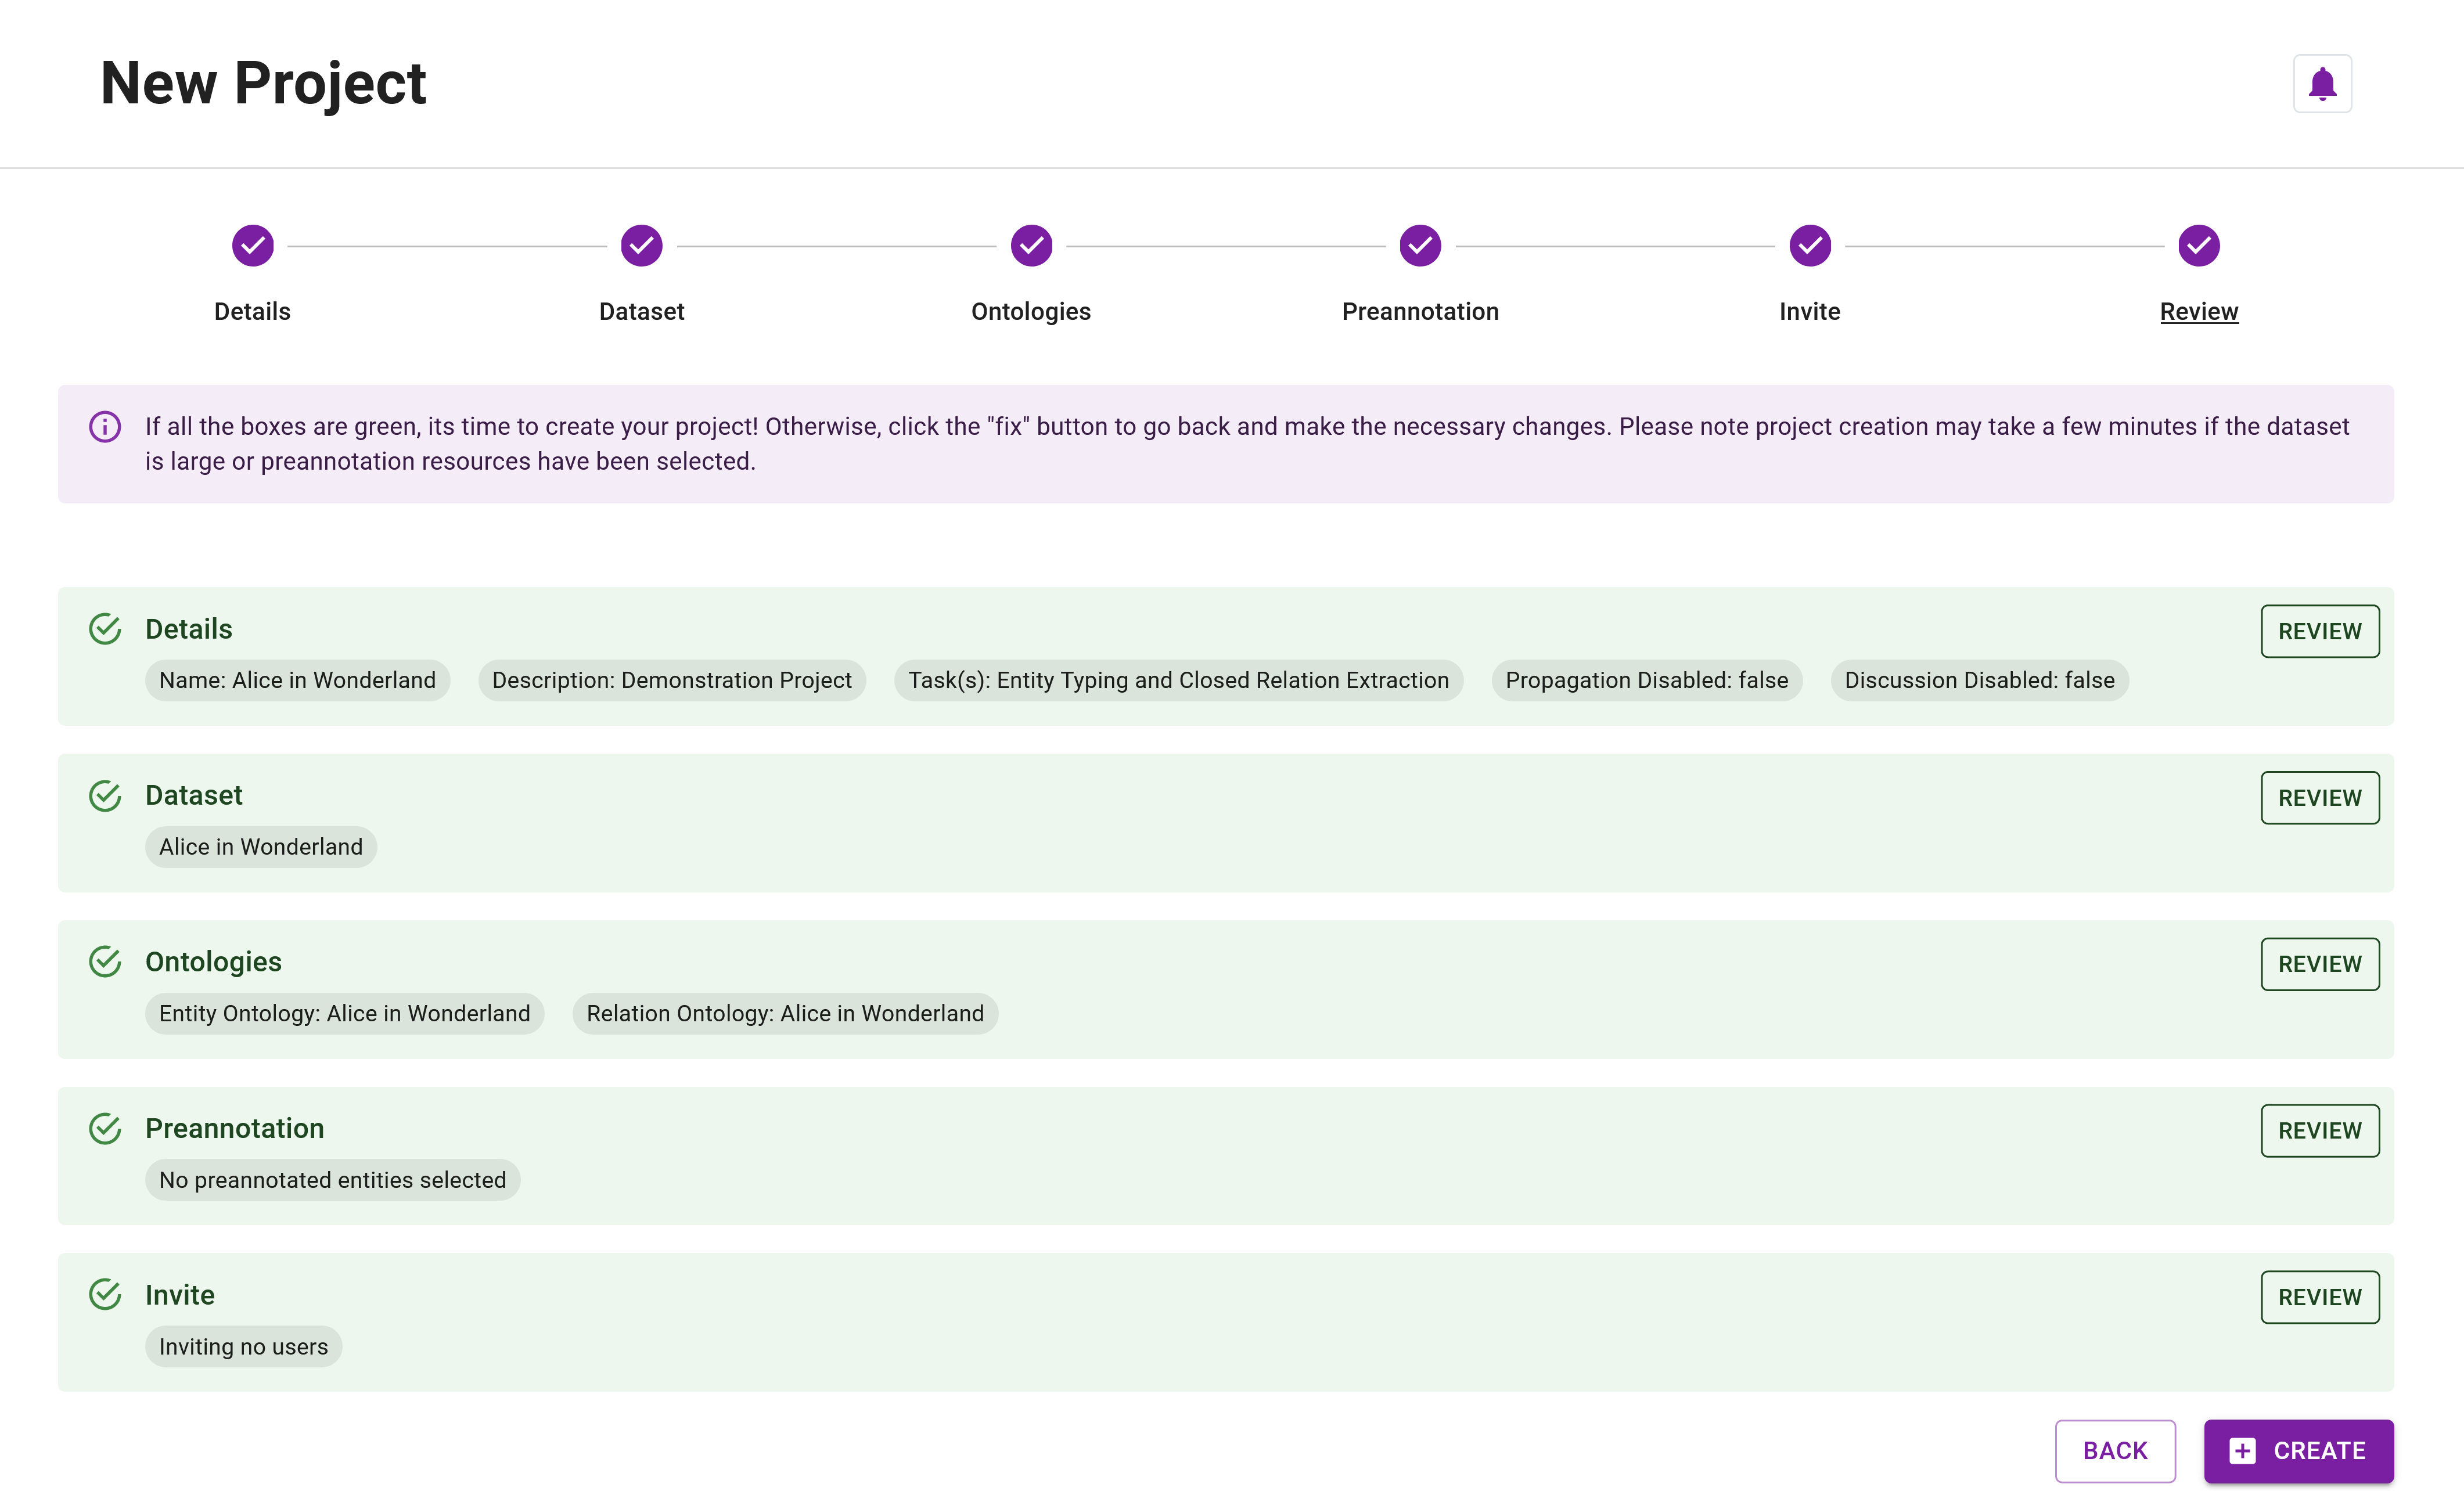
Step 31: Click Next to progress to the Review step, as we skip the Preannotation and Invite steps for this tutorial.
Checkout the Project Creator to learn more about preannotation and inviting collaborators.
Step 32: If all the boxes are green, click Create to create the project. Otherwise, click Fix to check if you have any error, have missed any details or have forgotten to select a dataset or resource(s). Your review step should look like Figure 14 below.
After QuickGraph has created the project, you'll be directed to the Project Explorer page where you'll see your newly created project.
Wrap up
🥳 Congratulations - you've created your first QuickGraph project! In this section, you've created your first entity and relation ontology resources, constructed a dataset, and started a project.
It's time to dive into the world of annotation! Let's learn how to annotate with QuickGraph.