Annotate your project
👋 In this section of the tutorial we will learn the basics of entity and relation annotation in QuickGraph using the project we created in the previous section. Let's get started!
Navigating to the project annotation view
There are two ways you can navigate to the Annotation View of a project:
- From the Project Dashboard - click the
Annotatebutton on the top right hand side - From the Projects page - click the
Annotatebutton on the project's card
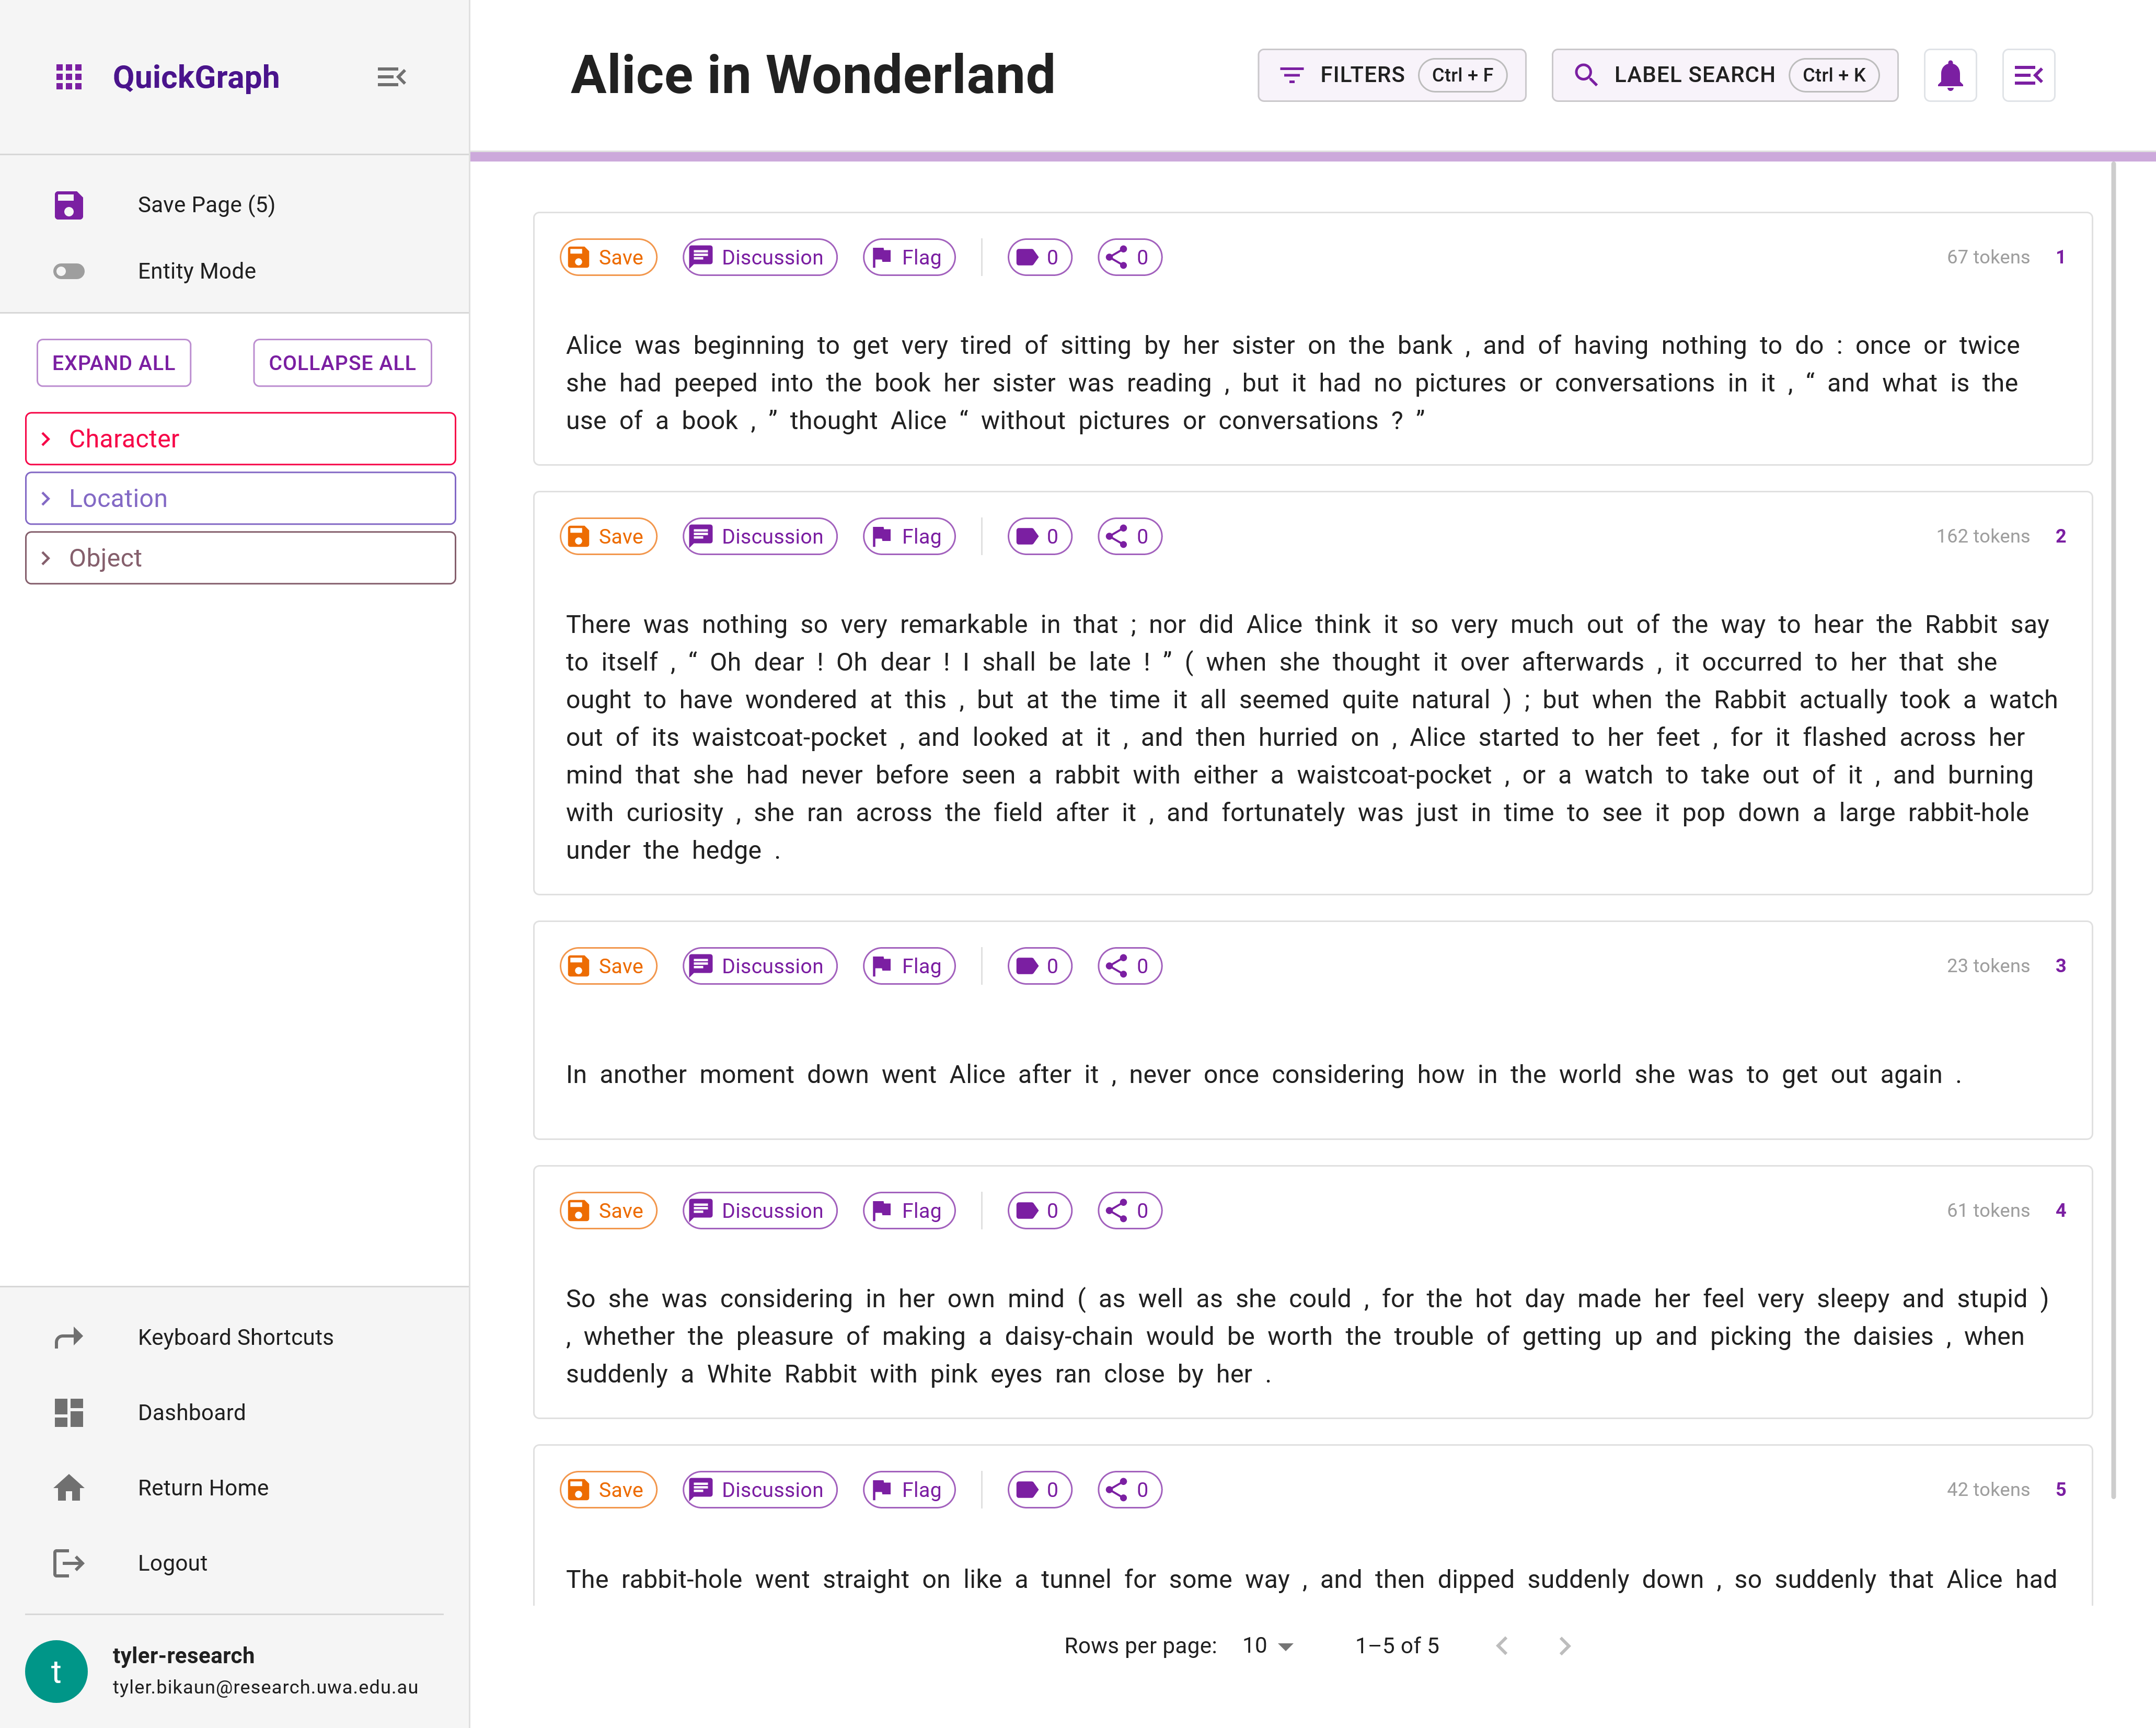
After navigating to the Annotation View, it should look like Figure 1 below.
Step 1: Navigate to the Annotation View.
Visit the Annotation View to learn more about its features!
Applying your first annotations
Let's dive into applying our first annotations! First, we'll apply entity annotations individually and then see how we can propagate unambiguous entity labels across the dataset to speed up annotation using QuickGraph's propagation functionality. Following this, we'll apply relations between the entities annotations we've created.
Entity annotation

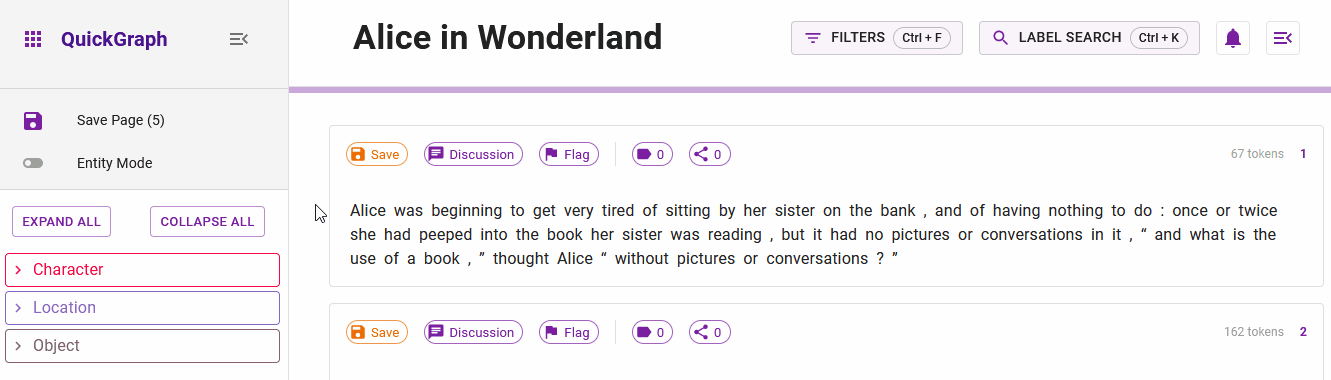
To annotate entities, first, you simply need to click (or click and drag) across the words (tokens) in a dataset item - this will constitute a "selected span" (Figure 2). The background color of the words will change to indicate the selection. Once selected, you can apply an entity label to the selection by either clicking on an item in the Sidebar Entity Hiearchy (Figure 3) or selecting an entity label in the Label Search Modal (Figure 4). To find out more, visit the Annotation View.
Using the Sidebar Entity Hierarchy is useful for small to medium sized entity ontology resources, however if a significant number of entities are being applied, the Label Search Modal can be faster due to its ability to display entity label histories and rapidly find labels based on partial search strings.

Using the Label Search Modal (ctrl + k) is optimal if you have a very large resource or the items in the resource are complex and require the user to see their descriptions and example terms.
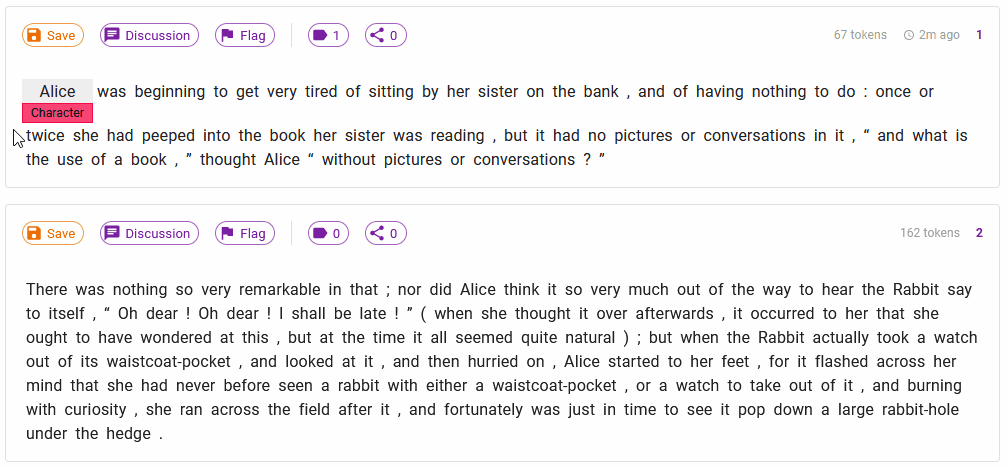
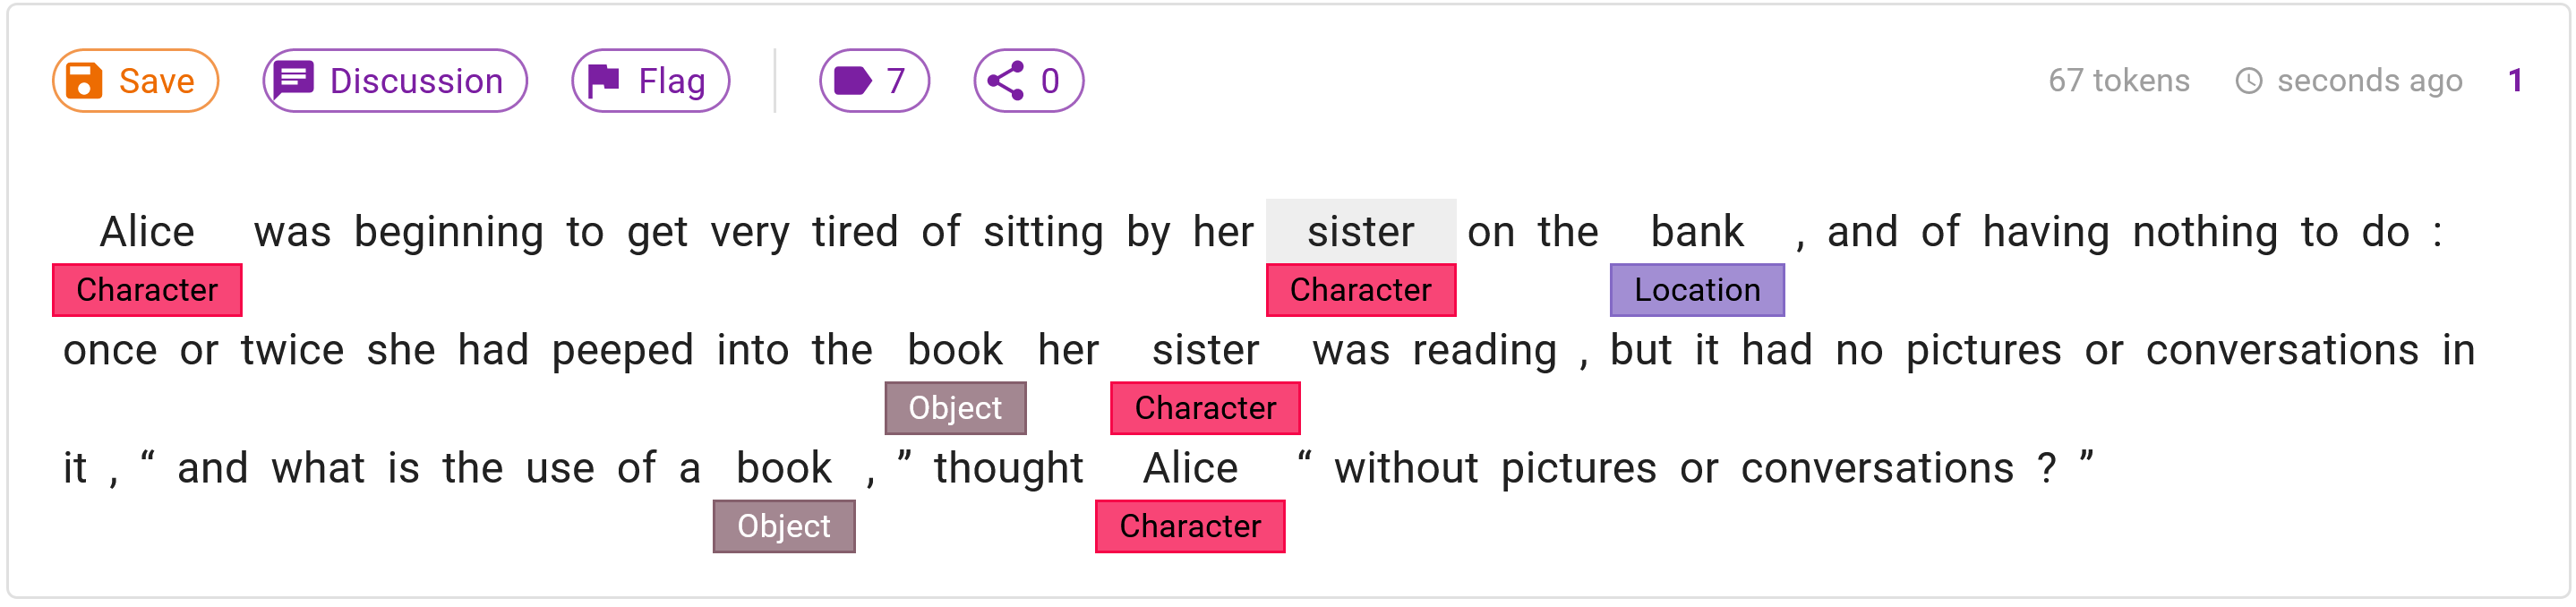
Before we can create our first relation, and hence a triple, we need to ensure we have at least two entities in the dataset item as they will act as source and target. Let's apply the entity type Character to the word Alice in the first document. To find out more about the actions and contextual information in Figure 5 - visit Annotation View.
Step 2: Apply a single entity annotation of type Character to the word Alice in the first dataset item.

Entity propagation
Looking closely at the five dataset items in our projects corpus, we can see that there are lots of unambigous terms/phrases such as proper nouns (Alice, White Rabbit, ...). Now, imagine we had a corpus with 100-1000x more data - repeatedly annotating frequently occurring unambiguous words would be arduous and unproductive. To combat this, QuickGraph uses the concept of Annotation Propagation to rapidly annotate such cases. Let's see how this works for the proper noun Alice.
Click on the entity we applied to the word 'Alice', this reveals a handy context menu that contains atomic annotation operations that can be performed.
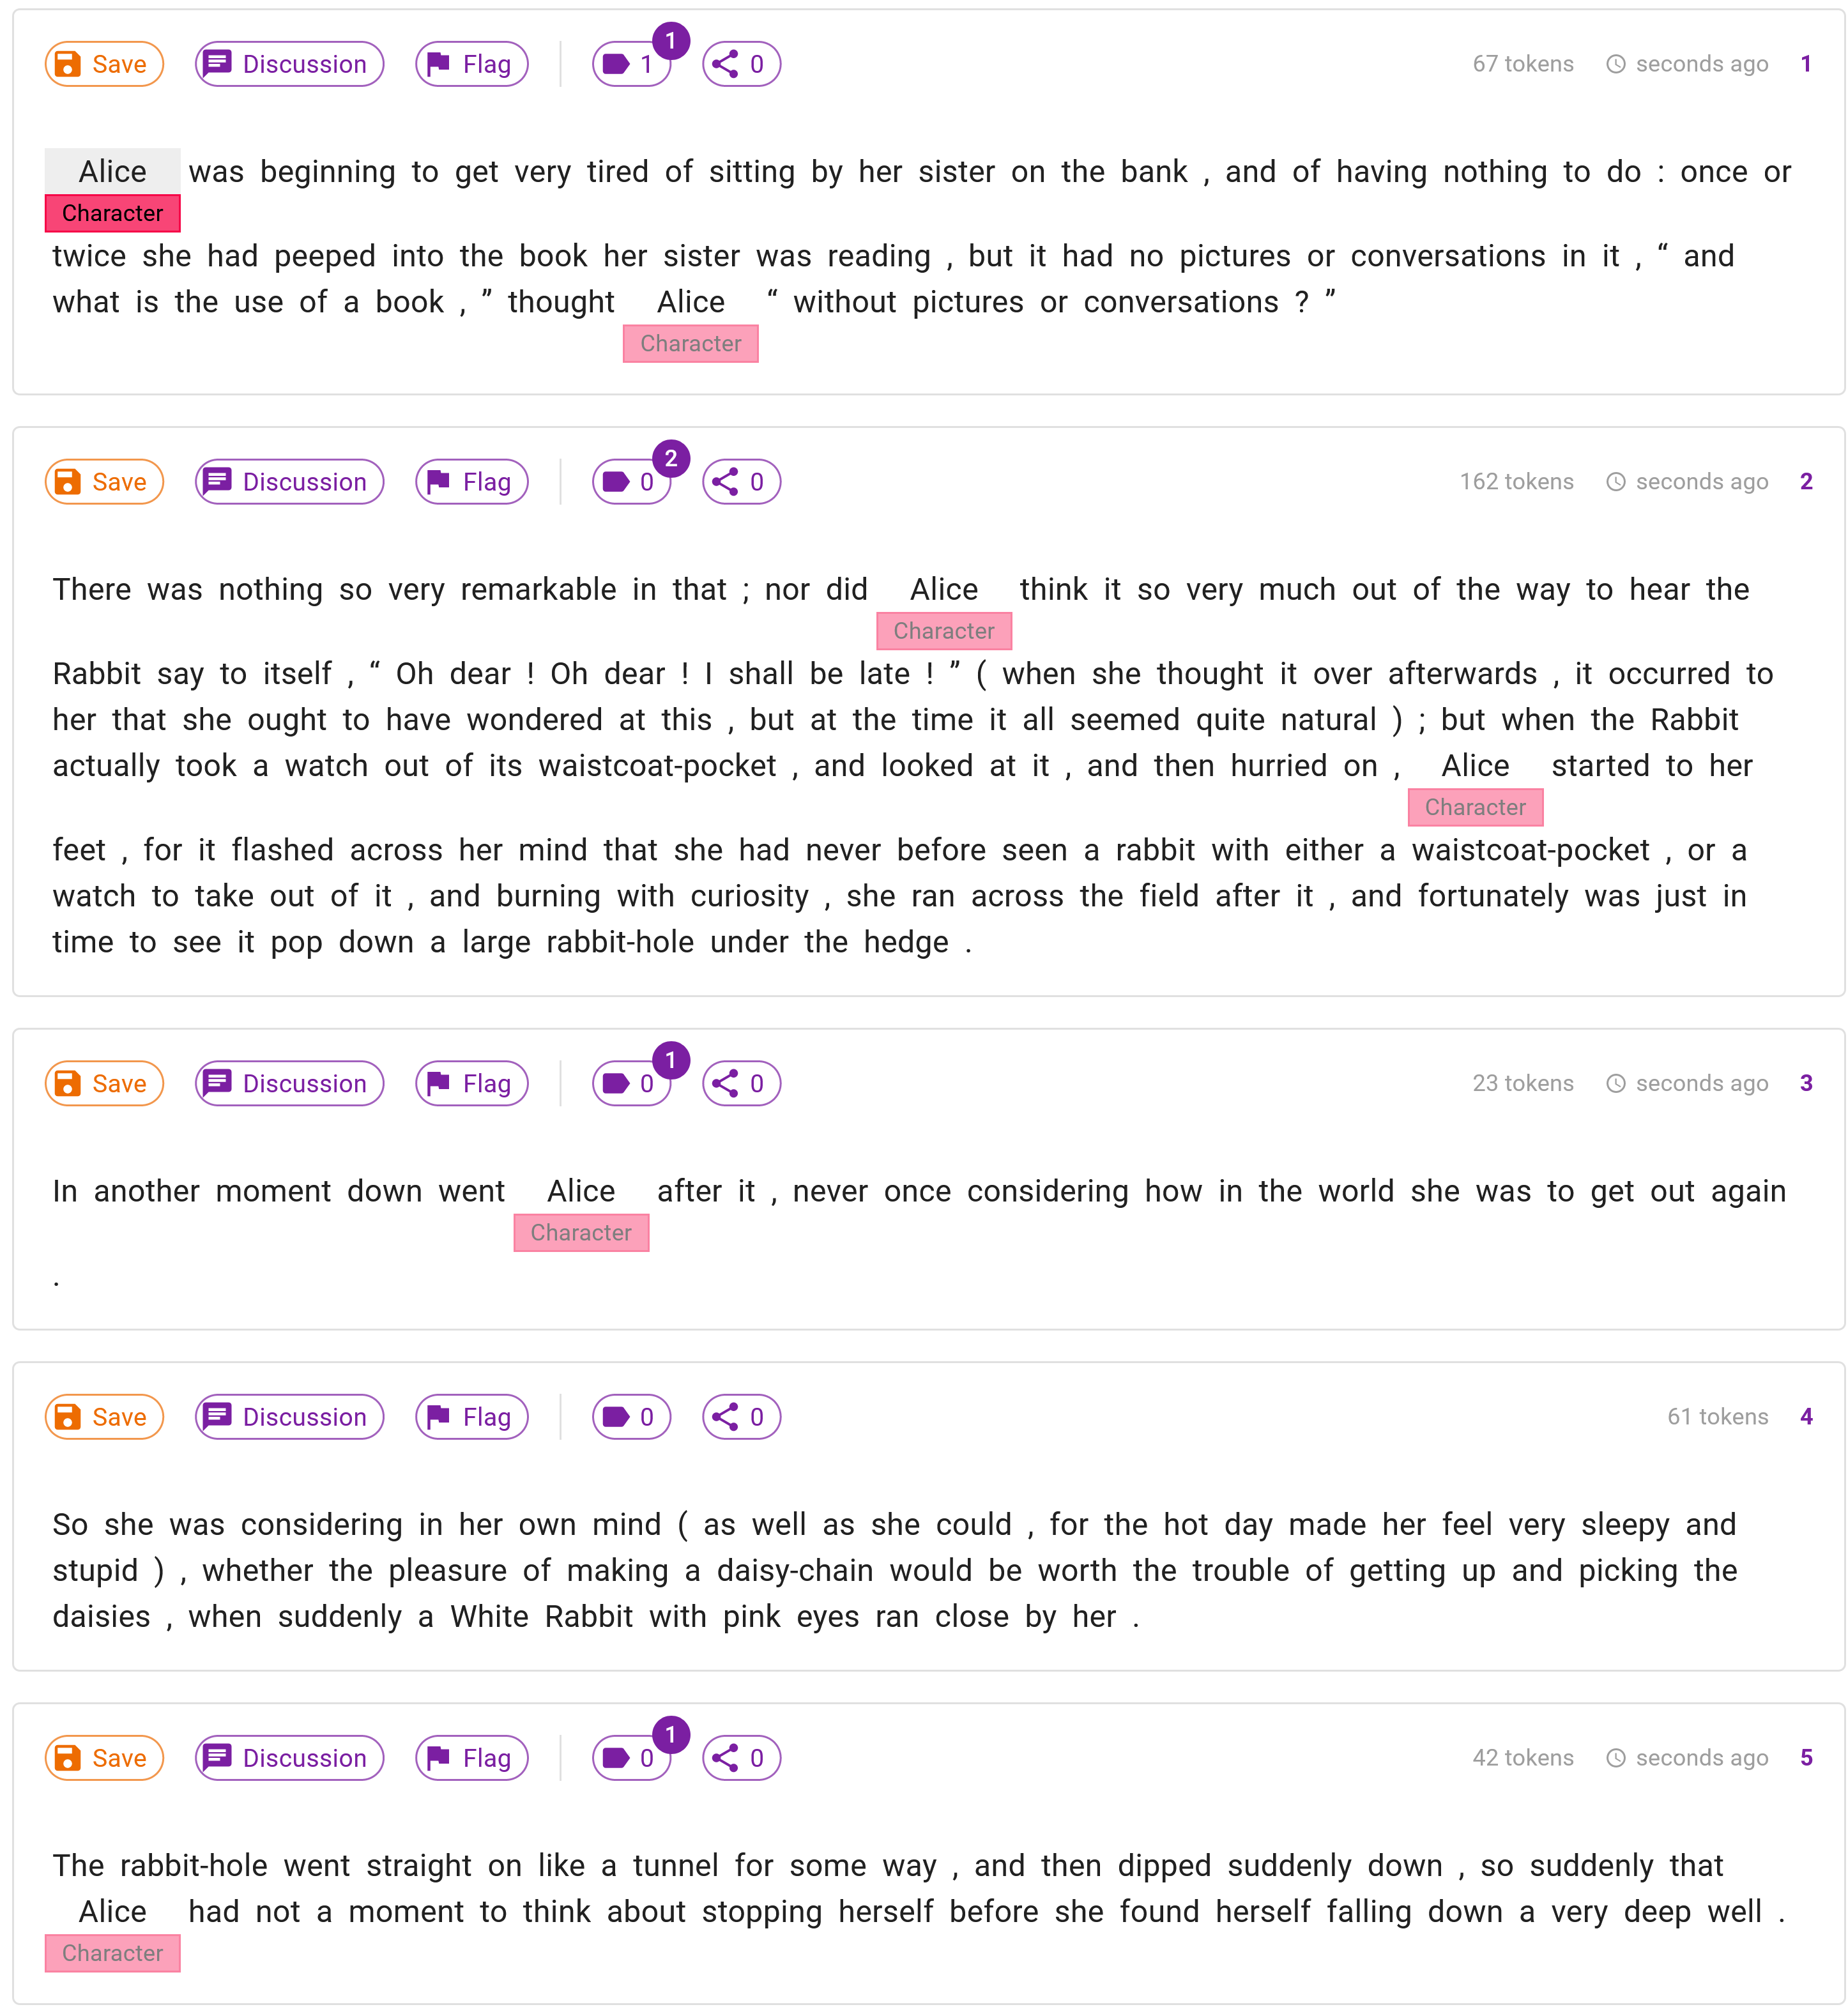
By clicking on the Apply All icon, we can propagate the entity type Character to all instances of Alice in our corpus (Figure 6). This action can significantly reduce annotation effort and potential for error by improving consistency when working with large sets of documents and/or large ontologies.
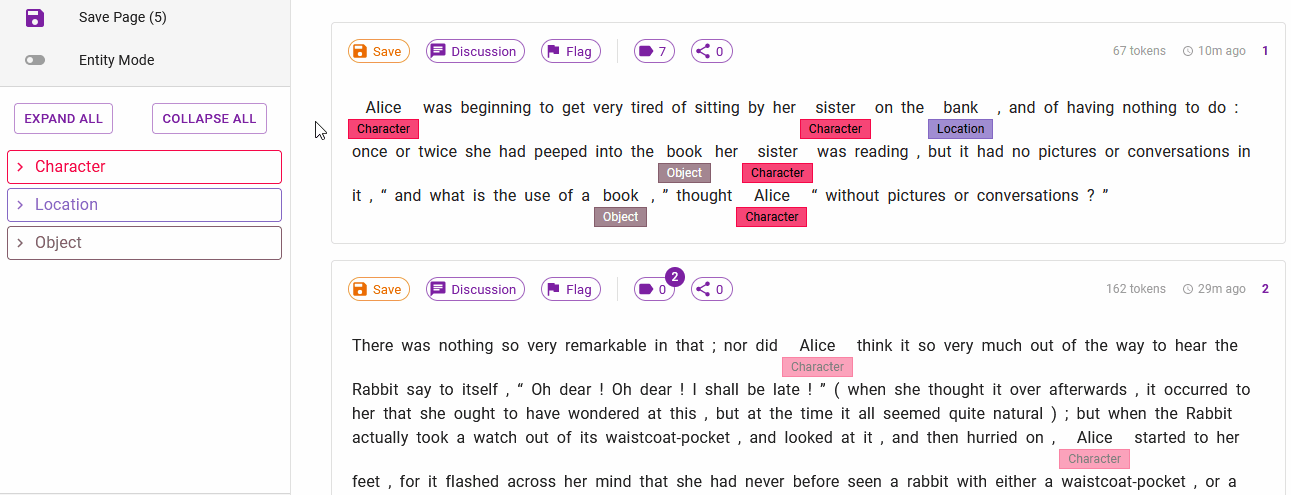
After applying this action, our five documents will look like those in Figure 7. Here, we can see a opaque entity applied to all instances of Alice. These opaque entities are called weak or suggested to denote that they have been applied, but not verified, by the annotator.
Step 3: Click on the entity label you created in Step 2 and then click on the Apply All icon.
Why do we use weak/suggested labels? Imagine if we had a general corpus of mixed documents, we could have the word bank which could for 75% of the time represent the entity type Organisation, however in the context of a river bank it could be another type of class. Hence, entities need to be accepted after they are propagated. For this tutorial, we'll leave this here - to learn more go here.
Before we move on, let's add a few more entities to the first dataset item so relations can be created. The dataset item should look like that below (you could add more entities or apply different ones, but we'll leave them for now).
Step 4: Apply more entity annotations to words or phrases in the collection of dataset items. These can be nonesense, it's just to get familiar with QuickGraph's annotation UI/UX.
Relation annotation
Creating relations between entities is simple in QuickGraph. First switch annotation mode into Relation Mode by clicking on the Entity/Relation Toggle switch in the left hand sidebar. While in the relation mode, only accepted (silver) entities will be visible - to show weak entities you'll need to accept them first. To create your first relation, select a source entity (this will begin to flash to signify it as the source) and then select the target entity you wish to create a relation between.
The border of the currently selected dataset item will change to indicate the dataset item you're interacting with in relation mode.
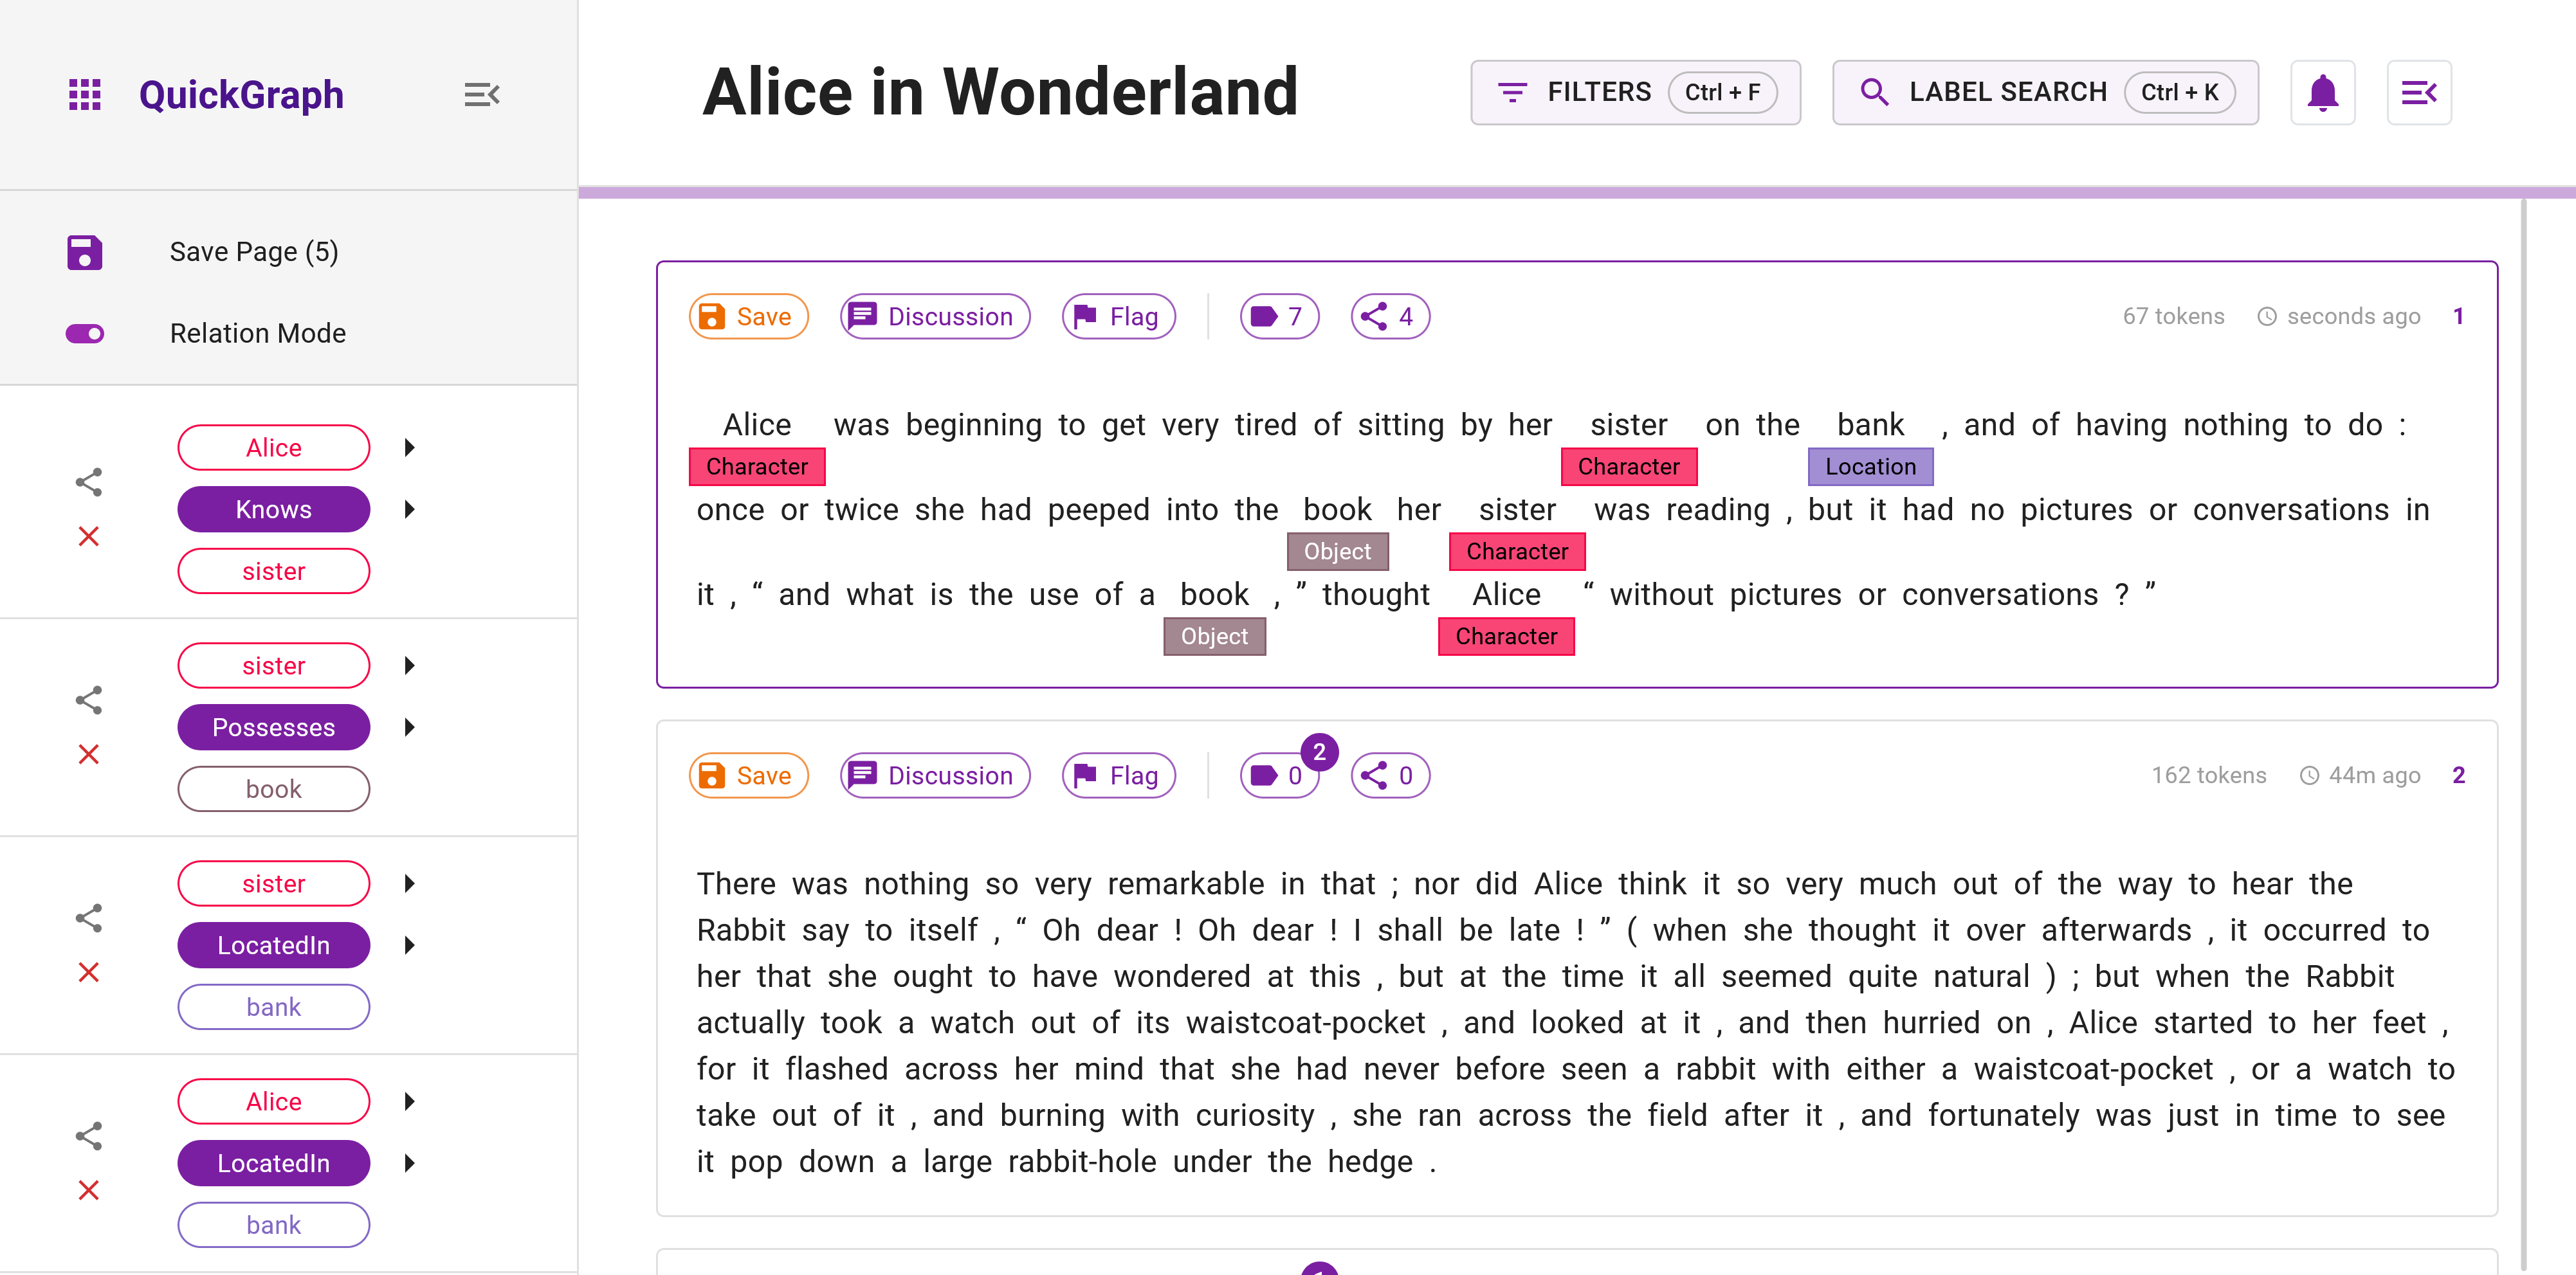
Let's create our first relation - click on the source entity Alice (Character) and target entity sister (Character). You should see a relation selector popover appear after the target is selected. Select the Knows relation type from the relation selector by clicking the green circular checkmark (Figure 9).
Step 5: Create the relation Knows between Alice (Character) and sister (Character). If you're missing entities, create them.
Just like entities, relations can be propagated and have similar atomic annotation operations - click here for more information.
You'll now see a few new things - the created relation in triple form in the Relation Viewer in the sidebar, and a new icon on the right hand side of the document symbolising a relation exists on the dataset item.
Common to other applications, QuickGraph purposely does not render links between relations over the document as it grows uncontrollably for complex annotations. Instead, the relation viewer makes it easy to see what has been annotated whilst allowing atomic operations to be easily performed.
Before we save the item, let's add a few more relations (Figure 10) so we can better explore the powerful Project Dashboard features.
Step 6: Create more relation annotations between words or phrases. These can be nonesense, it's just to get familiar with QuickGraph's annotation UI/UX.
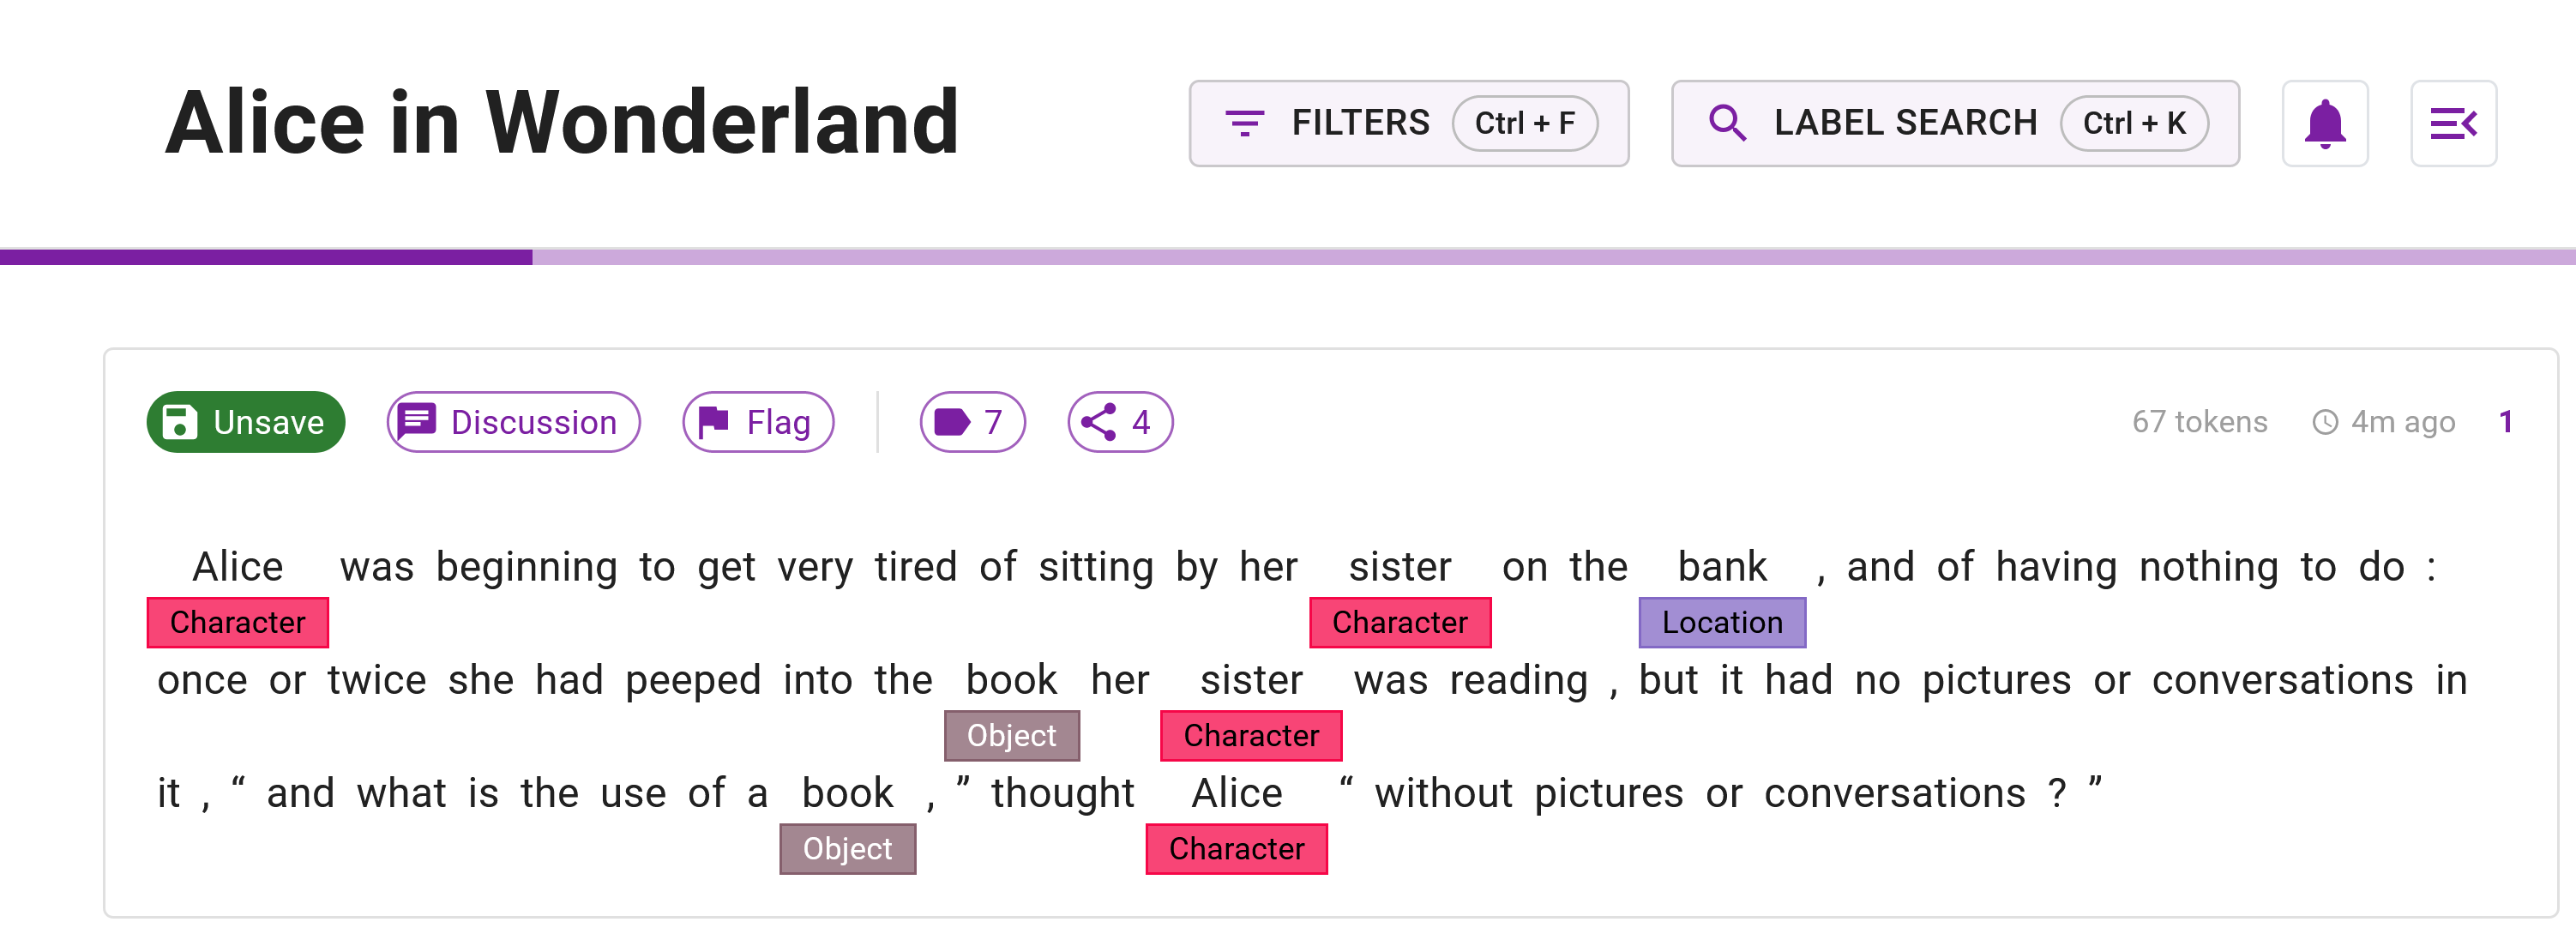
Now that we've got a few relations created, let's save the dataset item to mark it as complete (this also computes the inter-annotator agreement when you have collaborator). Simply click the save icon in the dataset item action tray which will turn green to signify the document has been saved and you'll see progress made on the linear progress bar in the top toolbar (Figure 11). When the dataset item is saved, it is excluded from annotation propagation events. However, dataset items can be 'unsaved' at any time.
Step 7: Save one or more dataset items by double clinking the save button in the left hand sidebar or by clicking the save button on the individual dataset items.
Relation propagation
The relation propagation feature is currently undergoing performance optimisation. Please check the Planned Features for when it will be reinstated.
Wrap up
🥳 Throughout this section, you've navigated the fundamental aspects of annotation with QuickGraph such as applying and propagating entities and relations. Having completed the annotation of our initial document, it's an apt moment to pause and assess our accomplishments. Let's visit the project's dashboard to gain insights into the progress we've made so far.